Tuesday, June 16, 2020

Cherry Blossom Peg Stamped Cards

Good Afternoon Friends! Today I wanted to share a couple cards I made using some fun new stamps from Rubber Stamp Tapestry. 


While this set only has two stamps they pack a lot of punch. The branch can be used as a tree branch but when stamped in green it looks like the newly opened leaves of the branch. The three little flowers are beautiful as cherry blossoms but can be used in meadows, potted plants, bouquets, etc. Really so very versatile.

I used VersaFine Clair inks to stamp both cards as well as around the edges. 


For my first card I had planned on just stamping in the upper corners but I was having so much fun I just kept going until almost the entire panel was filled with my cherry tree! It's very addictive stamping the crooked, ambling branches and then of course you have to fill them out with leaves and flowers.  I used a sentiment from Unity Stamp Co. to finish off the card.


Since I when hog wild on the first card I decided to make a second card trying to stick with a more minimal set of branches. To help keep myself in line I started by stamping the sentiment - that way I had to stop stamping when I got close to the center. It worked and this was my finished card. The sentiment is again from Unity Stamp Co.

Hope you've enjoyed viewing these card...more to come!!

Sunday, June 14, 2020

Coming this Friday....Steampunk Blog Hop!!!

Image may contain: text

LCD Celebrate Challenge #100!!!

Lost Coast Designs/Carmen's Veranda is celebrating their 100th challenge with the current challenge - Celebrate It!  You still have today and tomorrow to enter your creation. I wanted to share this card with you...


It was made using the Many Dogs background stamp....after it was stamped I noticed a little fellow in there that looked just like our Cecil bug. I colored him with Primsacolor colored pencils to make him stand out a bit. I then stamped the heart from the Doodle ATC set of stamps, fussy cut both the inside of the heart and outside. I mounted it so it would frame Cecil. I then stamped and added the sentiment from the Party Words set of stamps.


Such a fun way to celebrate LCD/CV 100th challenge don't you think?

Hope you join in the fun....

Friday, June 12, 2020

Origami Sea Life...Whales!

Hello Friends - Recently Rinea added a new color of foiled paper - Cobalt! You all know how much I love blue.  Well that color sparked an idea...actually several. The color reminded me of some lovely photos of whales that I had seen recently so I thought it might be fun to try and make a few of my own. So I set about searching YouTube for some origami whales and this is what I came up with...


These were so much fun to make!

Just a note - you can make any of these whales in a variety of sizes - all you have to do is change the size of the square of foiled paper that you begin with. The large flat whale was made using an 8x8" square, the two smaller 3D whales were made using a 6x6" piece of foiled paper.


The first big guy is a flat whale that would work great on cards, in scrapbooks, on signs or banners, etc.  The video to create this whale can be found here - Whale #1


The next origami whale reminds me a bit of a humpback whale. The great part about using foiled paper is that you can actually pose your creations with ease. I bent the flippers around so that they held the whale off the table just a bit.  Another benefit of using the foiled paper for origami is that you don't have to work so hard at creases and making the paper hold it's shape. The nature of foiled paper takes care of that with little effort.  This whale can be found here - Whale #2. 


The final whale I have to share with you looks like a sperm whale - imo.  It is different from most origami that I have made as it actually cuts the tail apart to create this look. The foil has again allowed me to pose him just so.  The video for making this origami whale is here - Whale #3.  You will notice if you watch the video that I positioned his tail and flippers a bit differently than what he did in the video.  I wanted mine to stand on it's own and look more 3D than his.

Just a note about using the foiled paper for origami. Many times in origami some folds are opened and closed quite often. This may expose the white paper center of the foil in the form of tiny cracks. When this happens, once you have finished all of the folding simply run a marker over the creases to hide the cracking. Works like a charm.


Wednesday, June 10, 2020

Rinea Foiled TP Roll Owls - Upcycled Kids Craft!


Hello Friends!

I hope you're doing well and are safe from the wicked storms rolling through the central part of the states courtesy of Hurricane Cristobal. Today I wanted to share a fun craft to make with your children...my Foiled TP Roll Owls! Aren't they darling? I had so much fun making them and with a little prep work you will have a parliament of owls in no time at all!


All you need is a 4x6" piece to wrap around the toilet paper roll, several circles cut from your favorite color(s) of Rinea Foiled Paper, a 3"x3" piece to cut out some wings (not shown) and circles cut for the eyes.  That's it! Easy peasy!


I made this owl using the Peacock Foiled Variety Pack...I just LOVE these colors. They are beautiful together and I rather like my Peacock Owl.


This cutie was made using two of the colors from the Floral Variety Foiled Paper Pack - Violet and Fuchsia.  I also used a scallop circle die to cut these circles...I thought it was a fun way to add a bit of texture to her feathers.


And my final traditional little guy was made using Mocha/Gold Glossy and Mocha/Mocha Starstruck foiled papers. I used the reverse side of the Mocha/Gold Glossy for his chest feathers.


If you'd like to give these little critters a go, you can find complete details here: Rinea Foiled Paper Owls with Roni.

Have a lovely day my friends!!!


Sunday, June 7, 2020

Coffee Lover's Hop Winner

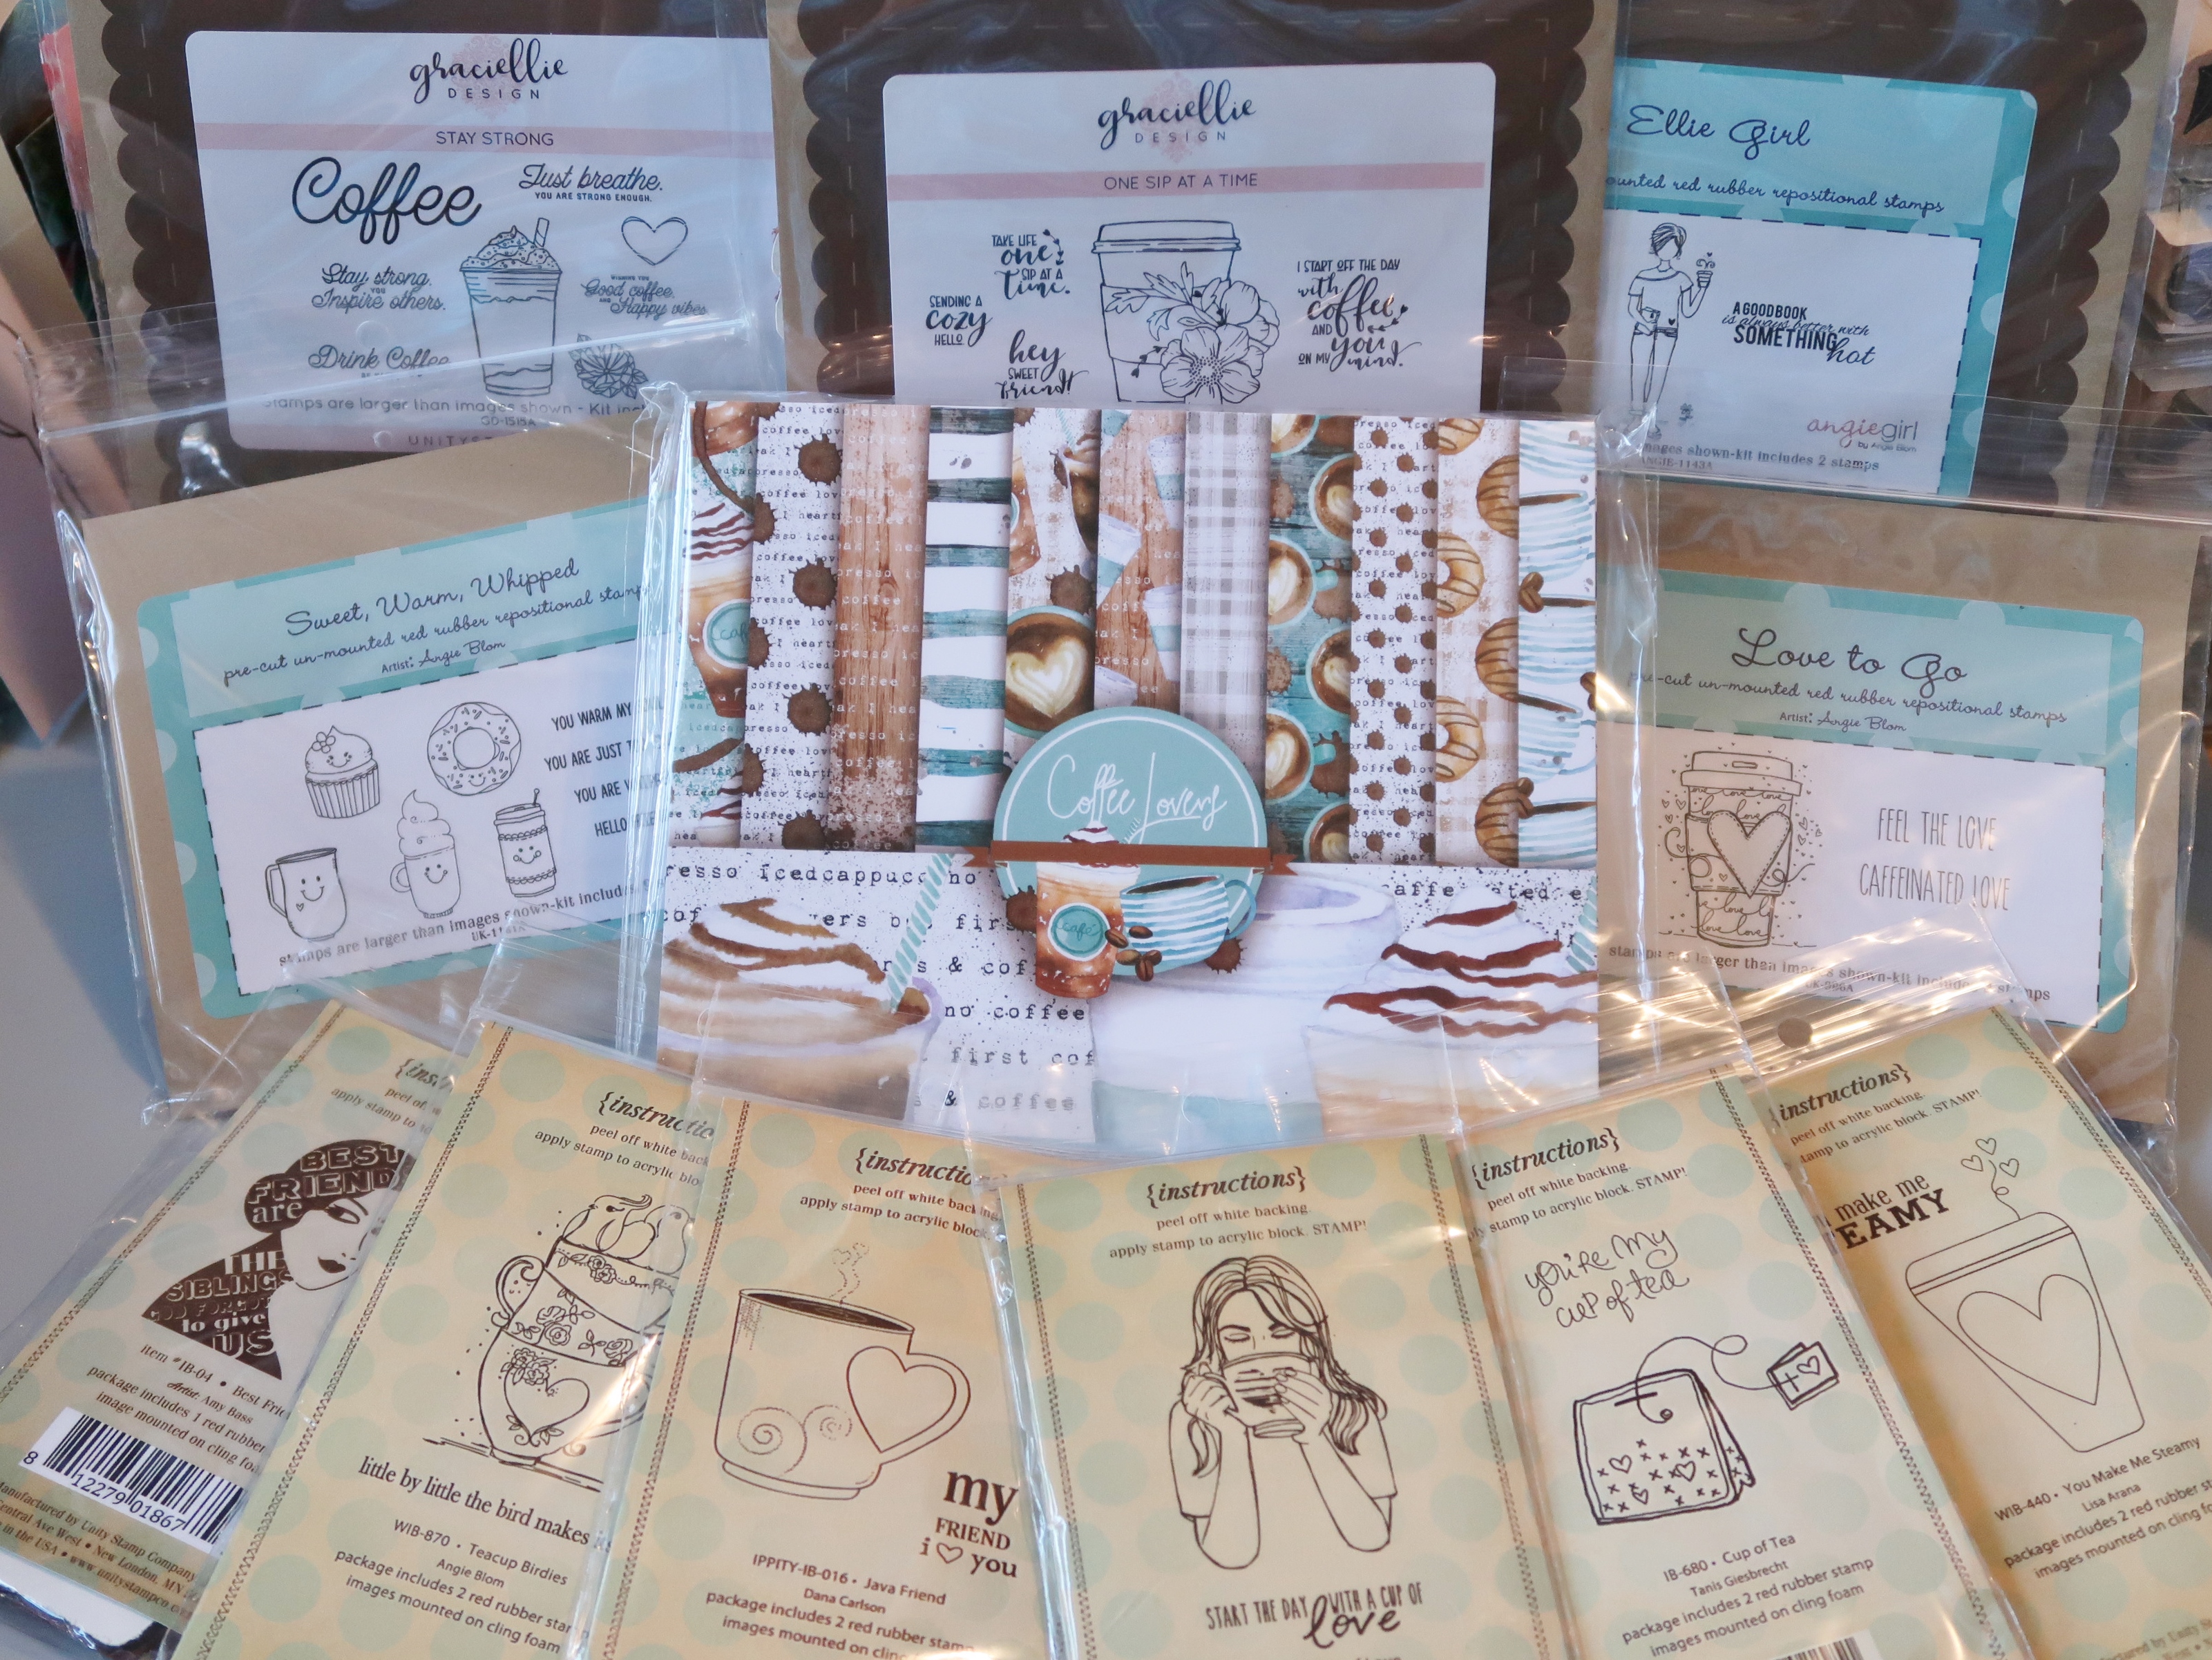
As you may recall a couple weeks ago I made several cards for the Coffee Lovers Hop...well as it turns out I was the lucky winner of a gift pack from Unity Stamp Co!!!  12 coffee themed stamp sets and a set of coffee themed pattern papers.  Well it arrived!!!


There was one additional set of stamps not pictured here - Old Bird.  I rec'd the package on Saturday and I checked the mail right before I went to visit my Mom for the first time since this whole thing started. (Yes, we social distanced and sat outside to boot). I opened this package there and she liked that stamp set so much I told her to keep it :)

I am so thankful for Coffee Loving Papercrafters for organizing the hop and Unity Stamp Co for being such an amazing sponsor! Such a fun way to jump start my creativity...after a very long dry spell.

Wednesday, June 3, 2020

Celebrate It Challenge


Hello Friends...the current challenge at Lost Coast Designs/Carmens Veranda is...
#100 - Celebrate It!!


And here is my contribution - Isn't he just darling! I love the new Gnomes at Lost Coast. They are all very cute and so much fun to color.  He is Pointy Hat but there are about 2 dozen to choose from! Be sure to check them all out.

Sunday, May 31, 2020

Jumbo Flowers with Rinea Foiled Papers

Good morning friends...I hope you're all doing fine this bright and beautiful Sunday morning.  I wanted to share my latest Rinea foiled papers project....my jumbo flowers!


These flowers are so very easy to make and they add such a WOW! to your door decor. I choose Blush/Blush Starstruck and Lavender/Lavender Starstruck but you of course could make them from any color in the lovely line of Rinea foiled papers.  I also made the centers with various designs just to show what you could do with it. There are all sorts of different patterns and designs you could make for the centers - just let your imagination run wild!


For detailed instructions and supply list please see:


Friday, May 29, 2020

2020 Spring/Summer Coffee Lovers Hop - But First Coffee


Welcome friends...my final card for the Spring Summer Coffee Lovers Hop of 2020.


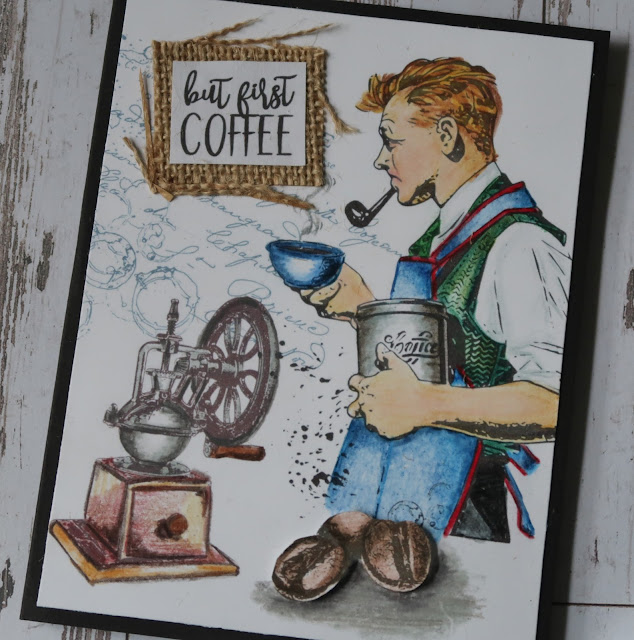
I absolutely love this set of digital stamps from Polka Dot Orchard. It is called He Said Coffee. It's got some really great vintage looking images in it and my favorite is this handsome gentlemen fixing his own coffee. I think he looks dashing in his apron enjoying his brew.  The coffee beans are from the Spill the Beans set which I used yesterday.  

It's also my very first card I digitally arranged!!!  You see I'm very much a paper, ink and paste kind of girl...digitally challenged you might say.  But I decided I wanted to use these images and I couldn't really print them all out and layer them without some very complicated fussy cutting so I decided to give it a go.  I did print the beans and sentiment (from a Graciellie Design set) separately and add them to the card once it was colored.  I am very please with how it turned out for my first go at a really digital card.


I hope you all have enjoyed the cards I've made as much as I enjoyed making them. I'm hoping to find something else to challenge me into creating more in the coming days.  Until then, bottoms up!

2020 Spring/Summer CLH - Spill The Beans!


Final day of the Coffee Lover's Hop and the second to last card I have made for it....


I had SUCH fun coloring this image from Polka Dot Orchard's set called Sack of Beans. Now you might not think brown bag, brown beans, grey shadow requires much thinking but I used probably 20 - 25 different colored pencils in total to achieve what you see here.  It was fun to futz around adding layer after layer of color. Very relaxing really. I hope you like :)