Showing posts with label acrylic paint. Show all posts

Tuesday, January 6, 2026

Altered Muffin Tin - Bee Happy!

 Happy Day!

The current quarterly challenge at Gecko Galz is Muffin Tins....

yes, you read that correctly - the challenge is to alter a muffin tin using Gecko Galz images. I love altering stuff...anything - if it's old and needs a new life, I'll alter it! I had this old muffin tin in my stash of stuff - it was a bit bent and worn so it was ripe for pickin'. 

And here is what I created....

Gecko Galz - What's the Buzz 

I started off by dabbing a layer of brown paint here and there then a bit of goldenrod through a honeycomb stencil.  Next I printed out the What's the Buzz collage sheet and cut the images using a couple sizes of circles. A bit of ink, cheese cloth, moss and a few bits of vintage doilies and here you have it!  It's going to hang in my kitchen to add some fun to our home!


Do you have an old muffin tin hiding in your cupboard? 

Why not pull it out, give it a renewed sense of purpose and make a lovely piece of home decor.

Tuesday, November 12, 2024

A Surprise Inside

 Hello Friends!

Today I wanted to share a fun ornament I made recently...


It's a paper mache' pinecone that I turned into a lovely Christmas ornament... I used the most beautiful bronze metallic paint for the base - the shimmer is amazing.

I added some textured snow paste, a bit of glitter (because don't you know everything is better with glitter!!) ribbon, evergreen bits and a few berries. I then added a silver cord to hang it all with.

OH...I did mention that there was a surprise inside didn't I?


Well, when you open it up you'll find a lovely little vintage boy and girl along with lots of fun mini vintage Christmas bits...and more glitter (refer to above)!! I had such fun making this beauty. I hope it inspires you to create an ornament or two this holiday season.

All images are from Gecko Galz.


Wednesday, July 17, 2024

Gecko Galz Challenge Fun


Finally getting around to posting some of the challenge projects I have made for the Gecko Galz monthly challenges this month.


My first card is filled with lots of painty - glittery goodness!  This is the Fantasy challenge image for July. I used a gel press background I made using some fun stencils and pretty paints to match the image.  I then framed it with a couple glittery mats...you know everything is better with a bit of bling.


My next creation is a under the sea tag I made using the Steampunk image. A steampunk mermaid!! I used some steampunk gear paper to cover the tag as well as a fun wax seal of an octopus underwater scene. 

Hope you enjoy...

Monday, June 10, 2024

Signs of Summer Flamingo Welcome Sign

Hello Everyone

 New month of challenges over at Gecko Galz. Today I have a project that fits into both the monthly challenge (Signs of Summer) and their quarterly challenge (Altered Wall Plaques). 


I used images from the Flamingo Court Junk Journal kit plus lots of diecuts and the fun plaque that had a funky photo decoupaged on it. A couple coats of paint and a whole new plaque appears!

GG Monthly Challenge 2024

GG Quarterly Challenge 2024


Tuesday, May 21, 2024

With Love

 So very excited to share this project with you today. Rather than another card I have been trying to think of a way to use the Gothic Challenge image from Gecko Galz. WELLLLL I did it and I love how it turned out. ....


Isn't she awesome? I loved the image and knew I wanted to do something special with her and I finally came up with an idea rummaging around with things piled on my desk. This is one of those wooden boxes that wood die-cut embellishments come in!! You see THIS is why I never throw anything away - I knew I'd use them one day - LOL!!

So, I broke out a couple of the cross members to open up the outer compartments and painted it black. I then cut the image so each piece fit in the little boxes. I again went to my stash for spooky looking pieces and came up with these great wood bits. AND I was so lucky to find these faded looking roses to embellish it with. I think they match the colors of the image perfectly. 

Hope you enjoy!

May 2024 Gothic Challenge


Saturday, May 11, 2024

Light the Way

 Hi all!

Hope you've been well...been away from crafting for a while but trying to get back into the swing of things. Today I have a a fun make using the Steampunk images from Gecko Galz for this month...


I made this 8x12" canvas using lots of different mediums - paints, glazes, inks, glitter and more. 

AND....

It's lighted!!


 I just love how it turned out. What do you think?

Thursday, March 14, 2024

A Strange Story

 I must admit that this month's Gothic Challenge at Gecko Galz has given me a run for my money. I started a Goth/Halloween junk journal last year and have been slowly adding new lay-outs each month. Well I really had to give this a think but I am thrilled with how it finally turned out!


Gecko Galz Gothic Challenge 0324

Sunday, February 11, 2024

Christmas Canvas

 Here is what I created using this month's image for Gecko Galz Monthly Christmas Challenge...


Getting a jump start on next year's decorations with this chunky canvas....
The trees are from Honey Bee Stamps. I LOVE their dies! So many cool designs.
I added some faux snow on the bottom which really adds such great texture.


Gecko Galz Monthly Christmas Challenge 0224

Kindred Spirits

 Playing with the Gothic image of the month at Gecko Galz...

A gothic take on Little Red Riding Hood...I love it!


A bit of gesso, watercolors, acrylic paint, vintage ephemera, washi tape, some stamping, stencils, Creative Medium and more!

Gecko Galz Monthly Gothic Challenge 0224

Sunday, June 28, 2020

Creative Embellishments June Challenge

Hello Friends - I hope you're all well and safe where you are. Today I wanted to share a creation I made for the Creative Embellishments June 2020 Challenge.


This is the inspiration photo for the challenge. Beautiful isn't she? For some reason at the moment I seem to be enchanted with faeries and mermaids so this really appealed to me.  I decided to give it a go and this is what I came up with....


I started off by using Marabu's new Metallic Alcohol Inks as well as Neon Blue and some of their glittery blends. to create the background. The clouds were made in layers. Initially I inked them on with Club Scraps White Pigment ink to which I added a bit of Fairy Hug Powder glitter (by Lavinia World).  I then sprinkled with Clear Embossing Powder and heated to set.  This process created a lovely texture.  To bump the color back up I added another layer of the white pigment ink and even more glitter.  A quick blast with the heat tool to set the ink.  


I then set to work on the dragon and fairy.  The dragon was painted with Blue Lagoon acrylic paint from DecoArt.  He was then colored with a variety of colored pencils to add depth and dimension. He also got a bit of white and black paint pen for details.  I painted the fairy black using Americana Lamp Black acrylic paint. Her wings were then coated with more of the Fairy Hug Powder....yes, I do love glitter!!  Once both of these elements were dry I glued the fairy to the dragons back and mounted them on the canvas using foam tape to really give them dimension.   The canvas still needed something so I stamped dandelion bits and the sentiment WISH using StazOn Black ink and a bit of white paint pen work.


Have a lovely day my friends!!

Supplies:

Creative Embellishments - Tiny Fairies, Dragon Set 2
Marabu Alcohol Inks
Club Scrap - White Pigment Ink
DecoArt - Lamp Black, Blue Lagoon
Imagine - Jet Black StazOn ink, Clear Embossing Powder
Unity - Wish set
Colored Pencils
Black & White Paint Pens


Tuesday, June 4, 2019

Craft Day

I mentioned in my last post that my Mom and DIL were getting together to craft this past weekend.  We did and it was so much fun! In the morning we worked on painted canvases that we topped with glitter :)  Yes, you know I have to play with glitter!!


Morgan's creations...


Mom's art


And mine...


After lunch I pulled out the gelli plates and we play some more. 
Neither of them had ever worked with a gelli plate but as you can see the results were amazing...

Mom's


Morgan's


Mine


It was such a fun day we've decided to have an art day each month after Mom gets back from Newfoundland.


Friday, January 11, 2019

This is Rinea Foiled Paper - Part 1

I thought it would be fun to explore Rinea Foiled Papers this month so I'm going to be sharing various ideas for using the foiled papers.


And here are today's examples....


This first example demonstrates how cleanly the Lavender/Gold Glossy Rinea Foiled Paper can be diecut and embossed in one operation. These medallions were cut using the Sizzix cut and emboss folder.  As you can see the foiled papers hold the shape beautifully.


I wanted to show how nicely the foiled paper takes acrylic paints. I used a credit card to swipe various colors of paint across the Ebony/Gold Glossy foiled paper in succession while each was still a bit wet. You can see the depth I achieved using this method.


The grungy side of me loves how you can crumble the foiled papers up, open it back up again, smooth it out a bit and it holds it's shape. This Mocha/Mocha Starstruck is one of my favorite colors.


Finally I have a fun dimensional flower I made using the 3D Rolled Star Diecut Set. I cut the Sapphire/Gold Glossy Foiled Paper using the medium sized star diecut. I rolled half of the petals into a point while the others I rolled into a cylinder. I then added a medium Turquoise and  small Jade diecut flower to the center.  As you can see all of the petals have held their shape perfectly.


GIVEAWAY TIME!!!

This month I wanted to share a bit more about Rinea Foiled Papers with you.
I will be sharing lots of fun ways to use these lovely papers with you to "Spark your Creativity"!  


Today is just the first of several posts that will gain you entry to the giveaway.

To be entered all you have to do is comment on this post or on the related post on my Facebook page (Roni Johnson). (One comment per post please) Each time you see a new Rinea post between now and the 27th of January be sure to comment for another new entry. The drawing will close at 12:00 pm January 27th and the winner will be drawn randomly and announced on January 28th.

One lucky winner will receive the Love Variety Foiled Paper Pack (6x12) and Pastel Foiled Paper Variety Pack (4x6) show above.


Good Luck Everyone!!


Monday, May 21, 2018

DecoArt Pouring Medium - Glass & Paper

Hello Everyone!  I am excited to bring you another installment of Acrylic Pouring using DecoArt's new Pouring Medium & Topcoat!


O.k..before we begin, I have a confession to make...I see art everywhere!  Dh and I were shopping a couple weeks ago at Meijers and we were adding a few cans of Bushs baked beans to the cart.  I happened to see this really cool looking brown "bean pot" type jar of baked beans.  I asked him if he wanted to give them a try all the while knowing I was truly only buying it because I KNEW that jar would be perfect (and so cute) to hold paint brushes - LOL!!  Well we had them this weekend so I washed it up ready to be painted ;)  Terrible I know - it's as bad as buying the altoids just for the tins - LOL!!

Anyway, on with the show...


O.k...so I started off by choosing my colors. Since my main objective was to paint the brown bean pot jar I wanted to use pinks and reds since they go so well with the brown.  In addition to the DecoArt Pouring Medium I used Americana True Red, Bubblegum Pink, Titanium White and Tutti Fruitti Crafters Acrylic (which is a few shades darker than the Bubblegum Pink).


And of course here is my objective...the fun and funky brown bean pot!  I was a bit worried because there are some words around the upper edge as well as a texture along the sides of the jar.  Not sure how it would turn out but as it happens it finished off pretty cool.


At the last moment I decided I need to add a bit of lavender so I used DecoArts Grape Taffy Crafter's Acrylic.  Mixed mostly with the 1:1 ratio - some had a bit more pouring medium by accident.


Layered my colors in the cup...


And started pouring!


I just poured it on until I liked what I saw.  You can see the pool of excess paint around the bottom of the jar...no fears - more on that coming further down.  So anyway, I let the paint drip off the jar and air dry.  Once it had dried I poured the DecoArt Topcoat on and let that dry as well.  Here is how it turned out.....


I am SOOO excited about how it turned out....


far better than I imagined! 


I just love how the colors flowed and blended, it is just so pretty!


Here is a close up of the paint over the texture in the glass... I think it adds an interesting dimension to it that an ordinary jar wouldn't have.  If you can see in some areas the paint was redirected by the little nubs of texture.  Pretty cool huh?   Now the only problem is...dh wasn't all that thrilled with the beans but I would really like several more of these jars to paint - LOL!!


I still had some paint in the cup so I poured over a canvas that didn't work last time.I REALLY like how it turned out....


A close up of the cells.


Not sure what I'll do with it but it is pretty.


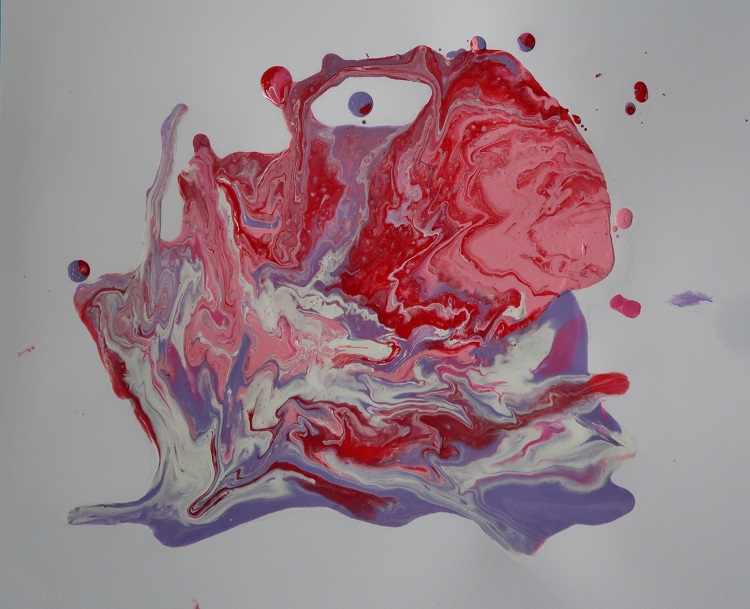
After my original post about the DecoArt Pouring Medium several people asked about pouring onto cardstock/paper.  Well I did just that and this is how it turned out.  This is the paint that I scraped out of the mixing cups and pouring cup. I poured it all into puddles then just started tilting this way and that.  The paper did curl a bit while the paint was wet but after it dried it went back to a fairly flat state...nothing that can't be fixed when it is glued down to a project.  


It is just so pretty....and you could use it in scrapbooks, on cards, mixed media projects, collages, journals, etc. I think I'll try making some skins next!


Finally there were also LOTS of questions about waste and left over paints.  As you can see from this photo there was quite a bit of paint that had dripped off the sides of the bean pot...no fear, not going to let it go to waste!


I took 2 pieces of foam core board and pounced them into the paint....the first one has lots of bold color puddles that were made from a couple of spills in the box ;)  I never said I wasn't messy - LOL!!  This is an approx 8.5 x 11 sheet...


The second is more blended (except for that splotch of red) but it's still very pretty.  It ended up making more cells than the first pounce did.  This piece is approx half the size of the previous piece.


Just a few more close ups of the smaller piece...


I just love all of the designs in the paint.


And finally the last piece I dipped into the excess was just plain old white cardstock.  It turned out very pretty as well.  

Supplies:

DecoArt -
Pouring Medium
Top Coat
Americana - True Red, Bubblegum Pink, Titanium White
Crafter's Acrylic - Tutti Fruitti, Grape Taffy

Other -
Glass Jar
Canvas Corps - 4x4 Canvas
Foam Core Board
White Cardstock