Showing posts with label IMAGINE Crafts/Tsukineko. Show all posts

Wednesday, June 3, 2020

Celebrate It Challenge


Hello Friends...the current challenge at Lost Coast Designs/Carmens Veranda is...
#100 - Celebrate It!!


And here is my contribution - Isn't he just darling! I love the new Gnomes at Lost Coast. They are all very cute and so much fun to color.  He is Pointy Hat but there are about 2 dozen to choose from! Be sure to check them all out.

Monday, June 10, 2019

Here Fishy Fishy Fishy...

I am so excited to share a new set of peg stamps with you...

Actually this is only one of the 9 newly released peg stamp sets but for some reason it jumped out and me and I had to use it immediately!


My first card is a pretty straight forward clean and simple card (at least it is for me). 
I started off by stamping the sentiment (Mom & Dad clear set) using VersaFine Clair Nocturne ink. I then started adding the fish...the green angler was first cause he's just so stinkin' cute!  Next the puffer, some orange jellyfish and finally the school of bright green mini's. I used a blending brush to give the feel of water here and there and finished it off with some glitter bubbles!


After the first card I decided I wanted to think out of the box or rather the sea just to see what I could come up with.  I decided upon a fish conga line!  I started off with the squid and decided to add a puffer and angler fish line and well, I couldn't stop until the entire panel was full of fishy conga lines - LOL!!   Added the sentiment and called it good.


My final card happened by accident.  While I was testing ink colors on the squid I happened to stamp them side by side and noticed it made a new look so I experimented a bit and found something that worked great! It actually made me think of a water ballet with these fun fish! 

I drew tiny circles across a white cardstock panel and used that as a starting point to stamp. I stamped the squids with the tips of their heads on the edge of the pencil circle - 4 purple then 4 pink. It worked so well that I tried the puffers and tossed in the little mini's for fun. After I had stamped all of the designs I went back and erased all of the pencil marks, added a gemstone at the center and mounted it on the green card base.   I can't wait to take this idea and pair it with different fish/colors.

Can you tell...I LOVE these creatures!!

Supplies:

Rubber Stamp Tapestry - Undersea Adventures, Mom & Dad
Imagine - VersaFine Clair Inks
Sunny Studios - Sentiment Stamps
Gemstones, Glitter, Cardstock

Monday, July 18, 2016

Stamping Over Stencils

The technique challenge this month on the Club Scrap Blog is - Stamping Through Stencils... a technique I love!  It's so much fun to play with the various combinations of color, stencils and stamps.  Today I have a couple to share with you....


For my first card I used a stencil for the background box which I inked with Angel Pink.  I then used the double heart stencil which was inked with one of my inky red daubers - no real color used, just left over ink.  I then stamped text from the Paris kit  with grey ink.   It still needed something after I stamped the sentiment so I stamped a few post marks also from the Paris kit to finish it off.


This example was made by inking the feather with a combination of Peanut Brittle along the edges and White Shimmer Delicata ink.  Since the Delicata is a pigment ink I was able to pull the dye ink along and blended it out into the rest of the stenciled area.  After the ink was dry I stamped a scroll stamp through the stencil.  Wish you could see it in person...the shimmer from the Delicata ink really makes this card so lovely in person.

So, have you ever tried this technique?
If not, you really should - it's so easy but creates such stunning finished works.

Supplies:

ClubScrap.com - Cardstock, Stencils, Stamps
Imagine - Memento Dye Inks; Delicata White Shimmer; Sponge Daubers

Saturday, July 16, 2016

Stencil Girl & Imagine Crafts Christmas in July Blog Hop!

Welcome to the Stencil Girl & Imagine Crafts Christmas in July Blog Hop!  I am delighted to be able to combine products from two wonderful companies!


I decided to step out of the box and create something a little different for the upcoming holiday season....


I stenciled a decorative pillow for my living room.  I like to change up my home decor for the various holidays and I thought this would be a great addition to my decorations this year.  Actually, I'm in the process of making a couple variations on this pillow so that I can scatter them on both of our couches.

Here's what I did...


1. I started off by ironing the canvas material so I had a nice flat surface to work with.


2. I taped off all but the largest flower on the Woodcut Roses stencil.

3. Dabbed a circle of Dandelion Memento Luxe ink on the canvas where I wanted my largest flower to reside.


4. Tape the flower stencil over the yellow circle and begin adding layers of ink.  I started off with Angel Pink.


5. Add a second layer of ink using Love Letter Luxe and finally Rhubarb Stalk.

NOTE: While the inks are still wet they are blendable.  Once you iron the inks are set and no longer blendable.


And here's how it turned out!


6. I repeated these steps for the 2 additional flowers and leaves I added  to the design. 

7. Iron the flowers and leaves to set the ink.


8.  I wanted to add a couple of pine cones above the flowers and I started off by using the inside of the Pine Cone Woodcut stencil to ink up the center of the cone.  I used a bit of Rich Cocoa, Espresso Truffle and Northern Pines Memento Luxe Inks.


9. A second pine cone was added in the same fashion. Both pine cones were then ironed to set the ink. 

10. I used the Pine Cone Woodcut negative to add a bit of color around the edges of the pine cone to fill it out.  The pine cones were then ironed a second time to set this layer of ink.


11. In the corner opposite of the flowers I inked the Allegro Clef Mini Stencil with a bit of Espresso Truffle and ironed.

12. Rembrandt's Words stencil was used to add the background along with Flannel Grey Luxe ink.  After the entire panel was covered it was ironed to set the inks.


13. At this point I decided it needed a bit of greenery in the upper corner so I used a FantaStix to apply Apple Green All Purpose Ink in wispy strokes to give the hint of pine needles behind the pine cones and among the flowers.

14. Finally for a bit of sparkle I used a FantaStix to apply Champagne Mist All Purpose Ink on the pine cones and Gold API to the centers of the flowers.

15. Stitch front and back together and stuff.


Here are a couple close ups of the pillow...


Supplies:

StencilGirl - Rembrandt's Words; Allegro Clef Mini; Woodcut Roses; Pine Cone Woodcut

Imagine - Memento Luxe Inks; All Purpose Inks; Sponge Dauber; FantaStix

Other: Canvas Material; Batting


What would a Blog Hop be without a GIVEAWAY??!!!
We'll be picking one lucky winner to receive $100 in Gift Certificates – a $50 Gift Certificate for StencilGirl Products and a $50 Gift Certificate for ImagineTake your time and visit each blog showcased July 9, 16, & 23 and leave your comments. The more blogs you comment on, the more chances you have to WIN! One comment per blog please.

You will have until Saturday, July 30th at 11:59PM Central Time 
to leave your comments.
The winner will be notified by email and announced on
StencilGirl's Facebook page on Sunday, July 31st.

Good luck everyone...Enjoy the Hop!

Friday, July 15, 2016

CAS(E) this Sketch! #181 - Better than Email!


Today I was inspired to play along with CAS(E) this Sketch! by their newest challenge - sketch #181 (below).


I've been having lots of fun playing with the retro colors and feel of the Office Space kit from Club Scrap and today's card is no exception.   I used Morocco Memento Ink to stamp the typewriter on the band of funky design paper....I then stamped it a second time on white cardstock for the "paper" in the typewriter.  I then stamped both sentiments.


Fun sketch to play with!
I actually have a couple more ideas for this sketch that I might try over the weekend.

Supplies:
ClubScrap.com - Cardstock, Pattern Paper, Rubber Stamps
Imagine - Memento Inks

Thursday, July 14, 2016

Peg Stamped Wreath & GiveAway!

Lately I've been playing with my peg stamps and stamping things just to see what I could come up with.  Today I wanted to share a wreath I made using a color palette from a challenge site (it's past the deadline now but that's o.k.)


The challenge was oranges, red, brown and greens 
mixed together and this is what I came up with.
The bow was a MFT die-cut that I colored with my Memento Markers.


Before I get to the wreath I wanted to show you a little tip on how I store my peg stamps...It's done wonders for my stamping and it might just give yours a boost as well.

The sets normally they each come in a little container but after playing with them for a bit I realized that I was restricting myself to work set by set.  So I took all of the stamps out of their respective packages and put them in a container all mixed together.   

After doing this I discovered how much more fun they are and that a flower goes with a pine cone and a tiny sprig can be used for a holiday card just as well as it can work for floral designs.  It was freeing for me to be able to look at them all together and mix them up in my designs.


So I started off with this fern-y looking stamp for the wreath base.  
I used Olive Grove for the base layer...


Then added a layer of Bamboo Leaves and a few more using New Sprout.


A few pine cones sprinkled here and there.


And some berries using LadyBug (red) - actually these are blueberries but hey, now they are red berries!  Then sticking with the challenge color story a few mini 5 petal flowers in Tangelo.  I die-cut the bow and added a few highlights and lowlights with my Memento Markers, pop-dotted it on the wreath.  I finished it off by stamping the sentiment in the center.  

This was a really easy card to make and I can see this being something I'd make for the holidays as there is no right or wrong where the stamping is concerned.  I "low-stress" card for sure.  Something I think we can all appreciate when the holidays are looming.


This is a fun little thing I stamped up to show just how easy it is to create with these stamps...4 little stamps make a huge impact!  These are as a matter of fact some of my favorite peg stamp images as they are so versatile.  By changing up the colors and the design they can be used for so many different ideas.  

I would like to give this set of 4 stamps away to a lucky Ink Stains reader!  Simply comment below if you own any peg stamps and what you make with them -  be it cards, tags, use them on sb lo's or whatever.  If you don't own any that's o.k. too...tell us what you'd like to make with them if you owned a few.

You have until 7-23-16 to post your comment to be entered to win!

Good Luck Friends
and
Ink on!

Wednesday, July 13, 2016

Note To Self...

I've been told I'm a Type A personality and I recently found out that those types of people are very organized and love lists.  Well, I'm not ashamed to admit that I'm a note taker and list maker... I am constantly writing down ideas of things I want to do (yes I really do have a growing "to do" list), techniques I want to try and ideas for card sketches, projects and other "stuff".  Writing it down helps me not only remember but it also un-clutters my mind.  If I don't write it down I usually forget it all.

I'm always in need of just one more notebook or pad of paper so I made this today ... 


It just so happens that this month's Club Scrap kit is Office Space which has a fun funky retro 70's feel to.  Cool huh? 


 As luck would have it the last time I was at Wal-Mart they were setting up their school supply section and snagged some cool composition books - both lined and graph paper! The lined comp book was only 50 cents!!!  How cool is that?  The graph book was 97 cents but who doesn't love to mess with graph paper?  


I set about covering it with some of the cardstock and pattern papers.  Remember, when working with a comp book or journal to protect the inner pages with a plastic bag so you don't get any glue on the pages.  I usually just wrap a bag around the pages and leave it there till I'm finished with both front and back.


I used this pretty teal green paper for the back cover.


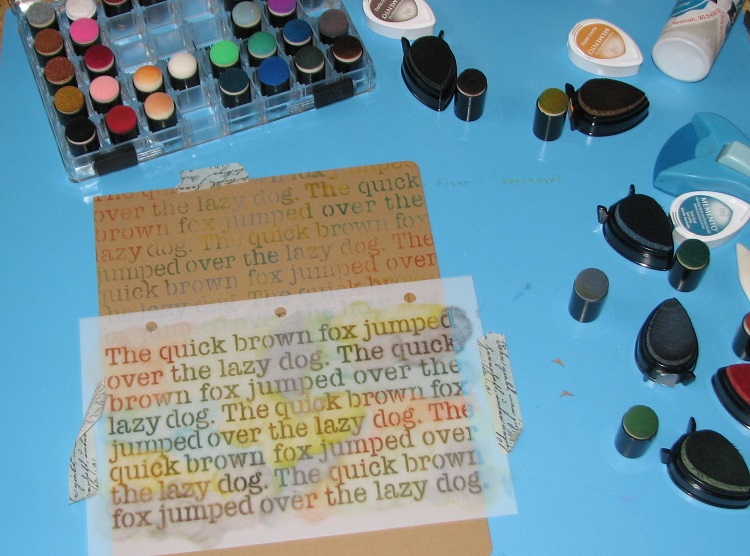
And for the inside of both the back and front covers I inked up a couple pieces of kraft cardstock with a variety of Memento Inks to match the color of the papers.  I wish you could see how vivid this is in person.  It is so pretty and you can see all of the various colors I used.


One for the front, one for the back, corners rounded and glued it in place!


I'm ready to start making a "Note to Self"!


Supplies:

Club Scrap - Cardstock, Pattern paper, Stamps, Stencil, Book Binding Glue
Imagine - Memento Inks, Sponge Dauber
Composition Book

Thursday, July 7, 2016

Peg Stamp Fade Technique

Well I've been having more fun playing with my peg stamps from Rubber Stamp Tapestry and I've got a quick and easy technique to share with you today.

Peg Stamp Fade


This is my favorite card I've made...I'm sure because of the blues I used.


So, here's all you do....

Ink a peg stamp.
Stamp it once starting at the top of your card.
Now imagine your card divided in 4ths.
Without reinking, stamp it a second time in the second quarter the card.
Stamp it a third time without reinking about three-quarters down
and leave the bottom quarter of your card stamp free.

Now repeat!

You just keep stamping the top 3/4ths of the card until you're satisfied with the design.
You can change stamps and colors but I think the more monotone designs look best.


I went wild with this card and used Imagine Crafts Radiant Neon Inks!
WOW, did they ever kick it up a notch or three.


For my final card I added a bit of a tropical feel by using the tropical leaf...
really adds such a nice summery feel to the raspberry, orange and pink inks don't you think?

So there you go - 
Told you it was quick and easy!

Just imagine all of the fun combinations you can come up with!
By simply switching out one or two stamps 
or coming up with new color combos
you can have loads of cards in a very short amount of time.


Supplies:

Rubber Stamp Tapestry - Various Peg Stamps
Imagine Crafts - Memento Dye Inks, Radiant Neon Inks
Club Scrap.com - Sentiment Stamps, Cardstock

Tuesday, July 5, 2016

Flip Album How To

Happy Tuesday....typed Monday to begin with because it does feel like one.  Several people asked for instructions on how to make the flip album I shared last week and I finally have it all around.


Directions:


1. Start off by making the outside of the album.  Cut 2 pieces of chipboard 4.5" x 8" and one piece 1.5" x 8" as shown.

2. Assemble the cover as you would for any other book. 

Glue these down to desired cardstock that you'd like the outside to be covered in.

Crease and fold excess paper to the inside and adhere.

Before you cover the inside of the album, attach a button to the front cover of the book and stretch cord to the back of the cover.

Cover the inside of the album with a piece of cardstock of your choice.


3. Cut 2 pieces of cardstock 4" x 12" and score every 1/2".   
4. Crease each fold back and forth so they all move easily.  

5. Fold as shown above.  1 hill, 1 flat, 1 hill, 1 valley, 1 flat, 1 hill, 1 valley, 1 flat, etc.  

6. Repeat for the second piece of cardstock.


7. You will glue both of these pieces into the album, one on each side.


From the side you can see that they will become the flaps that your pages are attached to.


8. After you have glued the flap binding into the book, measure the area below each binding.  Cut a piece of cardstock to cover the remaining area, glue it over the bottom of the binding.


9. Cut 16 pieces of 4x4 cardstock - either from a single color or from several different pieces.  I used light blue for all of my pages.

(Optional)  I chose to round the bottom corners of each page.  It's not necessary but it's a nice little touch.

10. Adhere one page to each flap on both sides of the album.


11.  Cut 34 pieces of cardstock/pattern paper 3.75 x 3.75".  


12. Adhere one of the above pieces to the front and the back sides of each flap. Glue the remaining 2 pieces to the area under the flaps.

13. Decorate the cover as desired.  I stamped, colored and fussy cut several images using the stamps from the kit.

Supplies:

Club Scrap - chipboard, Boardwalk pattern papers, cardstock, button, stamps, cut-aparts, book binding glue
Imagine Crafts - Memento Dye Ink, Memento Markers
Other - strech cord