Showing posts with label UTEE. Show all posts

Wednesday, May 14, 2014

Ranger Melt Art News!

I don't know if you're into Melt Art or not but I wanted to pass on a bit of news...

Due to a drop in demand and high minimum order qty they are going to discontinue selling the following:

Melt Art® and Accessories


The Melting Pot™ US/Canada version

The Melting Pot™ UK version SOLD OUT NO LONGER AVAILABLE

The Melting Pot™ European version


Melt Art Project Pan™  SOLD OUT NO LONGER AVAILABLE

Melt Art®Project Craft Sheet


Heat It Dye Inks/ Brilliant Gems (Sapphire, Garnet, & Citrine)

Heat It Dye Inks/ Organic Gems (Coral, Turquoise, & Jade)

Heat It Dye Inks/ Luxurious Gems (Emerald, Amethyst, & Pink Tourmeline)

Heat It Dye Inks/ Majestic Gems (Onyx, Tiger Eye, and Amber)


Melt Art Natural BeesWax

Melt Art Clear BeesWax

Melt Art Texture Treads


Melt Art® Texture Treads Mod Circles

Melt Art® Texture Treads Wood Grain

Melt Art® Texture Treads Floral Flourish

Melt Art® Texture Treads Scalloped Lace
Melt Art® Texture Treads Mod Swirls

Melt Art® Texture Treads Leafy Branches

Melt Art® Texture Treads Retro Holly
Melt Art® Texture Treads Snow Flurries

Melt Art® Texture Treads Scattered Leaves

Melt Art® Texture Treads Fancy Feathers

Melt Art® Texture Treads Graphic Gears

Melt Art® Texture Treads Winged Mosaic

So, if you want it now is the time to purchase it because once it's gone that's it!

Also, Ranger will continue to sell the UTEE and Mold & Pour.

Wednesday, December 18, 2013

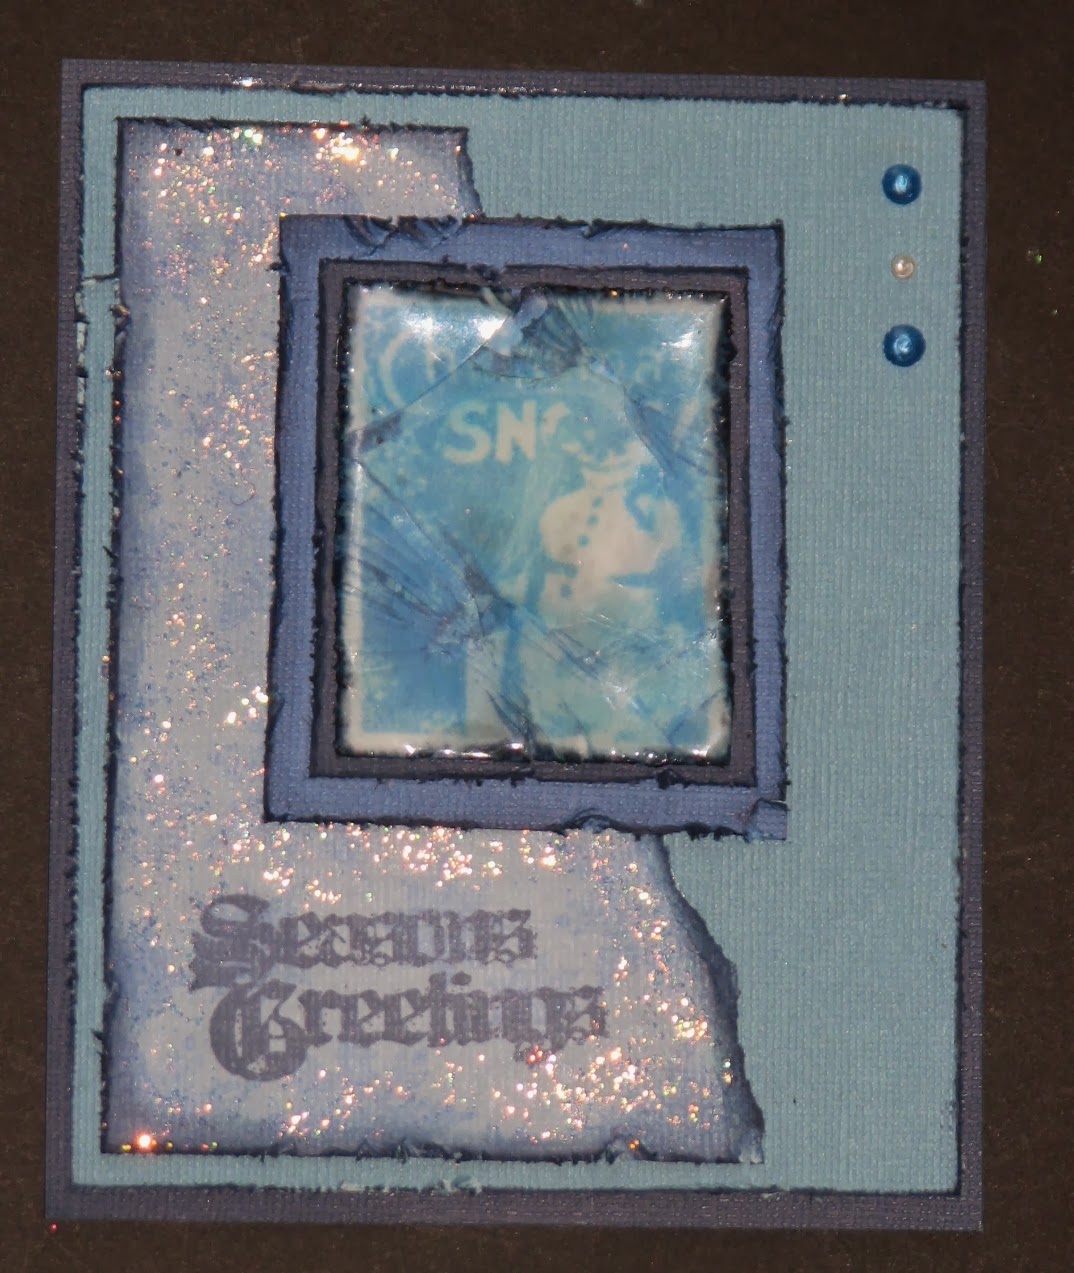
Monochromatic Cracked Glass UTEE Snowman Card

Hi All...

I had a request for another Cracked Glass example so I decided to go with a wintery theme....

this fun snowman here was stamped using Archival Ink
then covered in multiple layers (about 4) of UTEE.
After he cooled I cracked him strategically then I rubbed Chipped Sapphire Distress Ink into the cracks.  The background is Stickles over a stamped snowflake design (which you can't really see).


Here's a closer look at the cracks....


Hope you're all taking time to smell
the peppermint candy canes this holiday season!

Tuesday, December 17, 2013

Ho Ho Ho.... Cracked (UTEE) Santa

Santa's almost here!
Well, actually he IS here....
I wanted to share this fun UTEE - Cracked Glass Santa card I made.
The background on the left is a tree stamped with Pine Needle Distress Stain and the right side was made using a combination of Barn Door & Peeled Paint Distress Stains.
Santa was colored with various Distress Markers then covered in multiple layers of UTEE, allowed to cool then cracked.


A closer look at Santa.  Someone once asked me how my cracks don't end up on the face.  I start off by cracking the edges first.  If you start off by cracking in the center that's where the cracks will show up the most, usually obliterating the face.  Start off with smaller cracks along the edge and sort of bend the image where you want your cracks to go.  After two or three attempts you'll get the hang of controlling (as best as possible) your cracking.


Hope you're all enjoying the season!
We have our first two Christmases this coming weekend!
Of course I'm not ready but hopefully by the time it rolls around I will be :)

How are you coming with YOUR preperations?

Wednesday, December 5, 2012

25 Ideas for the Holidays - #2 Chipboard Faux Glass Ornaments

Today I wanted to share a fun way to make faux glass ornaments to send in the mail...they look great and won't break!

Chipboard Faux Glass Ornaments

Supplies:

Chipboard
Stamps (Stampers Best)
Ink
Markers
Embossing Ink
UTEE
Heat Tool
Metal Leafing Flakes, Glass Glitter, Leafing Pen
Stretch Cord
Ornament Die or Circle pattern

Instructions:

1. Stamp desired images onto the chipboard using permanent ink.  I started off by stamping music over the entire sheet then I went back and stamped various Christmasy images.  All of the images I used for these ornaments are from Stampers Best.

.SB - Christmas Ornaments 03

2.  Color the images with markers.

.SB - Christmas Ornaments 04

3. Hand cut or die-cut desired shapes for your ornaments.  I have a die that cuts large ornaments but I also cut one that is just a plain circle by hand.  You don't have to use just circles...your ornaments can be any shape you desire.  Let your imagination run wild.

.SB - Christmas Ornaments 05

4. Now pounce the clear embossing ink over the entire ornament. 

5. Sprinkle with UTEE and begin heating with a heat tool.  I like to work in a shallow box which has been lined with aluminum foil.   This helps protect my work surface from those tiny bits of UTEE that always manage to fly away.

.SB - Christmas Ornaments 07

6. Continue alternating between adding more UTEE and heating. 

TIP - When I'm working on a project like this I like to fill an old pepper shaker (salt shaker holes are usually too small) with the UTEE.  This is such a time saver!!!  I just shake on what I need and don't have to mess with the jar, tiny spoons, etc.    By having the shaker in one hand and the heat tool in the other I can really add many layers of UTEE without having to stop or slow down.  I can finish an ornament in no time using this method.

SB - Christmas Ornaments 08
 
Here is what the ornaments look like at this point.....


SB - Christmas Ornaments 09
 
 
7. You can add a faux hanger to your ornaments in any number of ways.  My favorite is to use metal leafing flakes.  Simply add a dab of glue, layer on the flakes, let it dry a bit then brush away the excess leafing flakes.  Makes for an awesome finished look....
 
SB - Christmas Ornaments 10
 
 
You can always use a Metallic Paint Pen - I like Krylon's.  They just paint right over everything.  
 
 
SB - Christmas Ornaments 12
 
 
Or if you've hand cut a shape that doesn't have a built in hanger you can always add a mat to your shape to add the hanger to.  Here I have die-cut a mat with holes around the edges, covered with glitter then I mounted the circle on the mat.
 
 
SB - Christmas Ornaments 13


8. The final step is to at a bit of stretch cord to each ornament for hanging and your ornament is ready to be given! 
 
 
NOTE: this is for a one sided ornament.  This leaves room on the back for a special little note to the person receiving the ornament.  You could always add a second ornament to the back of the first for a double sided ornament.  Just remember to add a bit of trim, glitter glue or other medium to cover the seam.


SB - Christmas Ornaments 14
 
 
Ho Ho Ho
Only 20 Days Till Christmas!!!

Thursday, April 1, 2010

Happy Day ~ on Ranger's Home Page!!

Happy Thursday Friends!!

Another of my cards is on Ranger's home page this month :)

It's my Happy Day UTEE card...

Here's a little peek

Roni - CHA 078

Be sure to check out their site for a complete supply list and instructions on how to make it.

Monday, December 21, 2009

Schmooze with Suze - Closing Webstore!

I got this a couple of days ago but what with finishing up some Christmas gifts and such I haven't had time to post it.

Not sure if you're familiar with Suze Weinberg or not but she's the person behind Rangers UTEE line of goods. She has up until now had an on-line webstore called Schmooze with Suze. She has decided to close the store. Here is her official announcement. Be sure to stop by and check out the discounts.

~ Schmooze with Suze Store Closing ~


It was not a difficult decision because I knew it was the right one & it felt 200% right to me.....I have decided to close my office. I am NOT - NOT - NOT retiring - repeat NOT. I am only retiring from selling online. So...now is a great opportunty to check each page at http://www.schmoozewithsuze.com/ for some great deals. The office will unload as much as possible with your help and then,with the target date of mid January, close.

I will still be teaching, demoing, traveling, developing product for Ranger, keeping my Yahoo Group, FaceBook, Twitter, my e-newsletter which goes thru the website as well as the Free Downloadable collages, my YOU TUBE videos, Ranger "U"...the whole 9 yards...everything else will stay the same.

Maintaining the office, staff, products, etc all got to be just too draining and I hate to have my energy sapped....I need lots of it ! So...fear not..I'll still be around, same email and all. And if & when we want NJ classes I'll simply rent the room from the landlord...no problem !

SOoooo...Jump on over to the website and help us unload some stock....we'll keep adding discounts daily....Check my blog which has specials that are NOT on the website. What'cha waitin' for.......GET BUSY...Xmas is coming !


SuzeWeinberg.typepad.com

Saturday, April 11, 2009

Degrees to Celsius

Sorry about forgetting to add the celsius yesterday!

You need to bake the UTEE at either 340 F or 171 C.

This is the temp that the Melt Pot is set at when you use the UTEE setting.

I'm going to add it to the original post but I wanted to be sure everyone saw it just in case :)

Be sure to check back later for some fun with mixing colors...

Friday, April 10, 2009

Oven Baked UTEE Charms

Several people have mentioned that they don't have Melt Pots so I thought I'd share an alternate technique so they can get in on the fun too!

((This is also for all of you out there asking for charm ideas as well.))

Oven Baked UTEE Charms

Supplies:

UTEE

Collage Images (Tuscan Rose, Southern Blackberry Designs)

Mini Frames, Label Holders, Bottle Caps, etc.

Silicone Baking Sheet or Parchment Paper

Cookie Sheet

Oven

Oven Baked UTEE001

Instructions:

1. Pre-heat your oven to 340 degrees F or 171 degrees C.

Oven Baked UTEE004

2. While the oven is pre-heating gather your frames & collage images.

3. Arrange the collage images on the silicone baking sheet or parchment paper. I like to leave quite a bit of space between each image so each charm heats evenly once it's in the oven.

Oven Baked UTEE002

4. Place the frames (or label holders) over each of the collage images*. There is no need to glue the images to the frames, once the UTEE melts it will act as an adhesive.

Oven Baked UTEE007

*Alternative - If you're making bottle cap charms, simply place the bottle caps on the baking mat/parchment paper and place the image in the cap.

5. Fill the frame/label holder/bottle cap with a mount of UTEE. You will want a nice mound of the UTEE.

Oven Baked UTEE003

6. Put the baking sheet into the oven. Now the length of time you will need to bake your charms varies ~ factors such as size of the charm, amount of UTEE, your ovens individual temperature characteristics, heat & humidity, etc. Your best bet is to just keep an eye on them. My charms took 2 minutes for the UTEE to melt completely.

7. After the UTEE has melted, check to see if you are satisfied with the results. If you feel the charm needs additional UTEE, add it now and return to the oven. Once your charms have been filled to your satisfaction, remove the baking sheet from the oven and let the charms/UTEE cool.

Oven Baked UTEE007

8. It's time to get to work... As soon as the UTEE has set but is still warm, you need to examine your charms. If some of your charms were over filled or leaked the molten UTEE from one side or another, as the first photo demonstrates, trim the excess UTEE using a sharp pair of scissors.

Oven Baked UTEE011

If you notice bits of melted UTEE on the frame it's self as below, while the UTEE is still warm, wipe it off with a cloth.

Oven Baked UTEE010

Your charms are ready for use! Add a bail, jump ring, etc and add it to any number of projects!!

Oven Baked UTEE010

Oven Baked UTEE009

Oven Baked UTEE011

Oven Baked UTEE010

Now there are a couple of neat benefits to baking UTEE...First, it melts it so quickly there is virtually no time for the UTEE to over heat and turn yellow. This is probably one of the best ways to achieve clear glass quality!

Another benefit is it's relatively quick and very easy. Simply pour and melt. No handling of the molten UTEE and less chances of burning yourself.

The best benefit I find is the collage images soak up the UTEE and turn transparent. Now I know this photo isn't the best ~ I couldn't figure out how to hold the charm up to the light and take the photo without getting a bad glare. I hope you can at least get some idea of how the light passes through the charm/image. It is so cool in person!

Oven Baked UTEE012

Well there you have it...another fun UTEE technique!

I hope that you've enjoyed all of the UTEE ideas, techniques and projects I've shared over the last couple weeks. Like I mentioned before ~ I've got lots more UTEE ideas, projects and techniques tucked away for you but will share those in the future.

I do have one more thing I want to share tomorrow...how to melt/mix various colors of UTEE and pour it so it doesn't come out as mud...which it will very easily if you're not careful.

I know some of you have a full weekend planned so if I don't see you before I want to wish you a very Happy Easter ~ stay safe and enjoy your time with family and friends!

Thursday, April 9, 2009

UTEE Cookie Cutter Examples

As promised, here are the cookie cutter UTEE examples!

The first two are paper mache eggs I found at Michaels...each was painted then decorated with the UTEE pieces.

UTEE cookie cutter ex 005

UTEE cookie cutter ex 002

The lines behind the flowers is melted UTEE that I drizzled over the egg.

UTEE cookie cutter ex 001

The pendants I made strung up a couple of ways....

UTEE cookie cutter ex 007

UTEE cookie cutter ex 011

A wire-work frame - each one of those cells is UTEE. That project is for another day!

UTEE Wire work frame

And this tag was made with an assortment of left over bits, pieces and extra colored UTEE! I love how it turned out. I wish you could see the depth in all of the swirls. Some of the UTEE is colored but clear, other parts are opaque and part has flecks of colorant suspended in it.

Psychedelic dude!!

~ as my youngest would say ;)

He's a (born in the) 90's - 70's guy - LOL!!

UTEE cookie cutter ex 012

So there you go...just a few fun things you can do with some of these cookie cutter UTEE pieces. The tag btw is the shape of the cookie cutter that I'm giving away ;)

One more UTEE technique to share tomorrow but certainly not all of them I could share.... I don't want to bore anyone so we'll be moving on to something new next week. Sometime in the future I'll come back to sharing additional UTEE techniques.

TTFN!!

Wednesday, April 8, 2009

UTEE Color Experimentation!

O.k. I was going to share some examples of things I've made using the cookie cutter UTEE pieces but I've been getting lots of questions about using re-inkers to coloring UTEE so I decided to experiment today.

Now first I must apologize, I do not own any Stampin Up Re-Inkers. Never really got into SU stuff so I experimented with what I had on hand. I would assume that if you tried to use Dye Re-Inkers you would get approximately the same results but I'm no chemist so I can't say for sure.

Anyway here are the results...like always I'll let you judge for yourself on how you think they did and at the end I'll tell you what I think :)

Distress Re-Inker - Worn Lipstick

Colored UTEE Examples001

Archival Ink Re-Inker - Tangerine

Colored UTEE Examples007

Adirondack Dye Re-Inker - Stream

Colored UTEE Examples005

Nick Bantock Re-Inker - Vermillion Lacquer

Colored UTEE Examples004

Tsukineko Re-Inker - Wisteria

Colored UTEE Examples002

So after I tried the dye type re-inkers I had I thought I'd mess around a bit and try some other stuff I had in my stash...

Glimmer Mist - Key Lime (my fav. GM color btw)

Colored UTEE Examples001

Lumiere Paint - Pearl Blue

Colored UTEE Examples002

Radiant Pearls - Lemon

Colored UTEE Examples006

Amazing the different results depending on the type of ink/paint huh?

My observations - I think the Archival Ink or the Adirondack Dye Ink were the best re-inkers to color evenly and come closest to the original color of ink. I did notice however that the Adirondack Dye Ink left bits of ink that didn't get mixed in enough (the dark colors) and if these areas were on the surface the ink was still wet... You'd need to wipe it off with a cloth or let it dry before you did anything with it.

Nick Bantock ink color totally surprised me. This is a very intense red and it ended up being almost pink/salmon color.

Tsukineko and the Distress Ink re-inkers were interesting...mixed but separated a bit - cool look if it works into your design.

Glimmer Mist was way cool...kept that iridescent shimmer and it gave the UTEE depth which you really can't see in the photo. It had more intense swirls of color in different layers of the UTEE. Really pretty.

Lumiere Paint was clumpy and chunky...finished that way too. Again, if it works into your design it would be great.

The wildest result was the Radiant Pearls! The UTEE and RP's were mixed very well but once heated the RP totally separated from the UTEE leaving free floating chunks. It looked pretty awesome and was a highly unexpected result!

So there you go ~ hope this helps you all a bit.

Tomorrow I'll have examples of cookie cutter UTEE and then on Friday I have one more technique I want to share before moving onto something new.

Have a wonderful day and remember to enter the two open contests....you can't win if you don't enter :)

Have a wonderful day everyone!!

Tuesday, April 7, 2009

UTEE & Cookie Cutters

O.k....now that I got that sweet confession off my chest - time for today's technique ;)

UTEE & Cookie Cutters!

This is a fun and really easy technique once you learn what NOT to do - LOL!!

All you will need is some UTEE (color of your choice); metal cookie cutter; Melt Pot; Non-Stick Craft Sheet. That's it!

UTEE & Cookie Cutters001

Instructions:

1. Pre-heat the melt pot for approx. 5 minutes - pour in the UTEE & melt. I normally work in small batches so you don't get any darkening of the UTEE which occurs naturally with prolonged heat.

2. Pour a bit of UTEE out onto the Non-Stick Craft Sheet. You'll just have to practice judging how much you will need depending on the size of your cookie cutter. If it helps you can lay the cookie cutter along side where you are planning on pouring to help determine when you've got enough poured out.

UTEE & Cookie Cutters002

3. Immediately - before the UTEE cools, place the METAL cookie cutter into the hot UTEE and leave it cool...do not try to move it until the UTEE has cooled to a luke warm temperature! (Remember - never touch hot or molten UTEE - it burns!) I know that some people suggest to coat the cookie cutter but you do not need to coat the cookie cutter with anything ~ not embossing powder, not spray silicone, nothing. As long as you're using a metal cookie cutter and place it into hot UTEE then let it cool you will be fine.

UTEE & Cookie Cutters003

VERY IMPORTANT TIP!!!! - Now, I learned this the hard way....trust me on this....never under any circumstances pour the UTEE "INTO" the cookie cutter!!! It basically freezes in there and you have a heck of a time getting it back out again! I destroyed a tag cookie cutter by doing it that way. Someone said you could use a "release agent" and just pour it in.... not so. That sucker was stuck tighter than a well diggers...well, never mind that ~ it was just a mess ;)

Always press the cutter into the hot UTEE, never pour it into the cutter.

4. After the UTEE has cooled to a luke warm temperature carefully remove the cutter. There are normally two ways the cutter comes out...either it pops right out and it will look like this ...

UTEE & Cookie Cutters004

in which case you just peel off the excess UTEE....

UTEE & Cookie Cutters005

OR

The whole piece comes up. When it does, just push the cutter through the excess as shown...

UTEE & Cookie Cutters007

Push off the excess then push out the center. Really easy!

UTEE & Cookie Cutters008

Now, just think of all the fun things you can do with this....

UTEE & Cookie Cutters026

Not only can you make basic shapes ~ check this out....

Use multiple colors of UTEE and cutters to create all sorts of fun and funky shapes. If you would like add a hole do so by inserting a piece of a bamboo skewer to the molten UTEE -

UTEE & Cookie Cutters011

Check it out....

UTEE & Cookie Cutters023

Neat huh?

These are so much fun and so very easy too! Now just think of all those cookie cutters or poly clay cutters that you may have in your stash....all of the cool holiday cutters, specialty shapes, etc. Just make sure they are metal and you'll be all set!

Now, another give-a-way time....

I have an extra tag cookie cutter that I thought I'd share with you...

all you have to do is tell me what your favorite Easter candy is. If you're not into Easter which I know many people aren't then tell me what your favorite "special" candy is...not something you have every day ~ something special you save for honored occasions or that only are available certain times of year.

You will have until 4-18 to post at which time I'll draw one lucky winner!

Good Luck Everyone!!