Tuesday, June 30, 2015

Ott Light - Amazing Deal!!!

I've been busy cleaning my desk this afternoon after I got home from work today.  Why?  Because my 2 new OttLites arrived!!!  This is what they look like....


and you'll never guess what I paid for them.   

$12.99!!!!

How cool is that?!?!?  These are $45.00 lights - OttLite 15w Telescoping 360 Light (70.00 - 80.00 other places).

But I wanted to share where I got them....  Cleaners Supply  (while supplies last).  I don't know how many they have in stock but I'd hurry if I were you.  You're not likely to find a deal like this again any time soon.  I've been searching for YEARS for a good deal on OttLites but never bought any because they are always too expensive.  

I found these by chance - I was buying some thread for our business and when I hit the check out button - it came up on the - "You might like these items" page before taking me to the cart.  Well I sure do like it - AMAZING!!!!

Now I had enough stuff in my cart for free shipping so I can't say how much shipping will be but at that price it'd be worth it to buy several and share with friends.  They are just too amazing!!  And I've ordered from this place several times with great results.

BTW, I'm not getting paid to put this on my blog...it's just a great deal that I wanted to share.

Where to find Brusho Colour Crystals....

You all know how much I love Brusho by now...well, Mike from ColourCraft just announced new suppliers!!!   It's very exciting, I'm sure these are going to be VERY popular...they are amazing and so easy to use.

The new Brusho packaging has just arrived and will be on its way to our North American Distributor during the next few days.

Armadillo Arts & Crafts
125 Stryker Ln
Hillsborough Township,
NJ 08844
United States
t: (908) 874.3315 (Customer service ext: 10 or 13)


We also have new stockists as well as Dick Blick,

SARASOTA STAMPS
2195 BLUEBERRY ROAD
NORTH PORT, FL 34288


BEVERLY'S ART EMPORIUM
415 BOGART ROAD
HURON, OH 44839-2309


SIMON SAYS STAMP
44 LAZELLE RD
COLUMBUS, OH 43235

and more coming soon.
Like · Comment · 

Monday, June 29, 2015

Travel Art Journal - Club Scrap National Parks Challenge

Good Monday Morning!!  I hope you've all had a wonderful weekend.  This week I'm starting off with a challenge - the Club Scrap Design Team Challenge for the National Parks kit!  I have to tell you that I love this kit - it's got a beautiful vintage feel to it so I had many ideas it was hard to choose just one.


I finally decided that this particular piece was going to be the starting point for my project....


It is full of fun sayings and places to add journaling or photos.  


I wanted a book small enough that it could easily be carried in a purse, have pockets to tuck bits of ephemera picked up along the way and a place for art too.  Tall order for such a compact size but I did it. 

The journal measures 5.5" tall x 4.25" wide - the covers and inside dividers are all pocket pages - 5 in all and it's divided up into 4 sections -  


one for lined paper,


 graph paper,


 mixed media paper


and watercolor paper.  


I added a journal box, quote box or photo box on each side of the pocket pages and I also stuck an extra piece of cardstock in each pocket.  It could be used to mount photos, ephemera or even more journaling.  

All that fun wrapped up in one little package!

Friday, June 26, 2015

Fun Summer Watermelon Tank Top

I am so happy to share today's post... it is a summer tank top that I created using Memento Luxe inkers but the best part is that it is being modeled by my future DIL - Miss Morgan!


Isn't she darling :)  We love her so much!  My creation is featured over on the IMAGINE Crafts blog today and the instructions can be found in the "Make" section of the IMAGINE Crafts website - Juicy Watermelon Tank Top.   It is so easy and lots of fun to make!  Hope you stop on over and check it out.

Thursday, June 25, 2015

Suitcase Mini Album Dimensions, Directions and Tips

The Suitcase Mini Album I created for yesterdays Club Scrap Blog Hop was quite a success.  I honestly didn't think many people would be interested in re-creating it so I didn't take any in the process photos but I did go back and figure out how I made it so I can share it with you today.  LOL!!  I know that sounds crazy but when I'm making something I just wing it ;)

I did want to mention that the matching Memento Dye Inks are Peanut Brittle, Rhubarb Stalk and Rich Cocoa - all of which were used to embellish this album.


So, here goes....

I cut mine from the pizza box the kit came in.  I used the folded back edge for the bottom of the suitcase since it already had nice creases in it.  The bottom is 2" wide.

You will need to cut a piece of cardboard/chipboard -  6 1/2" wide x 17" long. If you're using your CS ruler it's easy to measure this out because it's got markings in both directions - horizontal & vertical.

Next I laid out each section of the suitcase.  
Working from the left to right mark it out as follows:

4 3/4" - suitcase front
2" - existing bottom
5" - suitcase back
2 1/4" - suitcase top
3" - front flap of the suitcase


You will need to score on each of the lines you just made.  The photo below shows the box cut out, scored and folded into the suitcase form.  The scissors are just there to hold the flap shut...it kept wanting to fly open.


I covered the outside of the suitcase with the dark brown cardstock from the kit.  Since the length of the cover is longer than 12" I had to piece together the cardstock.  I cut it in a way that the seam would meet on the bottom of the suitcase which is also what I did to cover the inside as well.

Cut a piece of dark brown cardstock - 12" x 8.5"wide, cut a second piece 7" x 8.5" long.  Adhere them to the outside of the album cover, crease & fold over and attach to the inside of the album.  

To cover the inside of the album I used the mustard cardstock.  Cut one piece 6" x 11", cut a second piece of cardstock 6" x 6".  Adhere them to the inside of the album again over lapping on the bottom of the suitcase.  


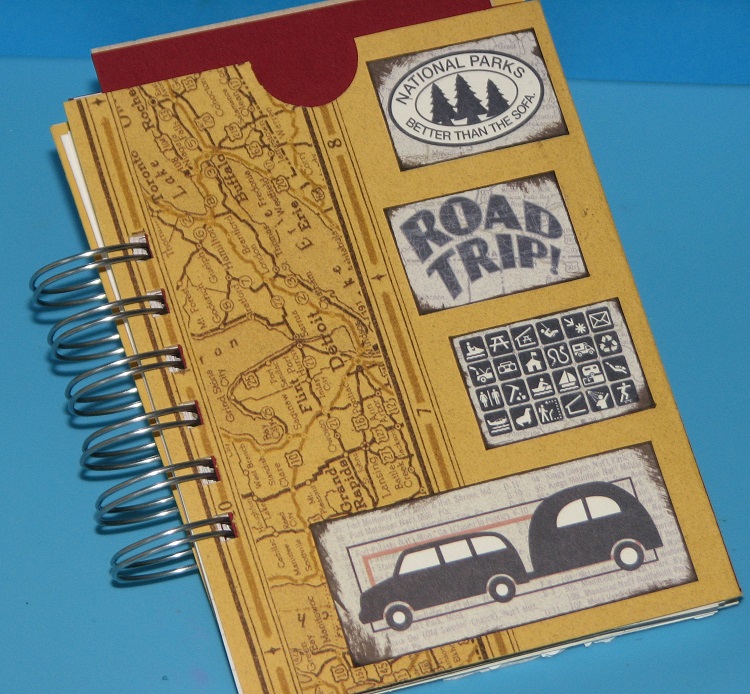
If you look closely at the above photo you can just see where the overlapping pieces (both the cover and inner liner) meet under the album pages.  I decorated the outside of the album with two 1/2" strips of mustard cardstock that I embellished with the map stamp and several vintage travel posters cut from the wine pattern cardstock.

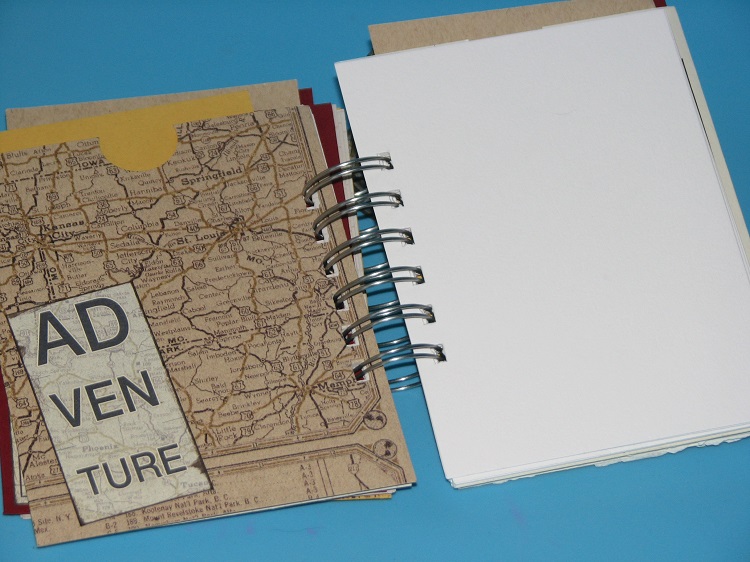
To create the album part of the suitcase I cut a piece of dark brown cardstock 6" x 12" and scored it every 1/2".  This is the album binding.  I glued a page to each mountain in the accordion - mine ended up with 10 pages and 2 extra flaps that I used to glue the accordion album to the bottom of the suitcase.  If you want to add more pages to your album simply crease, fold and glue additional strips to the first.

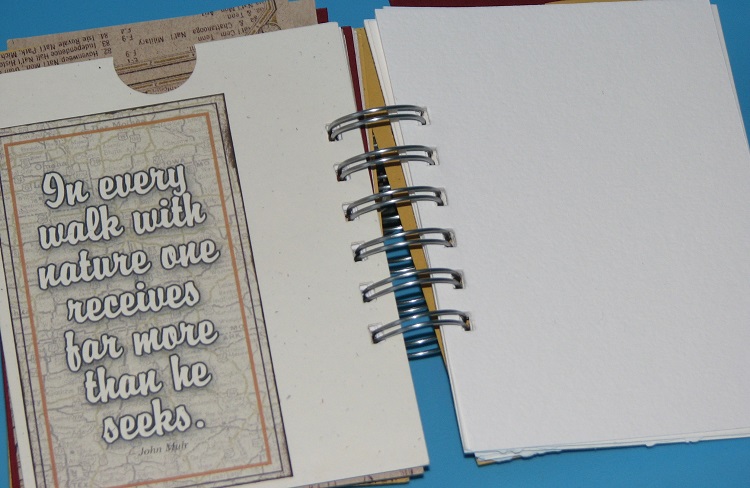
To keep the accordion from pulling away from the album I used a stretchy cord loop to hold it in place. You can see that in the above photo as well. The album pages can move freely but won't pull away from the album.


To hide the cover seam and stretchy cord I covered the bottom with a strip of the destination cardstock.


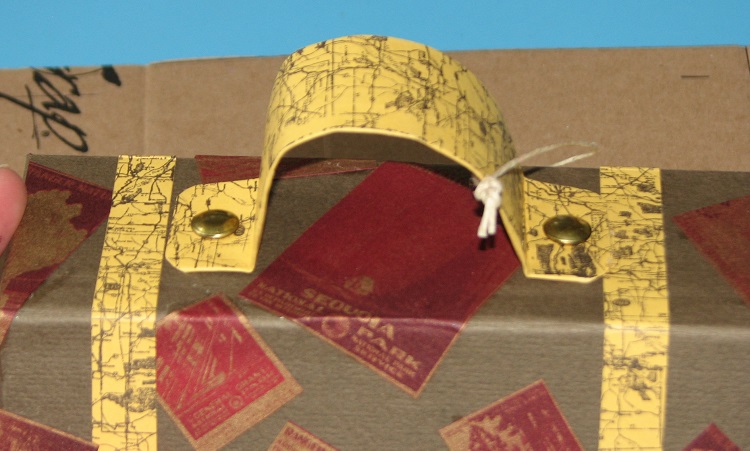
I used a scrap of the mustard cardstock to create the handle.  I scored it, folded and creased it until it was 1" wide.  I folded the ends over and shaped the center to form the curve of the handle.  I used 2 large brads to affix the handle to the suitcase.


I used another strip of the destination cardstock to cover the brads on the inside of the cover.


I finished off the album by adding a few extra bits of left over cardstock and stamped the "Road Trip!" image using Rhubarb Stalk Memento Ink.   The luggage tag was made from a wooden tag (from a recent kit) which was stained with Memento Peanut Brittle, edged with Rhubarb Stalk and then stamped with Rich Cocoa.

The two "buttons" on the front of the album came with the kit and two Velcro dots were used as closures which I lined up with the "straps" on the suitcase. 

I hope you give it a try and have fun making it!


Wednesday, June 24, 2015

Club Scrap National Parks Blog Hop & Give Away!

Hello Friends!  Where did June go?  Isn't this year just flying by?  Well it's the end of the month already, time for another wonderfully inspiring Club Scrap Blog Hop featuring this month's kit - National Parks!  I have to tell you I absolutely LOVE this kit!  It has a lovely vintage feel to it which is what inspired me to create this fun vintage looking suitcase album!

**Edited to add: I didn't know there would be that much interest in this mini album which is why I originally didn't take any "in the process" photos or dimensions.  I will get all the measurements, photos and details around for tomorrow.  


The base for the album was cut from the pizza box it came in!!
When you lift up the front flap you find this fun album ready to be filled with your vacation memories!


If you'd like a chance to win this fun vintage travel album simply leave a comment for your chance to win!  The winner will be chosen by Random.org on July 7th, 2015. 

Your next stop on the hop is


and if you get lost along the way you can find the complete list of designers on the


Tuesday, June 23, 2015

CAS - Another Wack at it...

I made a promise to myself that this year I would try to step inside the box a bit...  You know how much I love to do off the wall crazy stuff but it's the more simple things that really confound me.  So the CAS on Sunday challenge popped into my e-mail box this weekend and I immediately thought about deleting it.  Clean and Simple designs are so hard for me...blank spaces are enemies and no embellishments...unheard of BUT sticking with my promise I gave it a shot today....


I think it should have been positioned further up on the card and I'd like to add more color or something but I tried to respect the CAS challenge.

What do you think?
I think I need (MUCH) more practice but it's at least a start.

Supplies:

Unity Stamps - Bunny & Sentiment
IMAGINE Crafts featuring Tsukineko - Memento Tuxedo Black Ink; Memento Dual Tip Markers
Georgia Pacific Cardstock


Monday, June 22, 2015

CS Mini Maze Album Challenge

Welcome Welcome Friends!  I hope you all had a terrific weekend.  We had a very nice one and the weather even cooperated yesterday.  It's been rainy here almost every day but yesterday it was nice, warm and sunny.

Today I have a cute little project that is actually a challenge over on the CS blog this month - Maze Albums.  It is a complete mini album created from a single sheet of 12x12 cardstock!  Wicked fun and oh so easy.  Don't ya love things like that?  I'm thinkin' these would be great to make ahead and have on hand for unexpected little gifts, RAK's, "Thank You's", etc.  So many uses.


You start off by marking off the paper into 3x3 squares....


Then cut an M or W into your paper...depending on how it's oriented.


And then begin folding - starting at one end and ending up at the other.


And here it is after it's been creased.


I went ahead and glued all the pages together so they wouldn't come unfolded...
added a ribbon and then a couple squares on the front with my sentiment.


Bob's your uncle and you're done!


Doesn't get much easier than that!

Tricia has a really nice Maze Album Video posted on the challenge post which is great for visual learners...  I hope you'll give it a try and enter the challenge!

Supplies:

Club Scrap - Papers, Stamp, Ribbon
IMAGINE Crafts featuring Tsukineko - Memento Inks - Bahama Blue, Pear Tart, Tuxedo Black
FMT Heart Die

Sunday, June 21, 2015

King of Cool Father's Day Card

Happy Father's Day!

I wanted to share a card I made for Dad which was posted 
on the IMAGINE Crafts Blog Friday!


Who could resist all that cool....
For a complete supply list and details on how I made it please see - 

Friday, June 19, 2015

SCACD ECLECTIC SEA Rubber Stamp Release

SCACD celebrates today a newly released exclusive rubber stamp set Eclectic Sea (9 rubber stamps all together). The Eclectic Sea is a twist of sorts in how something land bound might be seen in the ocean; for example a Sunflower that is now a Coral Sea Flower and vice a versa. So check out the collection as these are really unique and elegant. SCACD Artist Carmen Medlin and Susana collaborated on the images and we are so happy to be showcasing them to you now :D

Now available for purchase in the USA HERE for the Eclectic Seas collection.  Our International Friends if interested can email Susana.


The stamp I got to play with is called the Jelly Lantern.
It could be used as a lovely jellyfish floating in the sea.....


But I thought it looked equally as beautiful colored up like a Chinese Lantern....


And if you stamp it strategically it makes a lovely vintage looking wall-paper design!


All this from one stamp!

Your next stop is Alaine.  If you get lost along the way, the complete list of participating artists can be found on the SCACD blog.

Supply Lists:

Jelly in the Sea -

SCACD - Jelly Lantern, Sea Kelp stamps
IMAGINE Crafts - VersaMark, White EP, Emerald City StazOn
Brusho Colour Crystals
Sequins

Chinese Lantern Birthday Card -

SCACD - Jelly Lantern
IMAGINE Crafts - VersaMark, Gold EP, Memento Tuxedo Black Ink
Inktense Colored Pencils
Watercolor Paper
Sentiment - JFF Rubber Stamps

Vintage Wall Paper

SCACD - Jelly Lantern
Brusho Colour Crystals
Club Scrap - Wood Bird, Flower, Ribbon
IMAGINE Crafts - Memento Tuxedo Black 

Thursday, June 18, 2015

Color Burst & Brusho Color Comparisons

Since I shared the color tags for both Brusho & Color Burst Pigment Powders I thought I would also share what the colors look like side by side so you can see the differences (or similarities) for yourself.  Since there are many more colors of Brusho vs. Color Burst I chose the colors most similar to share.

The tags on the top of each photo are Brusho - similar Color Burst on the bottom.  As you will see, some colors are very close while there are no real comparisons for others....

CB- A. Crimson is somewhere between B-Brilliant Red & Rose Red...prob. closer to the Rose Red.

Both similar Orange.


No real comparison...

B-Emerald Green is closest to CB-Pthalo Green but not a great match.

B-Turquoise is very similar to the CB-UltraMarine Blue.... Much closer than B-Ultra Marine.

As you can see the CB-Violet has no B comparison.  
All very different and beautiful in their own way.

I think a few people thought I was choosing Brusho over Color Burst the other day which isn't true.  I was simply sharing those colors and stating facts.  I own both (as you can see) and I feel though they are similar products there is room for both.   To me it's no different than purchasing 2 similar color ink pads from different lines or companies.  Yes, they both stamp images but there are always differences be it in shade, tint, ink types, etc.    There is always room for more ;)


Color Burst Color Tags

To be fair since a few people have mentioned Color Burst I thought I'd share color tags made using the 6 current Color Burst pigment powders. Color Burst comes in small bottles with a needle nose nozzle and hold 8g of powder.

These samples were made the same fashion as the tags I shared yesterday - spritzed with water then sprinkled the powders on. Examples on the left are Neenah 80lb cardstock, examples on the right are made on Fabrico 140lb watercolor paper.


There are several new colors coming out soon...be sure to follow Ken Oliver