Showing posts with label Marabu. Show all posts

Wednesday, June 14, 2023

Lost Coast Designs Challenge #168 - Mini Me


Hello everyone!!  the current challenge at Lost Coast Designs/ Carmen's Veranda is Mini Me..... Think ATC's, Inchies, Twinchies, Moo Cards, etc.  I have to tell you I just love this challenge - so many fun little bits to try! Today I made some ATC cards using images from the Butterfly Set, Long Swirl and words from the Misc Words set.  

To create these cards I started off by dipping 3 different pieces of vintage ephemera into Distress Oxide inks and let them dry. Once dry I mounted them on ATC cards and trimmed away the excess paper.  Next I applied embossing paste through a stencil and let that dry. These dots were then colored using a variety of Marabu Art Crayons.  

I stamped the open areas with the long swirl and green ink.  The butterflies and words were stamped on scraps of paper from my stash. The butterflies were colored using Clean Brush Markers with a bit of Stickles added here and there.  The words were trimmed and the edges were inked then they were affixed to each of the ATC's.

I hope you are inspired to create your own little piece of art.  If you do, be sure to add it to the challenge page for your chance to win!!


Wednesday, August 26, 2020

Art Crayons, Watercolor Pastels, Gelatos...Slimline Card with Unity

 Hello Friends...

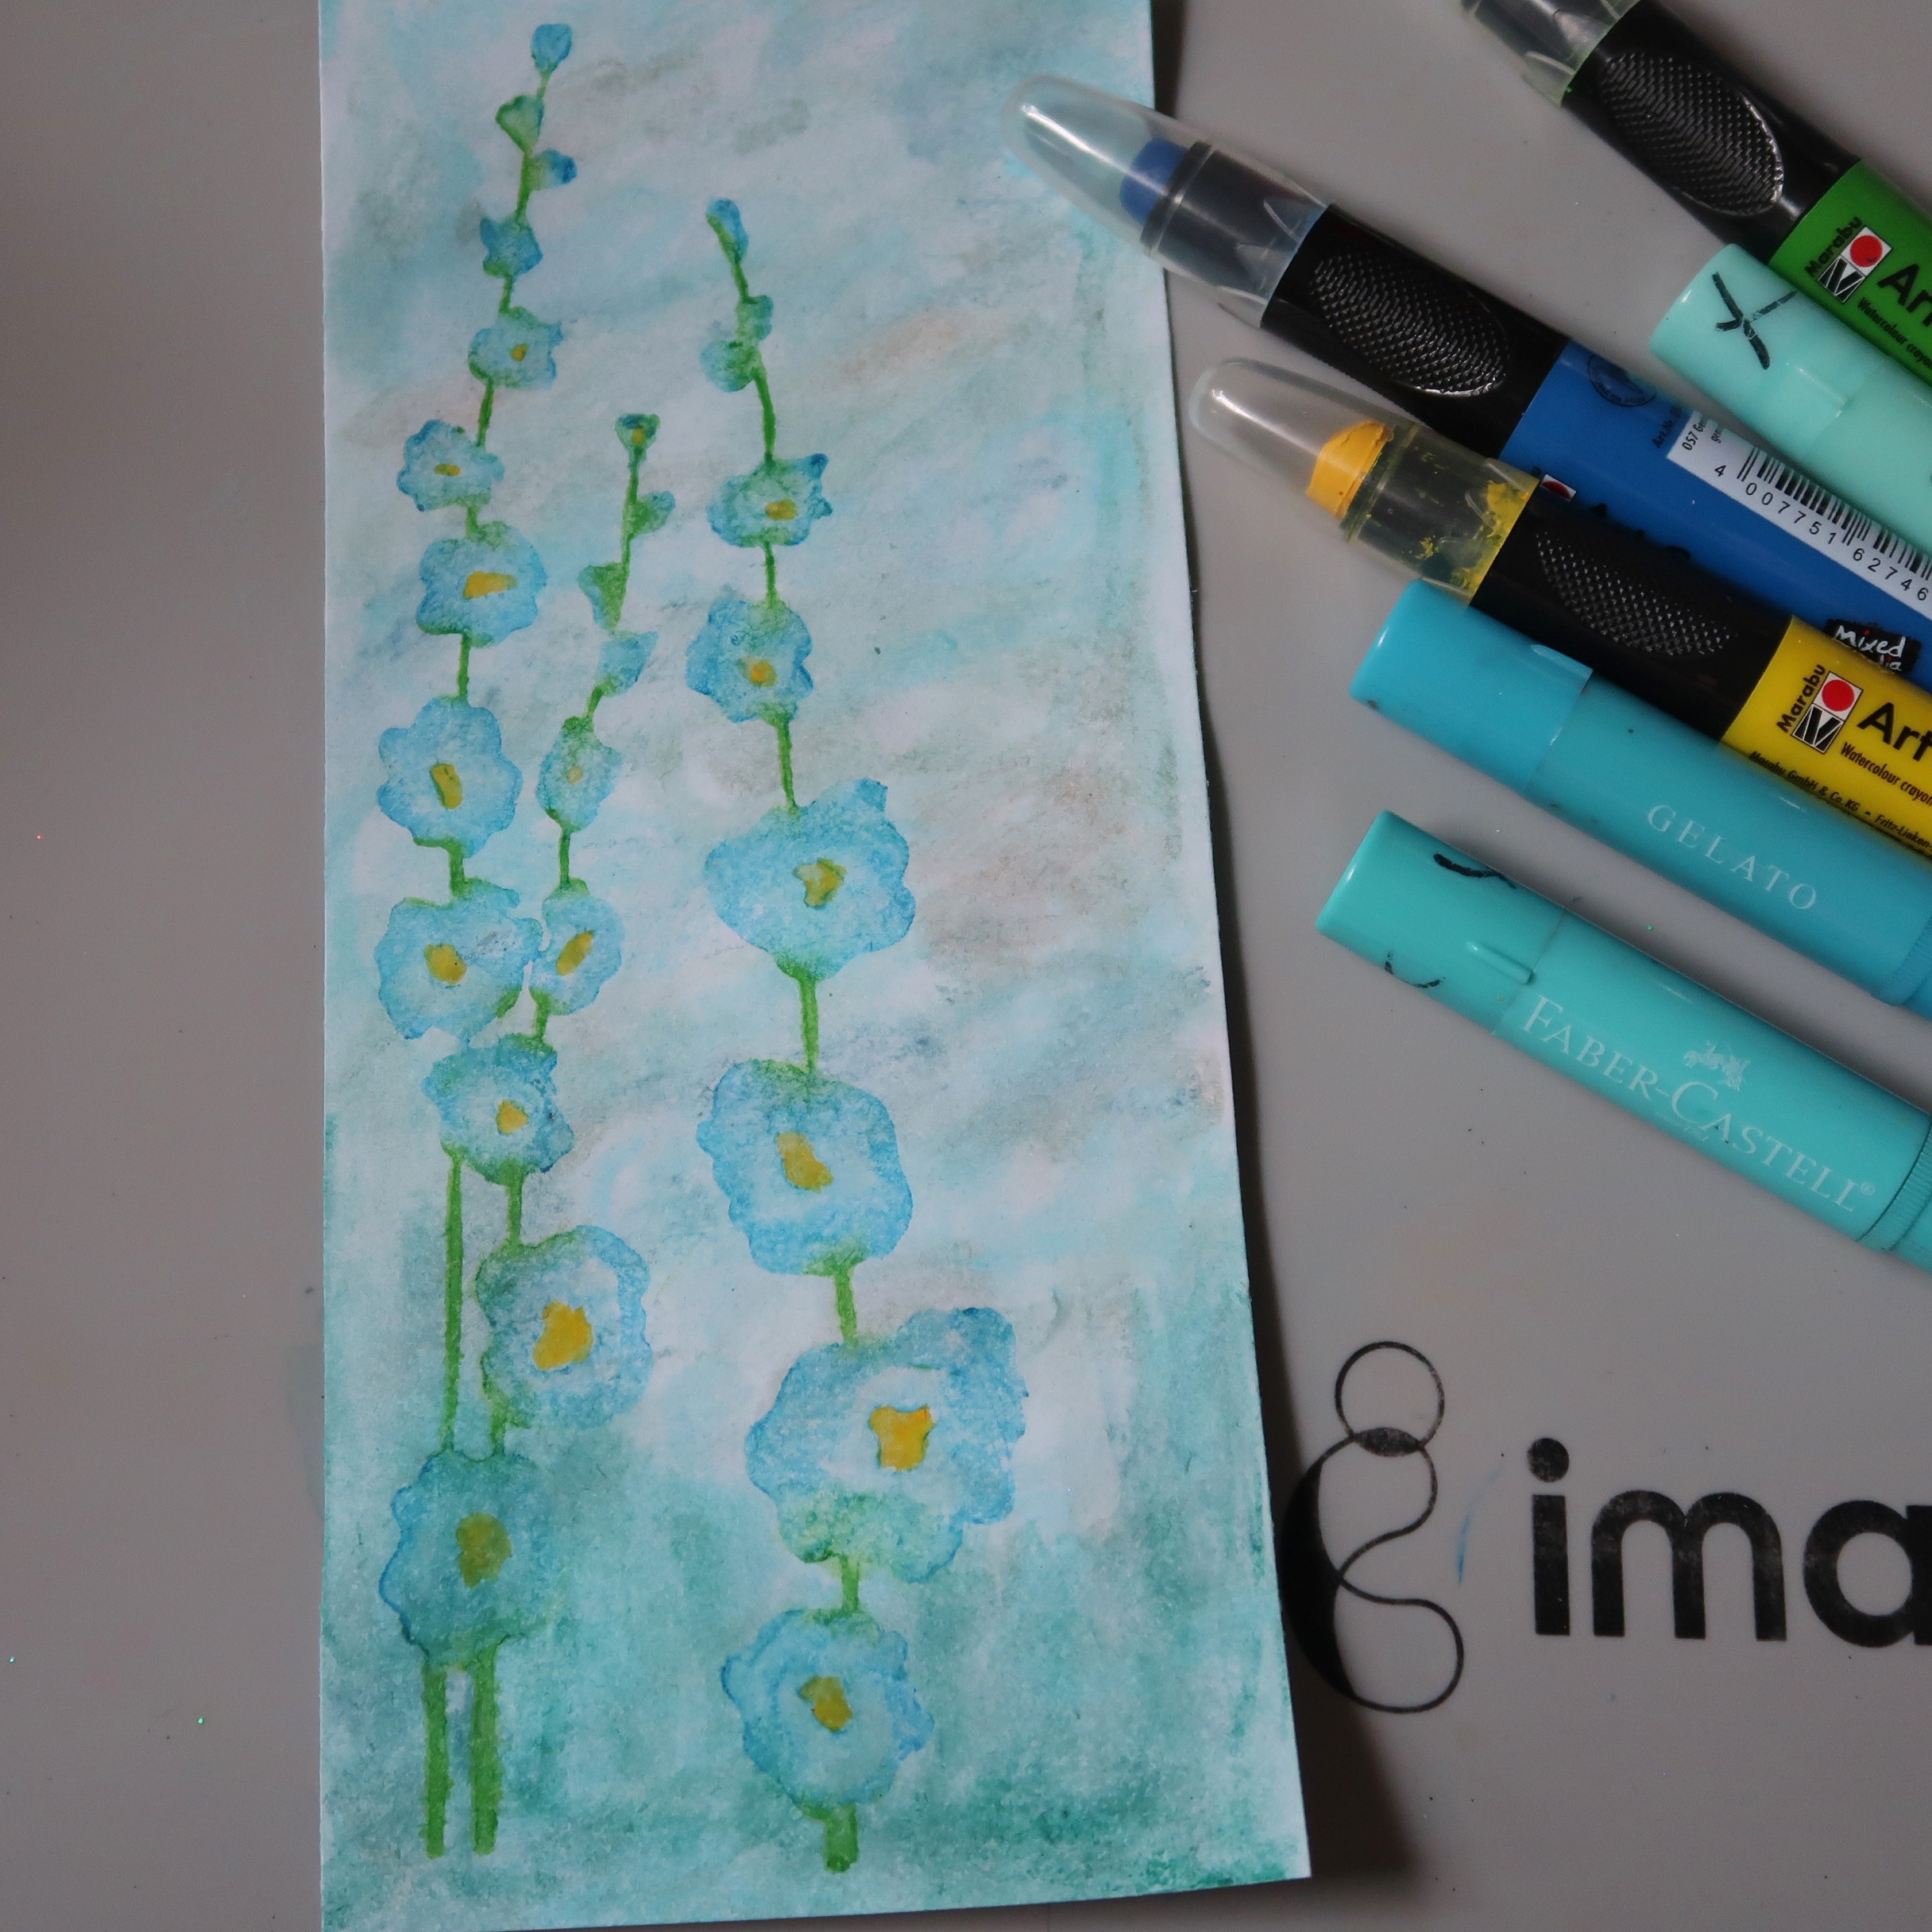
Unity's August challenge is centered around slimline cards...I love them! Finally more room to play :) It's been a while since I played with my watercolor crayons so I thought I'd pull them out and play. I know some artists are purists and only use one specific brand of medium but not me - I like to really mix it up. I pulled out a few Marabu Art Crayons, my Gelatos, some Watercolor Soluble Oil Pastels and more just to see what I could come up with.  This is the card I created! 


It doesn't look like I used many colors but there are loads on there, they just blend together so well you don't even realize it until you look closely. I'll show you what I did...


I started off by just scribbling two colors over the entire background panel.


I blended then added more colors - greys, greens, light browns and a hint of purple here and there.


When the background was done I scribbled color onto the stamp, misted and stamped. I added layers of color a little bit at a time to create depth and dimension with each stamping.


Tip: Once you mist your colored stamp it's a good idea to let the water dissolve the pastels a bit and when you stamp it you want to leave the stamp sit on the paper a while so the pastels have a chance to be absorbed by the paper and get a nice transfer of color.  It takes patience but it's worth it in the end.


Here's what the flowers looked like after 3 layers of color.


I then went in with a bit of yellow and a watercolor brush to fill in the centers. I also added a bit of Fairy Hugs glitter to each flower as well just for a bit of sparkle (not shown in this photo).


So there you go...dig out those art crayons and have a little fun today!  You won't regret you did.

Supplies:

Unity Stamp Co - Hollyhocks

Marabu - Art Crayons

Gelatos

Prima Art Philosophy Oil Pastels

Fairy Hugs - Sunshine Glitter Powder 

Gina Marie - Scallop Stitched Slimline Die

Cardstock, Gold Thread, Button, Adhesive


Friday, December 6, 2019

Catchin' Up...A little of this, a little of that

Things have been crazy here what with our business, the holidays and everything else going on.
I have fallen behind on sharing some cards I have made in the last few weeks so I'm going to try to get caught up here.


My first card is one I made for the Day of the Dead challenge.
I love this skull image...it's very festive don't you think - LOL!!

The background is a watercolor bit with a bit of glitter and Rinea Foiled Papers thrown in for a pop of color.


I REALLY like this card - it's a bit of Rinea Foiled Paper that I sent through one of WRMK's 3-D embossing folders. It looks and FEELS amazing IRL. I think it's such a fun contrast to the steampunkish image of the flying guy don't you think?


My final card for today is a very special one....
I call it Man's Best Friend. It's made using one of the newest stamps from Lost Coast Designs. I love all the doggies. It was colored using Marabu Art Crayons, a bit of Rinea Foiled Paper and some Sparkle Blends sequins.


Sunday, July 7, 2019

Fridafest Day 2

Hello Friends!


Image may contain: 4 people, text

For today's creation I was going for a "vibe"

LCD Stamp - Frida 1

I wanted to go with a raw in your face look much like her art so I gave her a very bright and vibrant aura using Marabu Art Crayons. I loosely colored around the image with yellow, orange and red then smudged it just a bit and left it to dry. I thought this technique fit very well with the quote from the stamp.  Once the art crayons had a chance to dry a bit the panel was then mounted on a white card base.  

Be sure to check out the Lost Coast Design Blog for the rest of the hop links 
and details on how to enter to win!

Hop around and leave some love here and on all the team's blogs for a chance to win
$10 to spend at Lost Coast Designs and/or Carmen's Veranda
We will be back again tomorrow with some more inspiration.
The more comments you leave the better chance you have to win a prize!

For another chance to win you can share up your Frida Kahlo inspired projects.
If you need some inspiration check out the wiki link above, or the teams makes of course!!
Your project can include a Frida Kahlo image, or be inspired by anything associated with her, but please explain your inspiration if it isn't obvious and don't forget that we need to see the use of real rubber or clear stamps.  Please don't forget to tell us the maker of your stamps and those using
Lost Coast Designs and/or Carmen's Veranda stamps
will get an extra chance at the random draw.

Sunday, March 24, 2019

Papercraft Superstar Day 6

Hello Friends!  Got busy yesterday and didn't post the next installment of my Papercraft Superstar feature over at Cut Out + Keep so here goes - 

Spread Your Wings ...

Create a striking canvas with wings! .  Free tutorial with pictures on how to make a mixed media in under 90 minutes by embellishing, papercrafting, stencilling, and stamping with canvas board, marabu art crayons, and rubber stamp. How To posted by Ink Stained Roni.  in the Papercraft section Difficulty: 3/5. Cost: 4/5. Steps: 9

Be sure to check out the instructions here:

Wednesday, February 20, 2019

Club Scrap Cobblestone Cards

Hello Friends...

I was recently asked to be the guest designer at Club Scrap using their Cobblestone Card Kit!  


Each kit comes with materials to make 12+ cards. There are 3 sets of 4 cards which they provide instructions for making the basic cards...as a guest designer we can kick it up a notch or two and do our own thing.  This is what I came up with...


My first card was made using the flip open design that was designed in the kit - I used the stamps and stone stencil for the front and one button instead of two.


The second card was made in the same format but I left off the buttons and turned it on it's side.


My next card was a Z on it's side fold with a little metal leaf charm tucked inside.


I decided to incorporate a flip panel on the get well soon card.
Don't you just love the Cut-A-Parts included in the kit?


The next set of cards were Double Z folds which I decided to spice up a bit...


I wanted to use some embellishments from past kits. I found this lovely canvas tag that took stamping very well using VersaFine Clair Verdant ink. Inside I used a grey envelope and tucked another tag inside.  The stone in the corners was made using the stone stencil and Bronze Creative Medium...gives a wonderful texture and a lovely metallic glow.


I went all out with the stamping on the second Double Z card...  I stamped all sorts of goodies on the grey panel and added a corrugated tag and fancy medallion with a bit of deep blue ribbon to accent the grey.


The next two cards are quite a departure from the Double Z. 
I wanted to keep with the double theme here but made the two panels open opposite of each other.


With a nifty message inside.


I know...this looks nothing at all like the Double Z. I actually used the cream card from the Z to create the brick wall.  It was colored initially with a variety of Brusho Color Crystals then I ran it through a brick embossing folder. I added a few inks on top here and there to create a more realistic look.  A few gold threads and die-cut ivy and you've got yourself a pretty cool looking card.


The final set of cards were new to me...Brick Cards - they actually looked like bricks when they are stood up!  I made the first 2 cards following the directions but with lots more stamping added and a mix and match approach to the Cut-A-Parts.  I also again added embellishments from my stash.


See - a stand up brick...pretty cool huh?


This one was stamped and die-cuts added...


Again for the final 2 cards I veered away from the instructions and did my own thing.
These two cards were what I initially envisioned for the cards...vintage southern charm. I actually made the final two cards with New Orleans in mind.  

The first is a shaker card with the front of a vintage brick home in mind....side walk, stone work, ivy, the whole nine yards.


And this to me is a night on the town.
Stamping, watercolor, and glitter...all rolled into one.


I hope you've enjoyed my version of the Cobblestone Card Kit and find inspiration here and there for your own cards.

Supplies:

Club Scrap - Cobblestone Card Kit & Stamps; Embellishments, Fibers, Tags, etc.
Imagine Crafts - VersaFine Clair Inks, On Point Glue; Tear It! Tape
Sizzix - Die-cuts
Gold Thread
Marabu Aqua Inks
Extra Fine Glitter
Sequins


Monday, February 11, 2019

Trio of Holiday Shakers...Do you Celebrate?

Here are a few shakers to get you moving on this snowy Monday morning...


My first shaker is a Valentine's Day card that is Sealed With A Kiss....SWAK!
I used stamps from Deep Red Stamps and Conversation Hearts Shaker Blend from Doodles Paper Playground.  Inks are VersaFine Clair - Nocturne and Tulip Red.


I had fun with this card...I don't know why there aren't more fun St. Patrick's Day stamps out there but these are darling!  The leprechaun is from Deep Red Stamps and was colored using Marabu's Graphix Aqua Inks. The rest of the inks are VersaFine Clair and the shaker elements are the Good Luck Charm mix from Doodles Paper Playground.


Finally a nod to Mardi Gras!  I used my new Sparkle Spirits...shimmery alcohol inks from Kristie Taylor for the background.  I hand cut the fleur de lis from the inked card and added Mardi Gras Parade mix from Doodles Paper Playground.  I then outlined the fleur de lis with glitter and flicked the entire card with gold All Purpose Ink.


Thursday, February 7, 2019

One for the Guys...Baby Dragon

Since I have lots of guys I love...


I thought it would be fun to make a card for them.
This little guy is just DARLING! I decided to coloring him up special for Valentine's Day.


I used my Marabu Graphix Aqua Ink watercolors as the color medium.
If you haven't tried them yet they are wonderful...so easy to layer and blend. 


One of the final drying stages...


And it's a wrap!


Such a sweet face and don't you just love the tiny hearts hidden on him...

Supplies:

Unity Stamp Co - Cuddlebug Dragon
Imagine - VersaFine Clair - Nocturne
Marabu - Graphix Aqua Inks
Strathmore Watercolor Paper
White Gel Pen
Red Card Base

I would like to enter this little guy in the following challenges...