Showing posts with label art journal. Show all posts

Monday, May 5, 2025

Wish Upon A Star

 Hello Friends

Today is the day I get to share my inspiration makes for this months theme over at Gecko Galz.

That theme is Wish Upon A Star!

Gecko Galz - Wish Upon a Star, Starlight ATC Sheet

I started off with this card I made using glitter paper to really make these lovely images pop. 


My next project was this layout in my art journal. I layered on vintage papers and the constellation papers from the Starburst ATC.  I stenciled on snow paste through a star stencil and sprinkled on glitter then spritzed the entire page with a couple shades of blue spray inks. I Then added the image, sentiment, other bits and pieces and finally the sentiment.

My next creation is a Waterfall card...when you pull on the ribbon it flips up the next image on the flap as you can see in the photos...
And finally I have a home decor piece in this plaque I made. I just LOVE this image - she is so very lovely. She has been matted with glitter paper and was mounted on a plaque that I covered with paper from the Starburst ATC collection.  The little paper stars are from the Sun Moon & Stars collage sheet which I inter-mixed with some metal screen stars.

Hope you are inspired and enjoyed taking a peek at my Wish Upon a Star creaitons.


Thursday, January 26, 2017

Farm Girl Glue Book


Art Journals are all the rage at the moment and if you’re like me you would love to make one BUT the journaling part is holding you back. I have honestly tried several times to try and get into the whole art journal thing…I took a class, scoured Pinterest, read blog after blog about how much fun it is but I just can’t get past the words. 

When Amanda challenged us to create a project centering on Planners or Journals I decided to give something new (to me) a try….a Glue Book! It is like an art journal without the stress of journaling. I can create, ink, stamp and get as messy as I want without having to come up with any of the deep, meaningful, soul searching messages found in so many art journals. I can simply glue pictures into a book and enjoy the process of getting inky.

Welcome to my “Farm Life” glue book adventure!

Directions:


1. The first step to is choosing a book to use as the foundation. I love vintage ephemera so I decided to use this old ledger as my glue book.  I tore out some of the pages to make room for the new “stuff” I was going to be gluing to the pages.


2. I gathered images I wanted to glue into my book, my spatula and Creative Medium.


3. I started off by spritzing on a bit of Summer Sky Fireworks! Spray.

4. Glue pictures down as desired.  This is the fun part…there are no rules, just enjoy yourself.


5. Embellish the page as desired…doodling, stamping, embossing, etc.  It’s all fair game.


This is how my title page turned out.  Yes it’s wrinkle-y but that’s o.k…it doesn’t matter, it’s a glue book!


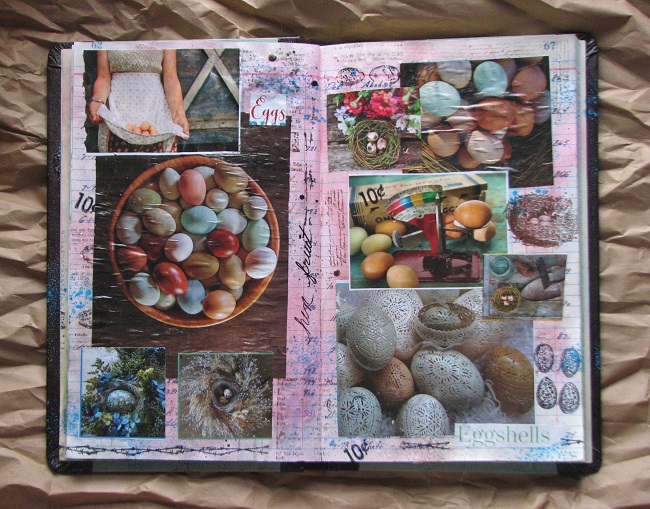
Finished Eggs Glue Book spread.


Finished Funky Chicken spread.

I'm going to continue to add pages to the glue book through out the year...I will share as I finish them up.  Oh and I'm adding pics of other aspects of farm life rather than just animals.  I found some really cool apron pics I wanted to include as well as "farm decor" type images as well...mostly things I want to make at some point.  I think as I collect more and more pics this might turn into an art journal/inspiration/idea book.  Just because I keep finding more and more things I want to add to it.

That's the beauty of a glue book...it can be whatever you want it to be.  So if you want to get into art journaling but are put off by the journaling part maybe a glue book is for you too!

Supplies:

Imagine:


Other Supplies:
Journal, Washi Tape, Pictures
Artistic Outpost – Birds of a Feather
VivaLasVegas – Collage Stamps

Friday, September 23, 2016

Garden Shed Artist Team Challenge

Welcome to the Club Scrap Artist Team Challenge.... This month in keeping with the Garden Shed kit the Club Scrap Artist Team was challenged to use some sort of wood embellishment in their creations.  It could be some element actually made of wood, a wood grain stamp or embossing folder, wood grain paper, etc.

Well I gave it some thought and was so inspired by the kit theme that I went ahead and made a Garden Shed Journal and holder....


I made the "holder" from book board glued together with CS Book Binding Glue.  I then painted it with green paint and added all sorts of foliage and flowers.  I had a length of picket fence that I aged with a touch of white acrylic paint and chocolate brown glaze from Deco Art.  The little welcome mat is actually a wood label from the kit that I painted and free-hand wrote welcome.


The album covers are chipboard from the pizza box the kits come it and some of the papers from the kit.  I used popsicle sticks to make the door which I also glazed with the same DecoArt medium.  The dark brown pieces on the door and roof are actually a fun foam that I heated with my heat tool and put tiny striations in to mimic wood grain.

(sorry for the blurry pic)

Here is a picture of the door open...you could put any sentiment you like behind the door.  I used a small velcro circle to hold it shut.


Inside I used some of the pattern and plain cardstock from the kit as dividers - in between the dividers are sheets of watercolor and mixed media papers to alter/decorate as desired.


And there you have it...my garden shed journal made from the Garden Shed kit!
Hope you enjoyed this bit of inspiration.

Your next stop on the hop is


If you get lost along the way you can find the complete list of inspiring links here:


Have a lovely day my inky friends!

Wednesday, July 13, 2016

Note To Self...

I've been told I'm a Type A personality and I recently found out that those types of people are very organized and love lists.  Well, I'm not ashamed to admit that I'm a note taker and list maker... I am constantly writing down ideas of things I want to do (yes I really do have a growing "to do" list), techniques I want to try and ideas for card sketches, projects and other "stuff".  Writing it down helps me not only remember but it also un-clutters my mind.  If I don't write it down I usually forget it all.

I'm always in need of just one more notebook or pad of paper so I made this today ... 


It just so happens that this month's Club Scrap kit is Office Space which has a fun funky retro 70's feel to.  Cool huh? 


 As luck would have it the last time I was at Wal-Mart they were setting up their school supply section and snagged some cool composition books - both lined and graph paper! The lined comp book was only 50 cents!!!  How cool is that?  The graph book was 97 cents but who doesn't love to mess with graph paper?  


I set about covering it with some of the cardstock and pattern papers.  Remember, when working with a comp book or journal to protect the inner pages with a plastic bag so you don't get any glue on the pages.  I usually just wrap a bag around the pages and leave it there till I'm finished with both front and back.


I used this pretty teal green paper for the back cover.


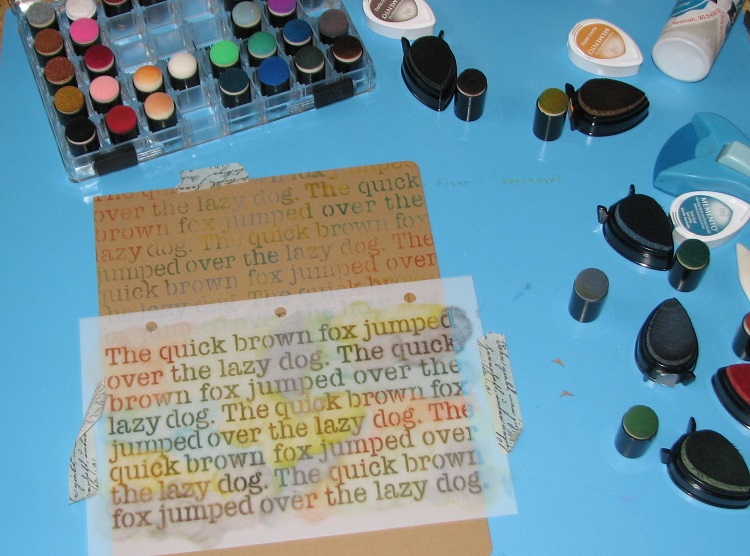
And for the inside of both the back and front covers I inked up a couple pieces of kraft cardstock with a variety of Memento Inks to match the color of the papers.  I wish you could see how vivid this is in person.  It is so pretty and you can see all of the various colors I used.


One for the front, one for the back, corners rounded and glued it in place!


I'm ready to start making a "Note to Self"!


Supplies:

Club Scrap - Cardstock, Pattern paper, Stamps, Stencil, Book Binding Glue
Imagine - Memento Inks, Sponge Dauber
Composition Book

Tuesday, June 28, 2016

Coloring & Drawing with Grandma

A couple weeks ago my grandma (93) fell and broke her hip...she's been in the hospital then nursing home ever since.  She has had to give up lots of her favorite crafts over the years ~ painting, crochet, knitting due to poor eyesight and arthritis.  She mentioned that she was so bored at the nursing home because she really can't do much of anything. They have a tv but seriously, how much tv can one person watch...specially with the crappy programing on lately.

She has always been into art - she's the one that originally got me interested in it so I thought it would be fun to take her a few goodies that hopefully she would get some enjoyment out of.  The first is a notebook/journal that I made....


I used some of the Club Scrap Boardwalk kit because it was bright and cheery.  
I stamped her name on the front just in case it was shuffled around.


Inside is blank drawing papers....
I thought she could draw, write down notes or whatever inside.


This is the inside of the back cover - using up scraps.


I told her the other day that I was going to color with her when I came back - I explained about adult coloring books but I think she thought I was kidding.  So, I am also going to take her this coloring book I bought by ColorIt.com.   I originally saw it advertised on FB so I went ahead and bought one to try.  I got the wild animals edition which was $16.00.


I have to say I was very pleased with it.  The pages are 8.5x11 (plus the binding) and printed single sided on heavy cardstock.  The front and back covers are both heavy chipboard - almost book board weight and it is spiral bound.  This is very nice because once open the front and back covers make a great sturdy foundation to color on even if you're not at a table.


The above photos are a  just a couple examples of what the pages look like.  They are nice big images that have heavy black outlines great for young and old alike.  This is such a nice coloring book I think I may have to buy another for myself.


I am also taking a small cigar box that I made dividers in for colored pencils, drawing pencils and pencil sharpener and eraser.  At first I just tossed them in the box but I couldn't stand it so I made the little divider out of cardstock.

What do you think?  I'm going to take it to her today or Wednesday (whichever works out)....I sure hope she likes it and that it helps pass the time.  She's always been very active so this is hard on her.

Wednesday, January 29, 2014

Graffiti Club Scrap Blog Hop & Give-A-Way!

Welcome to 
January's 
Club Scrap Blog Hop
featuring this months kit ~

This months kit was filled with lots of spunk, style and art ~


I particularly loved it because many of the prints were in grey/black and white which allowed for lots of personalization.  The suggested matching color scheme was very bright which really made this kit fun to play with...


When I saw that one of the stamps included in the kit was a Graffiti word - "ART" I knew I wanted to create an art journal filled with a combination of mixed media and watercolor papers.  I wanted the covers to be pretty sturdy so I started off by covering a pair of game boards cut to size.  Those puppies were so thick I ended up having to hand punch the holes...they wouldn't fit in my bind it all.

I like black and grey as you can tell from the blog so I covered the front with a piece of really cool pattern paper in that color scheme.  I added a pop of color by stamping the word "ART" on some white mixed media paper then colored it using Distress Stains which I let blend to create a really bright rainbow of colors.  Once it was dry I used the included American Crafts White Galaxy Marker to add lots of fun highlights to the word.  I then carefully cut around the entire word leaving a tiny white frame.  To finish it off I added a bright pink rubber band to help hold it closed to keep all your precious drawings, doodles & art work safe and sound.


I used one of the really cool color Graffiti prints for the inside and back covers as you can see here....
The book contains mixed media paper in the front....


and a divider of grey/white graffiti pattern paper and a very appropriate stamped sentiment about Art.
Behind that divider is a stack of wonderful watercolor paper just waiting to be inked or painted or whatever your heart desires....


I am going to be giving this art journal away to one lucky reader who leaves a comment.
(Be sure to leave a way for me to contact you)
You will have until 2-3-14 to comment to be entered into the drawing!

I was having so much fun with this kit that I made a few cards as well....
The first two cards were created by using Distress Stains to make some splatter paper.

Art....


and a Valentine's Day card....
Love...


Finally I wanted to share my Gnome card with you...

In December Club Scrap released an extra set of stamps and papers called "Gnome for the Holidays".
I loved that little gnome so much that I decided to keep the fun going and use him with each kit this year.

Here is my "Graffiti" Gnome card.... 
When I read the art sentiment included in this kit it was PERFECT!!!
 I KNEW exactly what I wanted the card to look like,
and it turned out just as I pictured it....


The gnome was actually stamped twice, once on white cardstock which is what I used as the base and a second time on the piece of pattern paper that had a cool graffiti print that faded to grey.  I paper pieced his hat, shirt and boots onto the white body.  

I then trimmed the card panel from the second piece of pattern paper and mounted him so the design on his clothing lined up perfectly with the background.  I when over the lines with a black marker to help him blend in a bit more and finally added the sentiment....


Told you that sentiment was perfect!
I hope you've enjoyed my take on this very fun kit...

It's time to hop on over to 
and remember, if you get lost along the way
there is a complete list of bloggers on the 

Have a wonderfully Artsy day friends!!

Monday, March 18, 2013

Elmers & Paper Doilies Resist

Today as promised I am going to share a fun technique to use for an altered journal page but then again, this technique could be used for any application.   A great plus for this technique is that it's very versatile and uses some common household items...Elmers White School Glue and Paper Doilies!

I don't know about you but I have a thing for paper doilies.  I just can't resist them when I find them and as you can see I have all different styles.  This is what I am going to be using to create my design but of course you could use any number of items...masks, stencils, punchenella, die-cuts, etc to create your pattern.

009

Supply List:

Elmers School Glue
Doily, Mask, Stencil, etc.
Sponge
Cardstock
Watercolor Paints, Dye Mists, etc.

010

Instructions:

1.  Begin by mixing up a puddle of glue with a bit of water.  Since we're not using the glue as an adhesive but a resist it doesn't have to be nearly as thick.  I usually just give it a few squirts and mix it up with my sponge.

011

2. Secure your paper to your work station ~ I just put a bit of my ATG tape down on my non-stick craft mat and placed my cardstock over the tape.  It holds it in place but is easily removable when I'm finished.

3.  Position your doily (mask, stencil, etc.) on your paper.  Swipe or dab the glue mixture over the lacy part of the doily then carefully lift and remove the doily from that particular section of the paper.

012

4.  Repeat step #3 by reposition the same doily or use multiple doilies until the entire piece has been covered in designs. 


013
5.  Once your cardstock has been covered, let the glue dry naturally or speed drying with a heat tool. 

014

6.  After the glue has dried, apply desired colors of watercolor over the entire work.  Technique isn't crucial here as we'll be blending it together in the next step. 

017


018
7.  Now mist a piece of cloth with water and gently rub the cloth over the cardstock blending the colors as you go.


020
Here is what it looks like at this point.  You can see near the center and lower left the paints I used were rather light.   As a result the pattern doesn't show up as well as in other areas.  This can easily be fixed....
021
I simply added more inks and blended it in with the existing colors.  Once dry it's ready to be incorporated into your book, on cards, scrapbook pages, etc. 
022
I actually think this would be fun to use on Gothic Arches...
Hmmmm, I feel an arch coming on!