Showing posts with label Color Burst. Show all posts

Wednesday, September 30, 2020

Spooky Skyline Challenge...Last Chance!!

 Good Morning Everyone!

September 30th which means it's the last day to enter the Spooky Skyline Challenge over at the Sparkle Blends Fan Club on Facebook!  You do have to join the club to enter but it's free and a great place to gather inspiring projects using sequins and shaker card ideas.

Today I wanted to share my final Spooky Skyline with you and encourage you to enter. 


Isn't this such a fun spooky Halloween scene?
I just love those little trick or treaters in those big scary woods.


I made it by sprinkling Color Burst powders over a piece of watercolor paper. I didn't want them to blend too much, just enough to make a nice transition so I had my spritzer bottle in one hand and my heat tool in the other. I "pushed" the water back when I thought they were blending too much so everything stayed where I wanted.

I stamped the trick or treat image along the bottom. Next I stamped the moon on a piece of cream shimmer piece of cardstock that was floating around in my stash. It was trimmed then glued securely to the background. I say securely because I didn't want any of the shakie bits to get stuck behind the moon.

As you can see I diecut the trees from black cardstock, added a piece of acetate and foam tape. I poured the You Make Me Batty sequins mix in the center of the card then affixed the shaker front to the panel. I know this isn't the traditional way to make a shaker but sometimes it's the only way to get the frame positioned correctly on a scene card.  


I had so much fun making this...and you know what?
Some of the bats glow in the dark!!!
How fun is that :)


I must say this is one of my favorite shakers I've made.


Hope you join in on the fun!!


Supplies:

Sparkle Blends Limited Edition Sequins Mix - You Make Me Batty

Gina Marie Designs - Trees

Crackerbox & Suzy - Trick or Treat

Lavinia - Moon

Colorburst

Cardstock, Watercolor Paper, Acetate, Foam Tape


Thursday, March 21, 2019

Thursday, January 4, 2018

Blue Purple n Silver!

Hello friends...I wanted to share a few cards I made for the newest challenge over on the JFF Stamps blog....Blue, Purple and Silver!


My first card was made by stamping the trees in the background with Paris Dusk Memento Ink which I sponged a few different colors of blue and purple inks over the entire panel.  Once everything had dried I stamped and embossed the stag with VersaMark & White EP.  I wanted to add a bit of zing so I framed it with a really fun sparklie washi tape.


My next card was made by stamping and embossing the snowflake image that had been previously colored using Color Burst pigment powders.  Don't ya just love the pretty effects they create?


Finally a but card with a bit of stamped & embossed snowflakes and watercolor over top.  Can you see a snowy theme going on here?  I guess the weather is guiding my art right now - LOL!!

If you have some time and inky desire...please feel free to join in on the fun...

Image may contain: text

Supplies:
JFF - All Stamps
Imagine: Memento Dye Inks; VersaMark; Embossing Powder - White, Clear, Sparkle; Sponge Daubers
Color Burst
Club Scrap - Cardstock, Ribbon
Washi Tape
MFT Dies


Tuesday, September 19, 2017

Watercolor Me Fun!

Hello Friends! I hope you're having a wonderful week so far. Thank you for joining me for the Club Scrap Artist Team Challenge! If you're following along the hop you should have arrived here from Pam's spectacular blog...if you missed out you can head that way or go to the Artist Team Challenge post on the Club Scrap Blog for a complete list of participants.

This month's Artist Challenge is Watercolor ~ use any medium to create a watercolor effect.  Well of course you all know how much I love to play with watercolors so I jumped in and made several different projects with a variety of mediums.

All images - Orchard Kit 09/17

The first project I made was this bookmarker. I had a strip of leftover watercolor paper from a previous project and as it turns out it was the perfect size for this!  Initially I stamped the background with a text stamp from the Orchard kit in a brown ink. I then stamped the basket directly on the book marker, I stamped the fruit on another scrap of watercolor paper.  All of the elements were then watercolored using Prima Confections watercolor paints and a brush.  


A close up look at the basket of fruit.


My next card was made using a mask and Gelatos....


I colored the gelatos directly onto the mask, 


misted it with water and pressed onto the watercolor paper.


It was then removed and I let it dry naturally.  I added a bit of penwork and Bronze irRESISTible Pico Embellisher at the center of the sunflower.

All Stamps from the Lagoon Kit 08/17

My final watercolor technique is so much fun...Color Burst + Stencils.  I used the mermaid scale stencil from the Lagoon kit - placed it over a piece of watercolor paper then sprinkled on 3 different colors of Color Burst powder, leaving the stencil in place and I misted it with water.  

The first card was the piece of watercolor paper that I actually sprinkled the Color Burst and misted with the water.  Generation #1.  I LOVE how intense the colors are and how they pooled around the stencil. You can't see it in this photo but there is glitter on some of the scales.


This card was made with a piece of regular cardstock that I had pressed over the paper/stencil above after it had been misted.  Generation #2.


This final card is a piece of regular white cardstock that I pressed the still wet stencil onto. Generation #3.  I also added a mermaid charm I made a while back just for the heck of it.  It matched the sentiment perfectly don't you think?


Thanks again for joining me...hope you're inspired to pull out your supplies and play in the watercolor!

The next stop on the hop is...


Have a great day friends!!

Friday, April 28, 2017

Club Scrap Artist Challenge - Stamped Bouquet

This month the Club Scrap Artist Team has been challenged to use a lovely set of stamps - Stamped Bouquet and I had lots of fun using them as you can see....


I'm not sure why but for some reason when I was working on these cards the color palette of red, orange and yellow took root so I just went with it.


My first card was made by stamping the large corner bouquet with pistachio ink. The leaves and flowers were colored with colored pencils to give them color but keep them in the background.  I then stamped the poppy, rose and sunflower with black ink,coloring them with various Chameleon markers to really make them pop.  These flowers were then fussy cut and mounted on the page with double stick foam tape.


My next card was made by stamping and watercoloring the daisies and background. I love the layers of paint over the colored inks.


For my final card I stamped the poppies several times then colored them using Color Burst pigment powders.  I love the randomness of the color you get with these types of powders. It is just so bright and beautiful.

I hope you've been inspired by my cards...

The next stop on the hop is


If you get lost along the way 
you can find the complete list here:


Supplies:

Club Scrap - Cardstock

Other -
Chameleon Markers
Color Burst
Colored Pencils
Imagine - VersaFine Inks, Memento Inks
Glitter
Double Stick Foam Tape

Monday, July 11, 2016

Color Burst Morning Glory

Recently the Color Burst folks were holding a DT call...I honestly thought about applying but at the moment I have too much going on.  You know when you really want something but it just doesn't feel like the timing is right. I didn't submit but I'm hoping they will have another call in the future when I feel that I can give them 110%.

Anyway, this was going to be one of my project submissions....


What do you think?  I was really happy with how it turned out, I just need to find a frame for it and hang it up somewhere.  And yes, the leaves are wonky...just like they were in the reference photo I saw on FB.

Hope you're having a wonderfully colorful day!

Wednesday, May 4, 2016

Molotow Masking Pen

I bought the Molotow Masking Pen and refill a couple months ago but I'm just not getting around to playing with it.  


It's a marker type pen that is filled with masking or frisket fluid.  It's got a relatively small tip that allows you to mask off smaller areas and it's also fun to write with or create free-hand designs on your projects.  (the top container is the refill.)


Prior to using the pen you will need to first shake the fluid thoroughly until the liquid is mixed well.  Mine had separated into a white and dark blue - I simply shook it up until it was a baby blue color.  This is VERY important...I believe the dark blue is just a coloring agent that will stain your paper if it's not properly mixed in the masking fluid.

You then need to prime the pen by pushing the tip up and down on a piece of scrap paper until the fluid flows freely.  I like to keep a piece of scrap on hand to do this every so often if I'm masking a larger area.  If you notice the fluid doesn't flow as freely as you'd like, just a few pumps and it's ready to go again.


My first card was made using the masking fluid in a very traditional technique....


Start off by stamping the desired image and let the ink dry completely.


Apply the masking fluid over the areas you want protected.  I wanted to color the background with Brusho Colour Crystals so I masked the entire stamped image.  Let the masking fluid dry completely. There is a visible color change from baby blue to a darker blue when it's dry.


Apply the background color as desired, let the paper dry!  This is very important...if you get in a hurry and try to remove the masking fluid before the paper is dry you will tear the paper.  No if and's or buts.  

Once dry, use an adhesive square to pick up the masking fluid.  You could also rub it off with your finger tip but if you're removing much your finger will get sore.  

Finish off the image as desired!


My second card was made using a stencil paired with the masking fluid.


Tape the stencil down over the watercolor paper.


Apply the masking fluid where desired, remove the stencil and let the fluid dry.


You can see I left an area free of the fluid - 
this is where I will add my sentiment.


I used a few colors of Color Burst to color the background.


And after it was dry I removed all of the masking fluid.

I've seen a few reviews of this product that states a blue haze was left behind and/or they had trouble removing the fluid from the paper.  I did not experience either of these issues.  If the masking fluid is properly mixed (by vigorously shaking) you should not have any issue with the blue haze.  Also, as long as the masking fluid is completely dry before adding the color medium and the paper is allowed to completely dry before attempting to rub the masking fluid off there shouldn't be an issue with removal.

I used watercolor paper for the examples because I wanted to use the Brusho & Color Burst for these cards.  I did try the masking fluid on regular cardstock (Georgia Pacific) and the masking fluid came off just fine.

Tomorrow I'll be back with another fun technique using this masking fluid...
till then friends - ink on!

Supplies:

Molotow Grafx Art Masking Pen
Canson Watercolor Paper
Brusho Colour Crystals
Color Burst Powders
ClubScrap.com - Flower & Sentiment Stamp, Ribbon
Altenew - Thank You Stamp
TCW - Stencil

Wednesday, April 20, 2016

Color Burst Layered Dahlia Birthday Card

Today I have a fun card to share with you...


My Color Burst Dahlia birthday card!  I had so much fun making this card and can see lots of potential for this technique.  So I got the idea when I saw this very large dahlia stamp (3.5 x 4") which was included in the Art Nouveau Stamp Sheet for the Dahlia Kit.  


Over in the UK they have a craft called 3D Decoupage Papertole where they take several copies of a single image and build the image into a dimensional layered design.  I figured I could do the same thing with this dahlia image.  My twist though is to use Color Burst to color the stamped images to give the finished flower even more depth.

And here's how I made it....


I started off by stamping the image 6x with Tuxedo Black Memento Dye Ink.


I then sprinkled Fuchsia and and Orchid Color Burst onto the paper & spritzed with water.  Once it was dry I cut apart each flower.


I started by trimming out one complete flower and set it aside.  This would be the base flower to build upon.  Image 2 - I cut the center most cluster of petals, I then placed this cluster over the 3rd image, traced around the petals I wanted to include on the next layer of petals with a white gel pen and trimmed.  I continued until I had each layer cut out.


I assembled the flower with double stick foam tape for a really dimensional flower.  Of course you could choose to glue the layers together for a mail friendly card.  This is where the variation in color created by the Color Burst really comes into play.  The natural random pattern of the Color Burst give added depth to the flower.


I die-cut some leaves, added highlights & shadows using Pastel Pencils and blended with my finger.  I then used a stylus to give each flower a bit more definition.  

To finish off the card I stamped the sentiment, adhered the flower/leaves and mounted it on a maroon card base.

I would like to enter this card into a couple challenges....

Take It, Make It Challenge

and 


Supplies:

ClubScrap.com - Cardstock, Pattern Paper, Stamps
Imagine Crafts - Memento Dye Ink - Tuxedo Black
Color Burst - Fuchsia, Orchid
Stabilo CarbOthello Pastel Pencils
Spellbinders - Leaf Dies
Double Stick Foam Take

Friday, April 8, 2016

Color Burst Stain Glass Effect

So this month's Club Scrap Technique Challenge is the Stained Glass technique!  I love this technique because the results are always a beautiful surprise.


This is one of the cards I created.  This piece represents the most traditional idea of Stained Glass the best - a pane of glass with mosaic of beautiful pieces of glass.  I used a variety of colors - I can't really tell you which ones though - I usually dump my bottles on the table and just grab n sprinkle.   

Here's what you do...


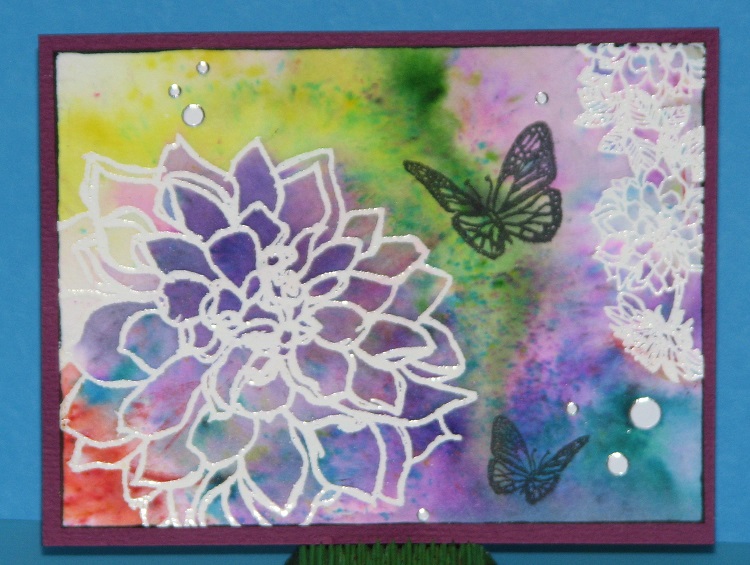
Stamp desired image(s) with VersaMark ink...


Sprinkle on Black EP then heat to melt to the powder.


These are the first 2 I made...


Sprinkle on the powders wet with water and let the powders do their magic.


I do know I used Violet and Orchid on the flower - 
Indigo and Turquoise on the background.


My final card really doesn't fit the idea of stained glass but I was having so much fun stamping, embossing and sprinkling on the powders I just kept going.  It was fun to make even though it doesn't fit the challenge.  I guess we can think of this as a bonus card - LOL!!

So there you go...have you tried the stained glass technique?  If not, you really should - you'll get caught up in the inks and powders - you just never know where it will lead you.

Supplies:

ClubScrap.com - Cardstock, Rubber Stamps, Die Cut Tag
Color Burst Powders
Imagine Crafts - VersaMark Ink, Black & White Embossing Powders, Memento Dye Ink