Showing posts with label club scrap. Show all posts

Saturday, July 1, 2023

I Pledge Folk Art Angle Card

 Hello friends...a new challenge is up over at Lost Coast Designs - 

Challenge #170 Red, White and Blue!! 

Very excited about this challenge...

such a fun way to celebrate this country's independence...


I used the image called Pledge for this card.  I decided she would be perfect to paper piece so I stamped it once onto confetti cardstock using black ink then a second time on white cardstock using Tulip Red ink and clear embossing powder.  Finally I stamped it a third time using Versa Mark ink and white embossing powder on blue cardstock.  I then fussy cut the various parts and assembled her on the black inked image.  The panel was mounted on a piece of Club Scrap musical cardstock and affixed to a red card.  I had some glittery star brads for the perfect finishing touch :)

Hope you can find the time to join in on this fun challenge!


Sunday, June 28, 2020

Creative Embellishments June Challenge

Hello Friends - I hope you're all well and safe where you are. Today I wanted to share a creation I made for the Creative Embellishments June 2020 Challenge.


This is the inspiration photo for the challenge. Beautiful isn't she? For some reason at the moment I seem to be enchanted with faeries and mermaids so this really appealed to me.  I decided to give it a go and this is what I came up with....


I started off by using Marabu's new Metallic Alcohol Inks as well as Neon Blue and some of their glittery blends. to create the background. The clouds were made in layers. Initially I inked them on with Club Scraps White Pigment ink to which I added a bit of Fairy Hug Powder glitter (by Lavinia World).  I then sprinkled with Clear Embossing Powder and heated to set.  This process created a lovely texture.  To bump the color back up I added another layer of the white pigment ink and even more glitter.  A quick blast with the heat tool to set the ink.  


I then set to work on the dragon and fairy.  The dragon was painted with Blue Lagoon acrylic paint from DecoArt.  He was then colored with a variety of colored pencils to add depth and dimension. He also got a bit of white and black paint pen for details.  I painted the fairy black using Americana Lamp Black acrylic paint. Her wings were then coated with more of the Fairy Hug Powder....yes, I do love glitter!!  Once both of these elements were dry I glued the fairy to the dragons back and mounted them on the canvas using foam tape to really give them dimension.   The canvas still needed something so I stamped dandelion bits and the sentiment WISH using StazOn Black ink and a bit of white paint pen work.


Have a lovely day my friends!!

Supplies:

Creative Embellishments - Tiny Fairies, Dragon Set 2
Marabu Alcohol Inks
Club Scrap - White Pigment Ink
DecoArt - Lamp Black, Blue Lagoon
Imagine - Jet Black StazOn ink, Clear Embossing Powder
Unity - Wish set
Colored Pencils
Black & White Paint Pens


Friday, May 15, 2020

Doodles Paper Playground May Blog Hop

No photo description available.

Hello Sparkle Blends Fans! Its time for our May Release Blog Hop! We’ve got a fantastic lineup of Blends this month & the design team & I have created some awesome inspiration projects featuring some of the 7 new Sparkle Blends in this release! As if that weren’t enough, we are offering you the chance to win 3 fantastic prize bundles!

See the Doodles Paper Playground Hop Post for giveaway prizes and entry details. Comments must be posted no later than 11:59pm EST on Sunday, May 17th, 2020 to be eligible to win. Open to US residents only who are at least 18 years old. Winners will be drawn Monday, February 18th & posted on the Doodles Paper Playground blog, Facebook page and in the Sparkle Blends Fan Club on Facebook.

Here are my creations.....


My first card was made using the Monkey Business Sparkle Blend.  Isn't this blend just darling...large and small Fimo monkey faces & little Fimo banana slices. What fun! 

Some days you just gotta say to yourself...Not my circus, Not my monkeys!


My second card is made using the Sparkle Blend - Spill the Bubble Tea! Have you ever had bubble tea? It's so much fun - Morgan and I had some at the State Fair and it was really good and well fun! 

This blend is made up of a nice neutral blend of sequins, Fimo bubble tea's and  other bits. Super cute for loads of projects.


I used them in my little heart shaker bit and in clusters around the sentiment. 
I added a few extras here and there just for the added shine!


As an added bonus, we’re offering you a little bit of Blog Candy, 15% off your total order!

No code needed - the 15% is automatically taken off in your cart!
(excludes May Release Bundle. Valid through May 18th, 2020)

✨💎✨💎✨💎✨💎✨💎✨💎✨💎

Hop along with us!


Roni (You are here!)


Have a lovely day friends.
Don't forget to get your shaker on!


Wednesday, February 20, 2019

Club Scrap Cobblestone Cards

Hello Friends...

I was recently asked to be the guest designer at Club Scrap using their Cobblestone Card Kit!  


Each kit comes with materials to make 12+ cards. There are 3 sets of 4 cards which they provide instructions for making the basic cards...as a guest designer we can kick it up a notch or two and do our own thing.  This is what I came up with...


My first card was made using the flip open design that was designed in the kit - I used the stamps and stone stencil for the front and one button instead of two.


The second card was made in the same format but I left off the buttons and turned it on it's side.


My next card was a Z on it's side fold with a little metal leaf charm tucked inside.


I decided to incorporate a flip panel on the get well soon card.
Don't you just love the Cut-A-Parts included in the kit?


The next set of cards were Double Z folds which I decided to spice up a bit...


I wanted to use some embellishments from past kits. I found this lovely canvas tag that took stamping very well using VersaFine Clair Verdant ink. Inside I used a grey envelope and tucked another tag inside.  The stone in the corners was made using the stone stencil and Bronze Creative Medium...gives a wonderful texture and a lovely metallic glow.


I went all out with the stamping on the second Double Z card...  I stamped all sorts of goodies on the grey panel and added a corrugated tag and fancy medallion with a bit of deep blue ribbon to accent the grey.


The next two cards are quite a departure from the Double Z. 
I wanted to keep with the double theme here but made the two panels open opposite of each other.


With a nifty message inside.


I know...this looks nothing at all like the Double Z. I actually used the cream card from the Z to create the brick wall.  It was colored initially with a variety of Brusho Color Crystals then I ran it through a brick embossing folder. I added a few inks on top here and there to create a more realistic look.  A few gold threads and die-cut ivy and you've got yourself a pretty cool looking card.


The final set of cards were new to me...Brick Cards - they actually looked like bricks when they are stood up!  I made the first 2 cards following the directions but with lots more stamping added and a mix and match approach to the Cut-A-Parts.  I also again added embellishments from my stash.


See - a stand up brick...pretty cool huh?


This one was stamped and die-cuts added...


Again for the final 2 cards I veered away from the instructions and did my own thing.
These two cards were what I initially envisioned for the cards...vintage southern charm. I actually made the final two cards with New Orleans in mind.  

The first is a shaker card with the front of a vintage brick home in mind....side walk, stone work, ivy, the whole nine yards.


And this to me is a night on the town.
Stamping, watercolor, and glitter...all rolled into one.


I hope you've enjoyed my version of the Cobblestone Card Kit and find inspiration here and there for your own cards.

Supplies:

Club Scrap - Cobblestone Card Kit & Stamps; Embellishments, Fibers, Tags, etc.
Imagine Crafts - VersaFine Clair Inks, On Point Glue; Tear It! Tape
Sizzix - Die-cuts
Gold Thread
Marabu Aqua Inks
Extra Fine Glitter
Sequins


Friday, June 15, 2018

CSI Case File No. 256

Hello Friends! 

This month the Imagine Artist Team is joining up with CSI Challenge blog to share a bit of inspiration. I was assigned case file #256 to try to solve the case (shown below) and this is what I came up with...


I was so excited about this as I had the perfect stamps to go with "The Scene" and since we like to travel so I thought the inspiration was the perfect way to celebrate how we "camp" on road trips!  You see, our idea of camping is the Holiday Inn, Marriott, Hampton Inn and Suites, etc.  The photos are from a trip earlier this year when we had to stop in Harrisburg/Hershey area during a pop up snowstorm. We lucked out and got the last room available at Spring Hill Suites and it was beautiful to boot!   


My inspiration from Case File No. 256 was "The Scene", Colors, Banners and more.  


These stamps from Just For Fun Stamps went with the theme perfectly!!


And I had this Club Scrap "Road Trip" stamp that worked out so well...
I also used a map and travel sign stamps to create various background pieces as well...


Hope this inspires you to pull out your stamps, inks and photos to scrap your travels.

Supplies:
Imagine - VersaFine Clair - Nocturne, Cheerful, Tulip Red, Warm Breeze; Memento Dual Tip Markers
MFT - Banner Die
Just For Fun Rubber Stamps - Camper 1, Camper 2, Wash Tree, Campfire
Club Scrap - Vintage Travel Stamps, Washi Tape, Cardstock


Wednesday, May 2, 2018

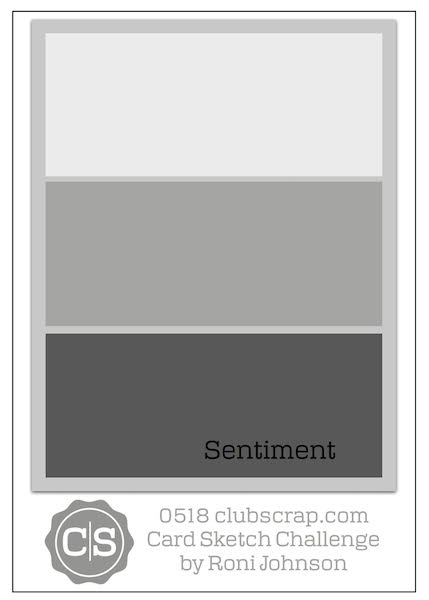
May Card Sketch Idea...

Hello Friends!  I wanted to share the card sketch I made for the Club Scrap Cards Sketch Challenge this month as well as a couple cards using the sketch....


I left it kind of open for embellishments of your choice.


I love this card, that blue is just amazing don't you think?
It was made using 3 different pieces of pattern paper - quick and easy!


This card was made by using 2 pieces of the same type of cardstock.
Simple but very embellish-able when I decide who I am giving it to.

Hope you give this sketch a try!

Monday, April 16, 2018

Yeah! House of Cards Top 5!

Our Next 5 Faves

What fun, my card below was chosen as one of the top 5 for Marches challenge...
Colored Pencils on Black or Dark Cardstock.


Stamps - Rubber Stamp Tapestry
Imagine - white ink
colored pencils
Club Scrap - Cardstock

Wednesday, April 4, 2018

New Card Sketch

Inky salutations my artsy friends! I hope you're all fairing well today. I had a rude awakening this morning...snow!  I know many of you have been dealing with the resurgence of winter this Spring but up till now we had been spared.  Unfortunately we woke up to the white stuff today....my dog was not happy about it either - he refused to go out ;)  LOL!!  I think he's had enough of winter like the rest of us.

Today I have a new card sketch to share with you that I made for the Club Scrap Card Challenge for April.  


And here it is...


And this is what I created!  It was made using supplies from the Daffodils kit (03/18), paper flowers from Prima and VersaFine Clair inks.  The splatter background is actually a stamp from the kit that I stamped all over with yellow then went back and stamped the orange in a few locations (so it didn't over power the yellow). I didn't notice it at the time but the orange strip (which is a cut-a-part border) is almost a mirror image of the flower I stamped on the tag!  Looks like I planned it that way but it happened purely by accident.

I hope it inspires you to get inky and you go ahead and give it a try!

Thursday, March 22, 2018

Stampin' Trees

Hello Friends!  I hope you're all doing well today.  I know many of you have been battling a late winter snow storm - I hope you're all safe and snug wherever you are.

Today I wanted to share a couple of cards I made today using the UM stamp set - Trees from Rubber Stamps Tapestry.


The first card was made for my sweetie...  I stamped the bare tree using VersaFine Clair Pinecone.  I then used a peg stamp that is called "Heart Dust" (isn't that darling?) to stamp the VersaFine Clair ink colors Glamorous (deep pink), Tulip Red and Charming Pink (bright pink)  VersaFine Clair.  You won't believe what I used for the grass...a Pineapple Top! It worked like a charm :)


This is a more traditional spring tree filled with lovely flowers and a sprinkling of flowers beneath as well.  A picture I'm sure we're all ready for!  The background for this card was stamped with a tri-flower stamp using VersaMark ink.

Supplies:

Rubber Stamp Tapestry - Trees UM set; Heart Dust, Pineapple Top, Oak Leaf, Flowers Three Ripply, Cherry Blossoms
Imagine - VersaFine Clair - Pinecone, Acorn, Tulip Red, Glamorous, Charming Pink, Verdant, Green Oasis, Golden Meadow, Blue Belle; VersaMark
Club Scrap - cardstock
Altenew - Painted Greetings
MFT - Stitched Dies