Saturday, November 30, 2019

Baby Things....

Happy Day Friends 

I hope you all survived Thanksgiving and Black Friday.
We had a nice Thanksgiving with family and didn't even attempt any Black Friday shopping. I can't stand crowds on a good day much less on a day where everyone is crazy with the day after Thanksgiving sales. I do about 98% of Christmas shopping on line - it's quite, calm and best of all - no people pulling things out of my hands :)  LOL!!!

It's not often I get to make things for/related to babies so recently it was a nice challenge. The lady that heads up the Craft Therapy program at our local library adopted a sweet little guy recently, her first class back Mom and I gave her a few gifts.

I wanted to make something that they could hang in his room now and that he could enjoy later on in the future so I made this...


I used Creative Medium to adhere bits from a map of Indiana.


As it turns out she loves Scrabble so spelling his name out in the tiles was perfect.


I added some keys...as he holds the keys to his parents hearts!
These are a die from Gina Marie Designs. Love how intricate they are and since they were cut from Rinea Foiled Papers they really look like they are metal.

I made this card to go along with. I used Rinea Foiled Papers for the background, pin and sentiment. The dies are all from a set by MFT.

It's fun to step out of the norm and create something a bit different.
Have you had the opportunity to create for a little one recently?

Supplies:

Rinea Foiled Papers - Sapphire/Gold Glossy, Sapphire/Sapphire Starstruck; Silver/Gold Glossy; Turquoise/Turquoise Starstruck, Ruby/Gold Glossy
Imagine - Creative Medium, VersaFine Clair - Blue Belle, Sponge Daubers
Gina Marie Designs - Key, Heart
MFT - Baby sentiment, Pin, Diaper dies
MDF Letter
Scrabble Tiles, Twine, Indiana Map
Cardstock

Thursday, November 28, 2019

Tuesday, November 26, 2019

"Gift" Gift Card Holders

Welcome my friends, I hope you are all having a wonderful Thanksgiving week so far.
Don't know how many of you are taking advantage of the avalanche of Pre-Black Friday sales but in case you're still planning on giving gift cards have I got an idea for you....

Gift Card "Gifts"....


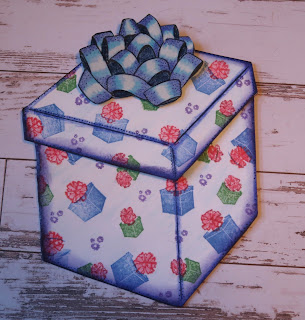
We recently went to a rubber stamp convention in Fort Wayne and while we were there we picked up the Gift Stamp. This "gift" can be stamped as a single flat gift box image and affixed to a card front. It would make a neat looking card BUT....


If you stamp it along the fold of a piece of cardstock you can turn it into a gift card holder!!


How cool is that!!!

 The nifty thing about this image is it's just a plain box. By switching up the stamps you use to create the "wrapping paper" the sky is the limit! This past Saturday Mom and I put this stamp to work to create several "gifts" and we paired them with the oh so versatile Peg Stamps!!


They have just released 8 brand new Winter/Christmas themed sets plus 3 sets of Unmounted Sentiments and several individual peg stamps as well. These new peg stamp sets have been sprinkled over these gift card holders along with some old favorites creating these spectacular"Gifts".


Stamps used:
Pine Bough from Christmas Baubles
Pine Cone and Pine Branch from Poinsettias in the Pines


Stamps:


Stamps used:
Flakes from Snowstorm & Country Christmas sets


Stamps used:
Gingerbread Man from Gingerbread Heaven
Snowflake from Snow Much Fun
Poinsettias from Poinsettias in the Pines


Stamps used:
Ornament from Christmas Baubles

Additional Supplies:

Imagine - VersaFine Clair, Memento Ink, Sponge Daubers, Tear It! Tape
Colored Pencils (various brands)
Cardstock

Wednesday, November 20, 2019

Woodland Magnetic Candy Tin

Hello Friends!

Can you believe it's only 1 more week until Thanksgiving!!!
I just don't know where the year has gone, it's flown by.

One of my favorite childhood memories with regards to Christmas is getting into our stockings! It didn't matter how early we got up we were only allowed to dig into our stockings until everyone was ready to open gifts (when Mom and Dad said). It was like a pre-game special - LOL!! Shoot Mom still makes us all stockings which is just fine with me :)

So today's project is something that will fit into any stocking with easy and I think it's a pretty fun idea... a magnetic woodland themed play set all tucked inside an Altoids/candy tin.


So Imagine teamed up with Joy Clair Rubber Stamps this month and I was able to choose the stamp sets I wanted to work with. Once I saw this set of stamps I KNEW I had to make this magnetic play set with them.

I have been saving magnetic sheets that come with some metal dies to use for something and this was the perfect time to pull them out and create. My magnetic sheets had a white back so I was all set to go but if you have a sheet that is just the black magnetic sheet you can simply adhere a sheet of white paper to the magnetic sheet. works perfectly fine and what I've had to do in the past.

I stamped the images onto the magnet using StazOn inks and then colored each image with alcohol markers.


I stamped the images onto the magnet using StazOn inks and then colored each image with alcohol markers.


I think these would be so much fun to play with and make up stories for the little ones - boys and girls alike.


If you'd like the complete instructions and supply list please see:


Have a lovely day my friends!!
Stay Inky :)

Tuesday, November 19, 2019

Here Turkey Turkey Turkey!

Good Morning!

I hope you all are having a nice week so far...

Today I wanted to share my origami turkey...actually it's something called modular origami. Modular origami is where you fold individual pieces then assemble them all into one complete project.


And here he is...
My Thanksgiving turkey!!


He could be part of a center piece or he could be made for individual place settings. Either way he's sure to garner ooohhhh's and aaaahhhh's. 


He looks far more difficult to make than it really is, mostly it's fan folds for the tail and his body starts off like a paper airplane so it's really quite easy.  I found that the folding was somewhat relaxing because it's just back and forth.


Adding a place setting is easy as well - just a couple of die-cuts and writing down the names is all it takes.

If you'd like to create your own flock of turkey's for the big day you find complete instructions here:


Monday, November 18, 2019

Autumn Flower Surround for your Table

Hello friends, I hope you all are enjoying what the calendar is telling me is fall but Mother Nature has other ideas - LOL!!


I wanted to share this flower surround I made recently to pretty up my holiday table.

It's made using a variety of foiled papers from Rinea and a couple fall themed quilt dies from Gina Marie Designs


It was so easy to make as you can cut several layers of the foiled papers in one pass. I wanted to keep with autumn colors so I used Marigold, Emerald, Gold, Copper, Silver and Ebony for the die cut pieces and Mocha for the background.


As you can see you get a whole new look by just switching up the color combos.
I used 6 panels for a standard size 10" pot but you can easily adjust the spacing between the panels to suit your needs.


Monday, November 11, 2019

Scorch Markers & Christmas Ornaments

Hello Friends -

Have you seen the ads for the Scorch Markers on Facebook that are supposed to be an easier way to get the wood burned look?  Well I'm here to tell you they work!  I bought a set of 3 markers so Mom, Morgan and I could test them out and play.  Here are the results...


The most important things to keep in mind when using these markers are:

1. Prime the pen...you have to push the nib down on a piece of paper until the tip turns an orangish color...this is the medium soaking into the nib.

2. Use enough medium on your wood. The wood really soaks it up.

3. HEAT - you must use a very hot heat tool. I started off with my embossing gun but it was only 450 degrees. It did it but took forever. We switched to dh's heat gun set at around 650 +/- and it worked fairly quickly (about 1/4 the time it took for the embossing gun). 


Something else to think about is the longer you heat it the darker it gets. We played with heating some areas more, some less. I think they all turned out amazing!


We used stencils for most of them but we also free-handed a few.
Sorry I can't name all of the stencils/mfg...I have an envelope I put them in all together.

If you have a question about a particular stencil, JLMK and I'll see if I can figure out who made it.


We went on to embellish the Scorched sides as well as the backs so no matter where they were on the tree they would be beautiful.


All in all these pens were amazing and really did yield some pretty new ornaments for our trees this year.

Friday, November 8, 2019

Day of the Dead Challenge #87

Hello Friends...

Hope this day finds you hale and hearty enjoying Autumn and all it's glory even though it may feel like winter as it does here!

Today I wanted to share a couple creations I made for the current challenge over at Lost Coast Designs....#87 - Dia de los Muertos which runs until the 14th of November.


My first card was made by playing with some Marabu alcohol inks on a piece of glossy cardstock. I started off by just applying the inks in lines across the cardstock letting them flow together but I wanted something more so I flicked some blue AI across the cardstock which gave it a bit more life.  I then stamped the new DOD Amor  image several times in a variety of VersaFine Clair inks. I fussy cut the images and reassembled them to create the final image. I mounted the computer generated sentiment on black cardstock and popped it all onto a yellow card base.


My next card was made by stamping and embossing the Skull n Bones background image on a piece of textured black cardstock. The texture gives an added hint of dimension and a fun distressed look to the background.  I stamped the Frida Skull image on a piece of white cardstock and colored it using Schpirerr Farben colored pencils (which blend so nicely). She was fussy cut and added to the card using foam tape.


I colored the skull on my Imagine craft mat which has some give to it. It's perfect for that extra little cushion when stamping but it also is pretty cool to use it as a foundation for coloring images with colored pencils because that extra little bit of give yields an embossed texture to the image once you are done.  It's a pretty cool way to achieve a bit of extra dimension without even trying.

So there you go...
I hope you're inspired to play along.
If you do create a DOD project be sure to post it on the Lost Coast Designs blog for your chance to win!!

Tuesday, November 5, 2019

Raven Feather Wreath


I wanted to share the wreath I made for Halloween this year...a Raven Feather Wreath which was made entirely from Rinea Foiled Papers! Each feather was cut using Spellbinders Feather dies and Rinea Ebony, Sapphire and Violet foiled papers.


I used hot glue to create a spider web effect over the entire wreath for a spooky creepy vibe.


If you'd like to check out the process and complete supply list please see:


Monday, November 4, 2019

Hello There! Chili Pepper Red Card


Hello there friends! I wanted to share this little penguin fellow that seems to be very appropriate for most of the country at the moment. Many of us have had a chilly blast...a possible preview of the coming winter ahead - eek!  The stamps are from Unity Stamp Co. and all the wonderful inks, powders and sprays are from Imagine.


If you'd like to read more about how I made the card and the supplies I used, please see the following