Showing posts with label watercolor. Show all posts

Monday, May 4, 2026

Tweet Spring!

Welcome to May everyone!! 

Our theme this month at Gecko Galz is Tweet Spring!

I had such fun with this challenge...

I started off by upcycling a $ 0.25 plate into this lovely piece of wall art!


I was so thrilled to finally be able to use this vintage bird food tin (i've had it a couple years). I knew it would make a fun piece of art at some point.  I added scraps of thread that I cut off a tangled mess of bobbins in my stash. Makes for a fun "nest". 


I used one of the digital stamps from the Spring Blush set to make this watercolored book mark.


A fun Memory Dex card... with lots of glitter :)


Another image from the Spring Blush digital stamp set...this time turned into a card.


And finally a few Tweet Spring ATC cards which have been framed with some rust paper that I made myself.


Hope you are inspired to play along!

Be sure to check out all of the amazing designs this month on the
for our Tweet Spring celebration!


Tuesday, July 1, 2025

Crafts Galore - Fred She Said...


Hello friends! New month, new Anything Goes challenge at Crafts Galore!!  If you create anything during the month of July be sure to pop it onto the blog and you could be the lucky winner!


This month the design team is playing with images from Fred She Said. I am tickled to say I was able to choose the lovely Hollyhocks image for this challenge and here is what I made...


I printed an arrangement of the different hollyhock images from the set onto a piece of watercolor paper. I then colored them using a combination of Prisma colored pencils, watercolor paints (background) and added some highlights with a marker. I then popped a bit of fence diecuts and sentiment. 

Be sure to stop over at Fred She Said to see all of their lovely digis and remember if you make anything during the month of July to add it to the list...you can't win if you don't enter!

Sunday, June 1, 2025

Crafts Galore Encore Challenge - #136 - MoondreaDesigns

 Hello Friends - Happy June!!

A new month full of fun new challenges.  To start the month off I'd like to share the new challenge at Crafts Galore!  This month the challenge as always is Anything Goes - so if you create anything at all during the month of June please feel free to enter the challenge for your chance to win. 

This month's sponsor is MoondreaDesigns and here is my creation using the Poppy Fairy...


She was colored using Prima watercolors, Prismacolor colored pencils and Zig Real Brush markers.

Be sure to stop by the Crafts Galore Encore Challenge blog to see all of the other amazing creations by our design team!!

Good Luck and Happy June


Tuesday, May 4, 2021

Under The Sea Shell Door Puzzle Piece

 Today I wanted to share my latest Fairy Hugs creation...


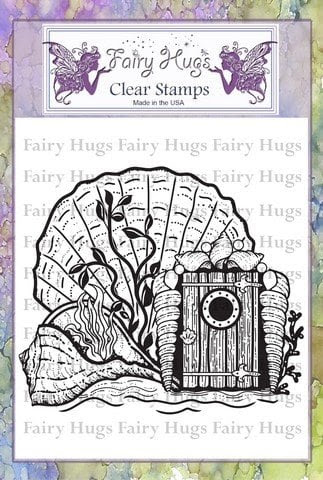
I love the brand new Fairy Hugs release filled with all sorts of fun under the sea images. These are two of my favorite in one project. The Shell Door and Tentacles create such a fun combination.  Here I have used the Tentacles so they almost look like a new form of sea plant life....swaying in the currents. 

I created this piece by painting the giant puzzle piece with black acrylic paint. I then watercolor painted it with multiple colors of Cosmic Pixie Sparkles.  After the paint had dried I stamped the Tentacles along the bottom of the puzzle piece with VersaMark ink. I then embossed them using Lucky Stars Mboss embossing powder from Imagine (it's got glitter in it!). 

The Shell Door was stamped on a piece of white cardstock using VersaFine Clair Nocturne ink then colored with colored pencils. I added a few faux pearls and lots of beautiful Fairy Hugs Powder glitter.  The door was then fussy cut and affixed to the puzzle piece.

I hope you have enjoyed this piece and check out all of the amazing new stamps in this enchanted oceanic release!

Fairy Hugs Products Used:


Be sure to stop by our Fairy Hugs Facebook Group 

Thursday, March 11, 2021

Azalea the Story Teller

 Today I wanted to share my latest Fairy Hugs creation...


Azalea is such a good story teller...all of the little hedgehog babies have gathered to listen to her latest story. A perfect way to start their day :)

To create this card I started off with a 5x7 piece of watercolor paper. I painted lines across the width of the panel starting off with yellow at the top and working my way down with a peach and light pink.  I then added a couple lines of a yellow-green to the bottom and let them dry. Once the initial layer of color was down I added additional color to blend and enrich the scene. I then started stamping first with Azalea, the tree stump and multiple layers of the Ivy Corner in a couple different colors. All of the hedgehog babies were stamped on a scrap of paper, colored and fussy cut. I then went back and added in some watercolor grass here and there to round out the picture.


Be sure to stop by our Fairy Hugs Facebook Group 


Wednesday, December 30, 2020

Cozy Little Winter Scene

 Hello Friends - the year is almost done...I hope you're safe, well and sound wherever you are. Today I wanted to share a cozy little winter scene with you that I recently made...


The main image is from Nellie Snellen - Nellie's Choice called Wintery House. It's just such a lovely image I couldn't resist it.  It has been stamped on watercolor paper with VersaFine Clair Nocturne then embossed with black MBossing powder. I colored it using Prima Confections watercolor and a bit of shimmery white watercolor from Yasutomo.  I then stamped the Large Fairy Fir Tree (Lavinia) and the Snow Falls (Lavinia) images on the panel. I added a few detail colors using Kuretake Zig Clean Color Real Brush Markers and finished it off with a bit of Twilight VFC ink around the edges.


I wish you could see the shimmer of the mica watercolors. They are amazing.  Hope you have an amazing end to 2020. Blessings for you all...stay inky my friends!

Supplies:

All of the stamps can be found at Fairy Stamper

Nellie's Choice - Wintery House 
Prima - Confections Watercolors
Yasutomo - Mica Watercolors
Imagine - VersaFine Clair - Nocturne, Twilight; MBossing Powder - Black
Kuretake Zig Clean Color Real Brush Markers
Watercolor paper, Cardstock

Wednesday, December 9, 2020

Merry Christmas Oscar Style!

 Sometimes you just get an idea and you have to run with it no matter how long it takes. This is how this card came about. I had an idea about using Oscar from Fairy Hugs for a Christmas card but never realized just how long it would take me to complete...

Here it is....


What do you think?

I am so in love with how it turned out. Just like I envisioned it but he didn't start out that way!  I began by stamping Oscar using the stamping platform because I wanted him to have multiple shades of green to give him some personality.  I then set about coloring some areas white for highlights.  Took a bit with all those suckers but I did it.  A bit time consuming but so far so good. 

Next I added his hat. Let me tell you that was no easy task...he's got a big head!! So I finally found a stamp that I could alter a bit to fit him. Looks cute don't you think?

Then I wanted to stamp the lights and ornaments here and there on his arms...it would be so cute WRONG!!! I did stamp them but I did not like how they turned out. Some of the images when stamped with the colored ink didn't show up very well against his green, others I didn't get a nice impression well you can see where it was going. I really didn't want to toss him out because I had spent so much time on him already. So I left him there over night to think about it.  

The next day I had decided I came that far I was going to go all the way. So I stamped all of the ornaments and lights on a piece of white cardstock, colored the ornaments that needed colored and added little details to the lights (pen work & glitter to each one). Then I began fussy cutting them all out!! Yes it did take a while but it was so worth it in the end.


I mounted all of the little ornaments & lights, added a few bits of holly. Next step was to outline all of his tentacles with a black acrylic paint pen and Oscar was finally complete...playing both Santa and the Christmas tree all in one.   So to complete the card I watercolored the background, stamped the sentiment and added a little ball on the tip of his hat, mounted him on a card base and called him done! 

After all that there is only problem.....

I love how he turned out and I don't think I can part with him - LOL!!

Oh well, I may just frame him and hang him on my wall.

Supplies:

Fairy Hugs - Oscar, Pixie Dust Glitter

Rubber Stamp Tapestry - Ornaments, Lights, Holly, Mistletoe 

Lost Coast Designs - Pointy Hat Gnome


Monday, December 7, 2020

Oh Deer!

 Good Morning Friends! I hope you are doing well this fine day. Today I have a couple fun cards to share with you using one of the newest sets of stamps from Rubber Stamp Tapestry - the Peg Stamp People...Deer Family.


My first card has a fun vintage vibe to it. I had made a shaker card a couple weeks ago and I saved the parts I cut out to make the shaker window...this tree and star which were cut from a piece of paper with a wood pattern on it. I thought it might be fun to use these die-cuts as my jumping off point for my little scene.  

I decided where I would like the hills to be and marked those off with a pencil. I then stamped the deer using VersaFine Clair Pinecone (the darkest VFC brown). Next came the Bare Trees stamped with VFC Acorn and the Tree Cluster stamped using VFC Rain Forest.


After all of the images were stamped it was time to add the snow and snowflakes. I used a white acrylic paint pen to draw the actual land then used a white pigment ink to add snow to the ground. I used the snow stamp from the Let It Snow set to add the flakes to the star and upper portion of the tree. The star and tree were edged using more Pinecone ink.

I assembled the card using pattern paper from my stash, mounted the tree to the card then stamped the snowflakes using VFC Morning Mist and the sentiment with Nocturne.


I had a scrap of watercolor paper left over from another project and I thought it would make a nice starting point for this little scene.  I penciled on the basic landscape then began stamping both the Bare Trees and Tree Cluster to create a wooded scene. I then stamped the deer family making sure that the buck could over see his family.

Once I had all of the images stamped and dried I watercolored the sky and snowy areas. After the paint was dry I added lots of sparkle with a bit of glitter then stamped the sentiment.  


Rubber Stamp Tapestry Stamps Used: Deer Family,  Winter Wishes (sentiment), Bare Tree, Tree Cluster

Have a lovely day friends!

Wednesday, November 11, 2020

Swim with Me

 Today I thought we'd go for a swim with this lovely mermaid Zelith from Lavinia Stamps.


I started off with one of the background papers I made the other day on the Elements Inks post. I stamped Zelith with VersaFine Clair Nocturne ink then embossed with black embossing powder. She was watercolored with a lovely purple metallic paint.

Next I tore a piece of paper and inked up the ocean floor; I then stamped the Sunken Ship and various sea plants. The fish were added and bubbles were stamped here and there to fill in some areas. A bit of penwork and glitter came next. Finally I stamped and painted the clamshell which was added to the sea bottom.

This panel was then popped onto a white mat and blue card base.

Below are a few more shots of the card...


Fairy Stampers Store

Lavinia Stamps - Zelith, Mini Fish, Sea Bubbles, Seaweed 2, Marine Kelp

Lavinia Elements Ink Pads

Brusho Pigment Powders

Gel Press

Fairy Hugs Stamps - Sunken Ship, Mini Oyster

Fairy Hugs Powders - Parakeet (seaweed), Arctic (bubbles)

Imagine - VersaFine Clair - Nocturne, Morning Mist, Green Oasis, Shady Lane, Twilight, Medieval Blue; Mboss - Black Embossing Powder

Paul Rubens Metallic Watercolor Paints

Black & White Acrylic Paint Pens


Tuesday, November 3, 2020

Happy Moon Card and Envelope Set

 Hello my friends!! Hope you're having a wonderful day.  Today I wanted to share my latest Fairy Hugs creation...


I love the Happy Moon stamp, he is perfect for so many themes. I thought it would be fun to create a night sky for him to shine.

  1. To create this card I used metallic Kuretake Gansai Tambi watercolors flicked onto a piece of black cardstock and a black envelope. 
  2. I then stamped the Happy Moon with Gold Delicata ink from Imagine. 
  3. The pane was then adhered to a black card blank with a Gold/Gold Starstruck Rinea Foiled Paper mat.
  4. To finish off the envelope I stamped the Happy Moon again with Gold Delicata ink.
  5. I used a white acrylic marker to draw a rectangle for the address.


Fairy Hugs Store Supplies:


Other Supplies:

Kuretake Gansai Tambi Watercolors
White Acrylic Pen
Black Envelope
Cardstock

Be sure to stop by our Fairy Hugs Facebook Group 


Tuesday, October 27, 2020

Toadstool Trio

Today I wanted to share my latest Fairy Hugs creation...


I love this simple Toadstool image. It is so versatile and can be used alone or paired with any number of the other lovely Fairy Hugs stamps. Today I have a trio of toadstools with an extra little tip to make your mushrooms grow a bit.

Directions:

1. Stamp the middle mushroom on a piece of white cardstock.

2. Without reinking, stamp the image onto a piece of scrap paper and trim. This will become your mask for stamping the rest of the card.

3. Cover the stamped toadstool with the mask, ink the stem part of the image and stamp it below the stem on the first stamped image. You just "grew" your mushroom!

4. Leaving the mask in place, stamp a second and third mushroom on either side of the tall mushroom.

5. Color the mushrooms as desired.

6. Stamp foliage and flowers around the mushrooms.

7. Use watercolor to create the ground and give more color to the images/foliage.

8. Die-cut the image; diecut the frame using Mocha/Mocha Starstruck Rinea foiled paper.

9. Cut and mount the Fairy Wings Background paper on a brown card base.

10. Cut a strip of Moss & Stone Background paper and adhere it to the center of the card.

11. Mount the mushroom image and frame on the card.

12. Add a twine bow.

Have a lovely day friends!!

Fairy Hugs Supplies:


Other Supplies:

Rubber Stamp Tapestry - Peg Stamps Foliage, Flowers
Gina Marie Designs - Frame
Watercolor Paints, Twine


Be sure to stop by our Fairy Hugs Facebook Group 


Monday, September 21, 2020

Harvest Blessings

 Hello Friends...I hope you're enjoying the start of another fine week.  Today I wanted to share a couple Autumn pumpkin cards with you....  Both cards were made using a combination of peg stamps from Rubber Stamp Tapestry as well as the Sparkle Blends sequins mix Autumn Harvest.


Harvest Blessings was created by stamping and masking the pumpkins into a nice little pile. I added a few curly vines, leaves and branch. 


These were then colored using Prima watercolors which I also flicked over the background.


The sentiment was stamped and embellished with the Limited Edition Autumn Harvest sequins mix.


My second card I wanted to add a bit more than just pumpkins so I stamped a few gourds, mums, grasses and bittersweet to round out this little fall card.


These were all colored using a variety of colored pencils.


The sentiment is from the Prima collection called Pumpkin and Spice. 
This panel was mounted on a die-cut card from Gina Marie Deisngs.
It too was finished off with the Limited Edition sequins mix Autumn Harvest.

Supplies:

Rubber Stamp Tapestry - Pumpkins, Bittersweet, Grass Sprigs, Mums, and more.

Doodles Paper Playground Sparkle Blends - Autumn Harvest

Gina Marie Designs - Loopy Rectangle Die

Prima - Hey There Pumpkin (Pumpkin & Spice Set)