Showing posts with label crystal lacquer. Show all posts

Thursday, December 3, 2015

Spicy Frame

Last week I shared a frame I made using Club Scrap Moroccan Spice kit - Live Live with a Little Spice.  Today I wanted to share the directions for making that frame.


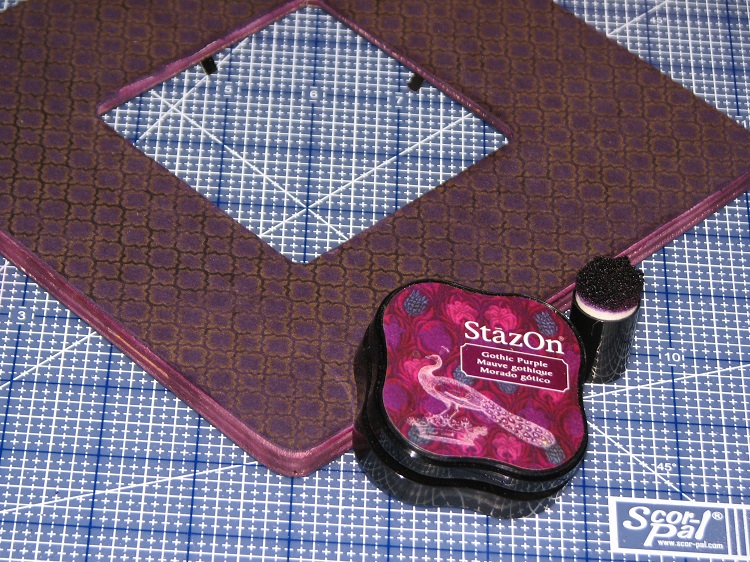
1. Sand all of the edges of the wood frame.


2. Apply an even coat of book binding or other glue to the frame; position the cardstock and let it dry completely.


3. Cut away the excess cardstock from the edges and the center of the frame.

4. Again, sand all of the edges.


5. Apply Gothic Purple StazOn ink to the inside and outside edge.


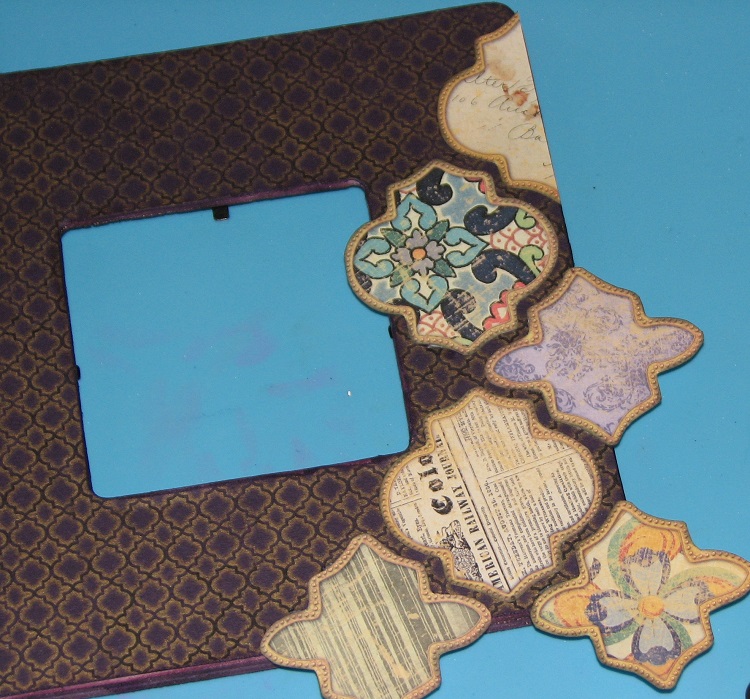
6. Trim then fussy cut the large Moroccan tiles from the pattern cardstock.  Apply Spiced Chai StazOn ink to all of the edges of each tile.


7. Play with the tile placement until you get them just so.    TIP - When you get a layout you like, take a quick photo of it to help recreate it - helps when you go to glue them all down!


8. Glue each of the tiles down.  Once dry, trim off the excess.


9. Now fussy cut all of the small tiles and apply the same ink to the edges of these tiles.


10. Glue the small tiles down to the frame.  Once dry, trim away the excess.

11.  Sand the edges where the tiles were added.


12. Apply a layer of Crystal Lacquer to each of the tiles.  This will give them a lovely gloss and add dimension at the same time.  It's amazing how much this changes the look of the tiles.  Let the lacquer dry completely.


13. Stamp sentiment, mat and adhere it to the frame.  Add additional embellishments as desired.


And your frame is ready to enjoy!

Supplies:
Club Scrap.com - Papers, stampes, embellishments.
IMAGINE Crafts featuring Tsukineko - StazOn Ink, Sponge Dauber
Crystal Lacquer

Wednesday, November 25, 2015

Moroccan Spice - Live Life with a Little Spice!

Today we're living life with a little spice as today is the November Club Scrap Blog Hop!  Can you believe it's that time of the month already?  Well it is and I'm so tickled to share this months kit and project with you!  This months kit - Moroccan Spice is just beautiful - think vintage spice bazaar.  


Live life with a little spice.   This frame was so much fun to make. It was a bit time consuming because of all of the fussy cutting but it was so worth it I think.  


I wanted to give each of the little tiles a genuine tile look so I covered each with a coat of Crystal Lacquer.  I wish I could better share the shine and dimension created by the CL.  It really does add so much to the finished frame.  Friday I'll be sharing the step by step details on how I created the frame.


I also made a Gothic Arch using one of my Gothic Arch Templates - Fancy Gothic Arch #2.  I thought the sentiment was perfect for out Thanksgiving get-together - I'm going to tuck it somewhere for all to see. 

I want to thank you all for stopping by and I'd also like to wish those of you in the United States a very happy Thanksgiving and to everyone else - have a wonderful day!

Your next stop on the hop is 


if you get lost along the way or you'd like to see the complete list of artists participating in today's hop you can find it here - 


Wednesday, October 1, 2014

Halloween Card with a Twist!

Today the sweet Friends of SCACD group and the SCACD DT are showcasing digital Fall images ~ some come with a twist as they are not necessarily images you'd think of for use on Fall projects.  If you would like to see all of the folks sharing their Fall inspiration today, not to mention a shot at some yummy blog candy, head on over to the SCACD Store Blog for details.  Susana's also offering a sweet FREE digi image thru 10-5 so be sure to check it out!! 

My project is one of the ones that comes with a twist....  I thought it would be fun to use this image...Winter Friends and turn her into a witch!

Winter Friends

and here's what I came up with....


WHAT I DID: 

I knew I wanted to make her in layers because it just screams dimension to me so I printed out 3 copies of the same image. I am using my Spectrum Noir Colored Pencils and baby oil to color the main image...I'll be using PanPastels for the background.

NOTE:  You wouldn't necessarily have to print out three but I am a messy color-er so I wanted to make sure I had enough just in case.  If you do print multiples and find you don't need them all well then that's just an opportunity to make another project!  

So for the first copy I started off coloring the wings...  I added a lighter shade of grey for the center of the feathers and almost black around the edges.


Next I used a medium shade in between the two...


And then I blended it all together using baby oil on a make up style Q-tip (the kind with a pointy end).  You can see in the photo below the left side has been blended while the right side has only been colored.  It really does make a huge difference in the finished look don't you think?  You can also see that I color outside of the lines which is why I use multiple copies ;)


Once I had blended both sides I then added another outline with my black colored pencil to really make the feathers pop.  

NOTE: I read a blog somewhere once that said you couldn't add more color to an image once you blended with baby oil...  I decided to give it a try ~ I WAS able to add more color after blending!!  I don't know if this is due to the colored pencils that person was using or if the Specturm Noir Colored Pencils have a different blend allowing me to add more color but it worked for me so maybe it will work for you too.  


Next I went to work on turning the "winter girl" into a Fall time witch!  I started off by coloring the girl with a couple shades of green and blending with the oil.


I did the same with her cape and outfit using purples....


I finished her off by adding a bit of color to her belt (orange), lips and shoes.  I added a tiny dot of Crystal Lacquer to her eyes and lips to give them a bit of dimension and shine.


I cut all of the pieces out and test fit to make sure it all went back together as it should.  I embellished her collar and ruffles with a touch of black Stickles glitter glue and set her aside to dry.


I trimmed the branch she was sitting on from the third image and colored/blended.


For the background I wanted to make a spooky sky and a shimmery moon so I cut a nice sized circle from a piece of cardstock.  Don't discard either piece as these will be used as masks for applying the PanPastels.


I positioned the circle where desired and began applying various shades of purples to the cardstock using one of the medium sized Softt sponges.   I just worked the pastels until I was satisfied with how it looked.


I removed the circle and then positioned the piece of cardstock that I cut the circle die-cut from over the area that I hadn't colored yet.  Of course I got a few smudges on my moon but the great thing about PanPastels is they can be easily erased until they have been set with a fixative.


I used metallic PanPastels for the moon...I started off with silver then applied pewter to create the look of texture on the moon.   I then used a dark blue color and one of the handles to add some sketchy - spooky clouds here and there.  Once I was satisfied with the spook factor I sprayed the background with hair spray to set the pastels.


I then pieced the Winter Friends back together onto the night sky. Some pieces I glued directly onto the background while others I used a bit of foam tape to pop them off the background to add dimension.


I'm really please with how my little witch turned out
and I hope it's inspired you to think out of the box when looking at your stamps...
both digital and rubber.


Happy October!!

Thursday, September 25, 2014

Altered Playing Cards - Week 3 - first half

Hi All!

As you know last week was a mad house here so I'm already behind on the Altered Playing cards and it's only week #4- LOL!!  

Sooo, this afternoon after work I started on the first half of week #3.  Claudine's playing card was made using Alcohol inks with a Steampunk theme.  (whoo hooo!!)


So I started off with Alcohol Inks too!  I used a couple different colors of blue on an old flash card (remember, I'm not using playing cards...I'm using flash cards & bingo cards).


Once it was covered I added a layer of Gold then a layer of Copper. 


Finally I took a felt soaked with Blending Solution and pounced over the entire card.  It ends up looking like a hammered metal.  (looks even better in person!)


Next I glued down a gear die-cut (Memory Box) on the card and pounced the felt I had soaked with Blending Solution over the entire die-cut.  This had picked up just enough of the AI to color the die-cut.


I then applied a layer of Crystal Lacquer over the entire card.  This will both seal the gears to the card and it will really accentuate the metal look of the AI's.


You'll need to let this layer dry completely but it looks awesome already huh?  Don't try to speed drying with a heat tool...the CL will bubble and that's not the look we're going for with this card.  I want to keep the sleek, smooth look of metal.


Once the CL had dried I applied Black StazOn to the edges.


and stamped a few Steampunk images/words...


Now for some extras ~ I stamped my sentiment (Genius is 1% inspiration and 99% perspiration.)  and my Steampunk Guy Eyes.  All of the stamps used are from the Steampunk sheet from Artistic Outpost.


I colored the eyes with a variety of inks and added silver pen work for the glasses frame.  He was then cut out and matted as was the sentiment.


I decided the card needed something so I used my Bronze irRESISTible Texture Spray and flicked dots onto the card.  It was just what I was looking for.


And after it dried...I mounted my image & sentiment....


I love it! 
It's so very me :)

Tomorrow I'll be back with the second half of week 3...hopefully I'll have time to work on Week 4 over the weekend so I can get caught up with Week #5 next week!  


Friday, April 25, 2014

Ephemera Photo Canvas - Pt 2

O.k...  yesterday we left the canvas to dry.


Now we're going to pick it up by creating the little ephemera boxes we're going to affix to the canvas.  To start off with you're going to need 9 pieces of ephemera.  The size will be determined by your canvas.  For this example I'm going to cut the pieces 2.5" x 2.5" square.  For larger canvases you could cut larger pieces for larger boxes or you could still cut the 2.5" squares but add more to your canvas.  It's totally up to you.


Score each of the squares 1/4 - 1/2" on each side.  You're also going to score a diagonal line in each of the corners as shown below.


Crease and fold each of the sides - you're going to pinch the scored corners in towards the center.  You don't need to add any glue - we're going to use them just as they are.  Fold the other 8 squares of paper.


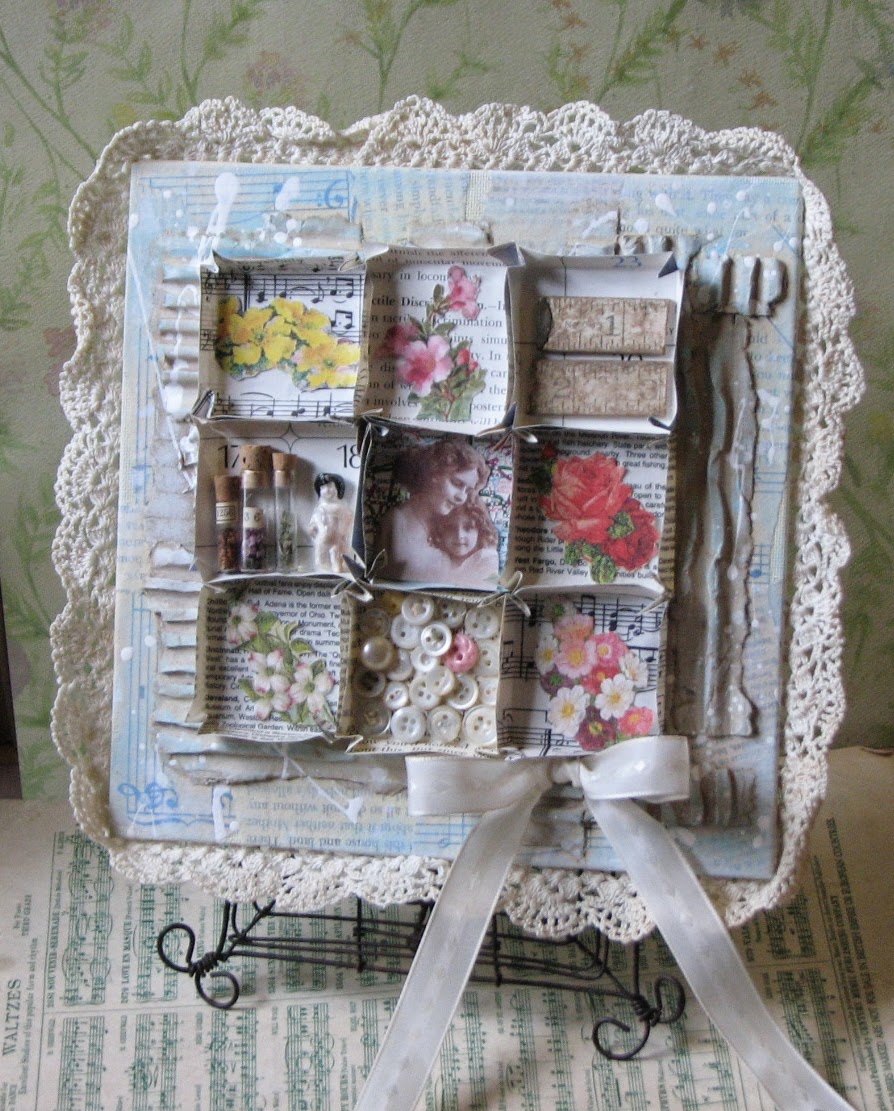
Now comes the fun part...you can add collage images, photos, bits of ephemera, stamped images, or anything you like to each of the squares.  I was originally going to use photos and collage images but I changed my mind after I got going...  I did use several vintage looking flower images (from Altered Pages)


But I also filled one of the boxes with mini buttons...


a few pieces of a foldable ruler and more!


Once you have all of the boxes filled, it's time to start affixing them to the canvas.  You can see here (sort of) where I made an X in the center of the canvas using a highlighter.  This is just to give me a starting point for gluing my first box down.


I started by gluing the center box down then gluing the rest of the boxes in.  When you place them on the canvas you want to make sure that all of the edges are snug against the others.  This will ensure that the walls of the boxes will stand up.


And here's what it looks like with all of the boxes glued down...


You can finish it off any way you like.  I added some vintage crochet lace around the outside and added a bow.    I kept it simple because I wanted the boxes to be the focal point...not a bunch of embellishments.


So there you go...
hope you like it and give it a try.
It's really lots of fun to fill the little boxes.

This is a great idea for gifts because you can use any little goodies in the box so they can be highly personalized for anyone!