We're up to month #4 in our Mixed Media Technique Calendar for 2015!! Can you belive it? We're 1/3rd of the way done already.
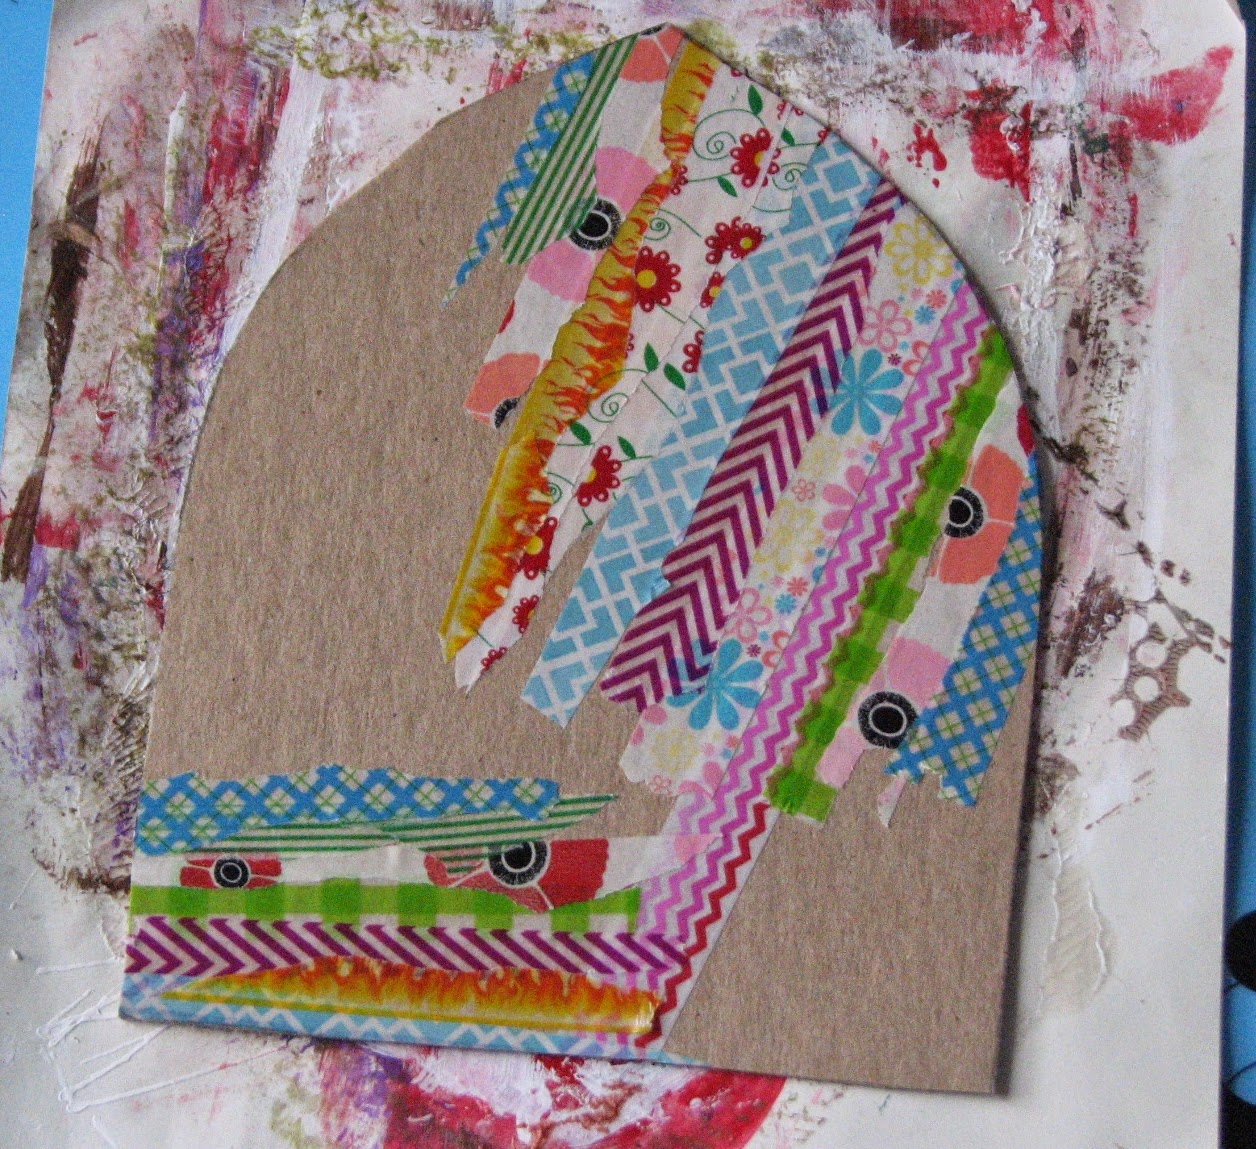
Today we're going to be using lots of washi tape on the foundation layer but don't fret if you don't have any. You can stamp your own washi tape using masking tape & StazOn inks or you could cut up scraps of pattern paper into 1/4" - 5/8" strips! Remember, use what you have in your stash :)
Let's begin...
I started off by drawing my arch on a piece of reclaimed chipboard (old game board box).
Then decided which tapes I wanted to incorporate. Since this is Aprils calendar and we're all anticipating Spring at this time (in Indiana anyway) I figured bright colors were a must.
Tear numerous strips of the tape and adhere it in groups on 2 - 3 areas of your arch. I went with 2 areas but one is much larger than the other. Try different angles for interest on your finished card. I tore some of my tapes in half (length wise) so I had a straight edge and a torn edge on each strip...this just adds another dimension to the finished look...and I could use the torn piece in another spot ;)
Once you're happy with the look of the tape (or pattern paper) trim it from the board.
Use your finger to apply a light coat of gesso to the entire arch...yes, even over the washi tape. I just used my fingers - I didn't have a brush handy and I'm lazy - I didn't want to go fetch one. You're not looking to obliterate the look of the washi tape, just tone it all down a bit and give our next layers a tooth to hold onto.
Depending on the gesso you are using (some comes off more opaque than others) you may want to wipe a bit off of the washi tape areas. I did so with a dry cloth.
Apply 3-4 colors of ink over the entire arch. I used Memento Dandelion, Love Letter, Bahama Blue and Teal Zeal and sponge daubers. All very bright colors!
At this point I didn't feel the colors looked blended enough...
So I blended them with my fingers!
Ahhh...much better :)
Next layer - time to pull out some of your favorite stencils and add a few here and there. I used a bit darker ink colors for this step so they would stand out from the background.
Now this is where I differ from LOTS of artists...I added a FEW spritzes of spray color here and there. Just enough to create a few splatters of color. I am using DecoArt Shimmer Spritz from the Media Line. It adds beautiful color and shimmer at the same time. The color is very intense so a little goes a long way (in my book).
(going off on a tangent here) So many times I see people take the time to assemble a collage only to totally obliterate it by using TONS of spray dyes so you can't see anything underneath. What's the point of going to all that work if it's all hidden under a layer of dye? Sure you know it's there but other than a tiny bit peeking through nobody else does. Not that it's wrong or anything but it's just not my cup of tea.
I wanted to lighten it up a bit so I took a different stencil and used an inkBlusher to dab a bit of gesso (or you could use white paint) here and there.
To help push the stenciled items to the background I added a bit of stamping using black StazOn ink. I used the tiny circles stamp and a script stamp on select areas of the arch.
I finished the page off with by adding the calendar, a bit of pen work - black around some of the white circles and white around the red circles; black Gelatos around the edge and a few gemstones to top it off!
Supplies:
Chipboard
Washi Tape
IMAGINE Crafts - Memento Inks; inkBlusher; Sponge Daubers; StazOn inks
DecoArt Media Line - Gesso, Shimmer Spray
JustForFun Rubber Stamps - 4 Sided Background Block #4; Long Script
Stencils
White & Black Gel Pens
Gelatos
Gemstones
I am linking this creation to...
Craft Stampers Magazine's February Take It Make It Challenge - Stencils.


Cool! I don't have any bright or patterned washi tape but will use what I have and see what transpires. Looks like fun and super messy! yay!
ReplyDeleteLove this one! Terrific idea, using washi tape as a first layer. I'm sure I'll be using that technique soon.
ReplyDeleteLove this one Roni!!
ReplyDeleteNice example of stenciling! Thanks for joining us at the Take It Make It Challenge.
ReplyDeleteFab arch, love your detail ! I have also become your latest blog follower.
ReplyDeleteGreat job with the stenciling ...... the finished project looks fab! Thanks for joining in with the TIMI challenge .... good luck! Linda xx
ReplyDelete