
 Coasters are a quick and easy gift for anyone on your list or just to have on hand for those "just in case" moments! Here is a quick little how to on whipping up a set of coasters in no time.
If you know me, you know how much I LOVE Alcohol Inks. They are just so much fun and there are endless possibilities on color combinations you can come up with. The cool thing about Alcohol Inks is it's NEVER the same look twice. Yes, the techniques are the same but the look it's self is always different. You can add color, remove color, blend colors, puddle colors, etc. The more you play, the more looks you achieve. They are just remarkable!
I like to use the "tumbled" tiles as they have a bit more character than the plain tiles but virtually any tile will work. You can use the 4" size for coasters but the larger 12" tiles work great for trivets and can be made in the same fashion as the coasters.
When you're at your local home improvement store you might want to check, it's usually less expensive to go ahead and buy a box of the tiles as opposed to purchasing smaller quantities. I saved almost half the cost by buying in bulk.
Supply List:
Ceramic Tiles (from local home imp. store)
Ranger Adirondack Alcohol Inks
Ranger Alcohol Blending Solution
Ranger Alcohol Ink Applicator/Felts
Ranger Archival Inks
Rubber Stamps
Acrylic Spray Sealer (Krylon or Plaid)
Self-Adhesive Cork (for base)
Instructions:
1. To begin I always clean my tiles using plain water and a soft cloth. This removes any dust, dirt and debris that may have gotten on the tiles during the manufacturing process and storage at the home improvement store (they aren't the cleanest places in the world).
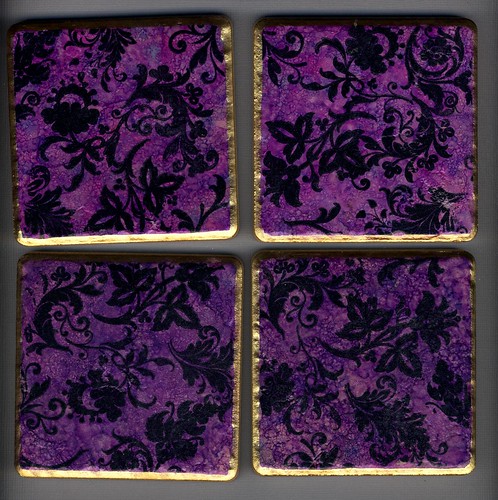
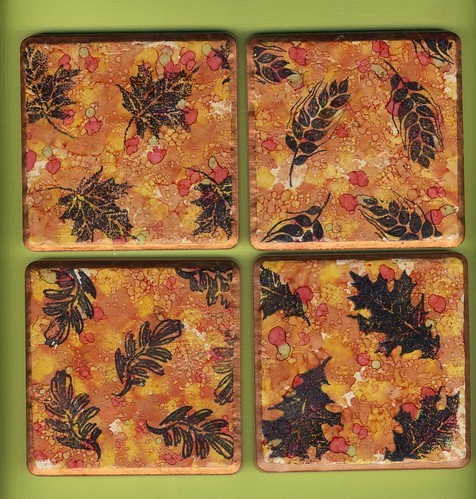
2. Apply Alcohol Inks as you would on any other project. Use 1-3 inks as desired in any color combination you wish. (this is the fun part!!)

3. Stamp images using Archival Inks. I like black because it shows up the best on Alcohol Inks but you can use other colors. Let this dry. It may take a while so don't get impatient. I like to speed up the process some by heating with a heat tool but it's not necessary.
4. Edge the tiles with Post Accent Pens or leave plain.
5. Mist with a light coat of Acrylic Spray Sealer. I find that Krylon or Plaid varieties work best. Let dry.
6. After the tiles are dry, attach cork to the bottom of each coaster.
Your coasters are ready for use or gifting!! :) These tiles are always a big hit whenever I have given them as gifts. Something practical but still artistic and fun!
Take time today and Get Inky!! :)
Oh wow, this just reminds me that I have alcohol inks that I STILL have never even opened! Don't know why I'm so afraid of them, but I will have to get them out after the holidays and make up a coaster ortwo for myself!! Gifts...nothing! I'm the one who needs coasters!
ReplyDeleteKaren
Great job! I love alcohol inks and am always looking for more ideas to use them. I did coasters for gifts & used alcohol inks to create the background for my cards this year. Would love to see more ideas using them.
ReplyDeleteNancyS (momsnack)
Love this project. I've used the non-coated stone tiles before for coasters but love this idea of using the glossy ones with AI. Wonderful idea for gifts, too. :)
ReplyDelete