
 I LOVE this technique!! It is a quick and easy technique that is often over-looked. With just a few basic supplies and a bit of time you'll be creating stamped images that really look like they are mini watercolor masterpieces!
 As you will see the results are amazing and it only takes a few minutes to give it a try. Inking up the image is the most challenging part of this technique but after a few trys you'll get the feel for the inking technique that works best for you.
NOTE about the rubber stamp. This technique works best with bold images. Fine line stamps don't yield the same striking results as the bolder images. Keep this in mind when selecting your stamps.
Supplies:
Dye Inks
Rubber Stamps
Mister filled with water
Cardstock
Heat Gun (if desired)
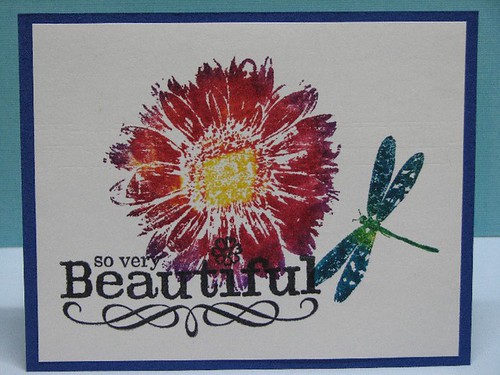
For this example I am using Ranger Adirondack Raspberry, Purple Twilight and Nick Bantock Chrome Yellow Dye Inks.
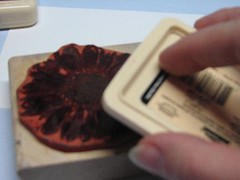
1. Ink your rubber stamp. You will do this by dabbing on ink onto various sections of the rubber stamp. This may be done in a variety of ways. I prefer dabbing the ink on directly from the ink pad. Start with the lightest color first and continue on gradually adding darker colors. Another method to try would be applying inks using a blending pen. Pick up the ink with the blending pen and "coloring" the stamp in the desired areas. You could also pick up the ink with a piece of Cut & Dry Foam and dab it onto the desired areas as well. Each works equally well, you'll just have to decide which method works best for you.
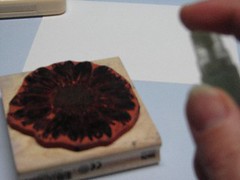
2. Now that your stamp has been inked mist the stamp with water. I suggest using a fine mist spray bottle such as the Mini Mister from Ranger. A regular spray bottle dispenses much larger droplets of water which may distore the image resulting in poor results.
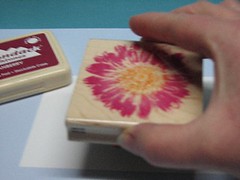
3. After misting, immediately stamp the image onto your cardstock.
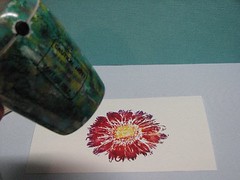
4. Let dry or speed drying using a Heat Tool.
5. Enjoy the results!!
The dragonfly image was stamped using Denim & Lettuce Adirondack Dye Inks.
I hope you will give this often over-looked but stunning technique a try :) Feel free to post a link to your creation in the comments or send me a scan of your card and I'll be happy to share it here with everyone!
Happy Inking my Friends!!
Hi R. i do love this technique, and it is so simple and striking isnt it? so easy to do...love your blog. keep up the good work, your photos are great and easy to follow!
ReplyDeleteellen :)
That is beautiful!
ReplyDeleteDo you think you could do this with markers, too? I have done a little of the multiple-colors inking, although mine has been much more of a random effect b/c I just don't feel like I have very cool control with the inkpad--so I think I would be more apt to try this with markers... That mini mister is on my list, too!
Cool technique Roni!
ReplyDeleteYes Ann, this will work with pigment or watercolor markers!! I have done this as a matter of fact. I used this particular technique for a couple cards that were published in the Spring issue of Stamp It! magazine.
ReplyDeleteYou're so right about this being easy, but often overlooked! Haven't done much multi-colored inking with pads, but will give it a try!
ReplyDeleteThat is a wonderful technique. Can't wait to try it!!
ReplyDelete