Saturday, September 12, 2020

Blast From the Past

Happy Saturday friends! I often get inspired by challenges and mood boards. Well today I have a little something to share with you that was inspired by this mood board/challenge and twist from Creative Embellishments Sept. 2020 Challenge -


The optional twist...RUST!!

So by now you all know how much I LOVE vintage anything. I love Love LOVE this mood board!! It is so very me and well, rust goes along very well with vintage.

Here's what I came up with....


I had such fun making this piece!!  The old card is something my youngest son is hoping to restore and bring back to life. I hope he does too so I can drive it - LOL!!  Anyway, I thought it would be fun to incorporate it into this canvas. As I was sorting through my stash of vintage ephemera I found bits of an old California map from the 50's...perfect!

I actually remembered to take some "in the process" photos so here's how it all came together...


So I started off by tearing the top layer of paper off this cardboard piece.
I applied DecoArt Modeling Paste to build up a bit of texture.


Next to add to the vintage appeal of it all I applied DecoArt Crackle Paste.
Once that paste had dried I went over it with a layer of DecoArt Vintage Effect Wash in Grey.
I used a damp cloth to wipe down the panel with Lamp Black acrylic paint giving it more a dirty look than actually painting it.


This is what it looked like at that point....I love the grungy, lumpy texture of it all.


So then after all of that was dry I applied Blue Vintage Effect Wash to select areas for no other real reason other than I like blue - LOL!!!


Next came the bits of the vintage map. I loved the old Triple A logo...very retro and fits with the photos perfectly.  Now I know the "thing" is to pile loads and loads of bits of this and that on canvases/scrapbook layouts at the moment but I like to incorporate and highlight a few select items with actual meaning...not just toss it all on including the kitchen sink. Not that there is anything wrong with the other...it's just not how I work which is why this is all the ephemera I added to the background.


Next came the Rust! I knew the bits and pieces I wanted to use so I pulled them all together and painted them with metallic paints then set about adding rust and verdigris corrosion to some of the pieces. Other pieces just got dirtied up by rubbing black ink over them.  I liked that look so much I went back and rubbed ink on some of the embossed bits as well.

And this is how it all came together....


Hope you've enjoyed this look into the process...
have a wonderful day friends!


Supplies:


DecoArt - Modeling Paste, Crackle Paste, Vintage Effect Wash - Grey, Blue, Americana Lamp Black Acrylic Paint

Emerald Creek - The Altered Page Baked Texture - Chunky Rust Embossing Powder

Imagine - Verdigris Embossing Powder, VersaFine Clair - Nocturne

Other - Cardboard Panel, Vintage Ephemera, Brads (mini & vintage)

Friday, September 11, 2020

Sparkle Blends Spooky Skyline Challenge!

 Hello my inky friends!! I am so excited to share a new challenge with you....  The Sparkle Blends Spooky Skyline Challenge! It's something new on the Sparkle Blends Fan Club on FB - yes you have to join but it's free and full of fun inspirational posts using Sparkle Blends Sequins.  


Let this Spooky Mood Board inspire you to create your own Spooky Skyline creation. 

The Rules are Simple:

1) Create a NEW Card, Layout or other Paper Crafted project featuring either a cool Sky Technique, or a Spooky Skyline. (No reposts, please.)

2) Your project MUST include Sparkle Blends, either in a shaker or as embellishment (you may use retired or freebie blends).

3) Post a photo of your card in this Album any time between now & September 30th, 2020.

4) Up to THREE entries per person.

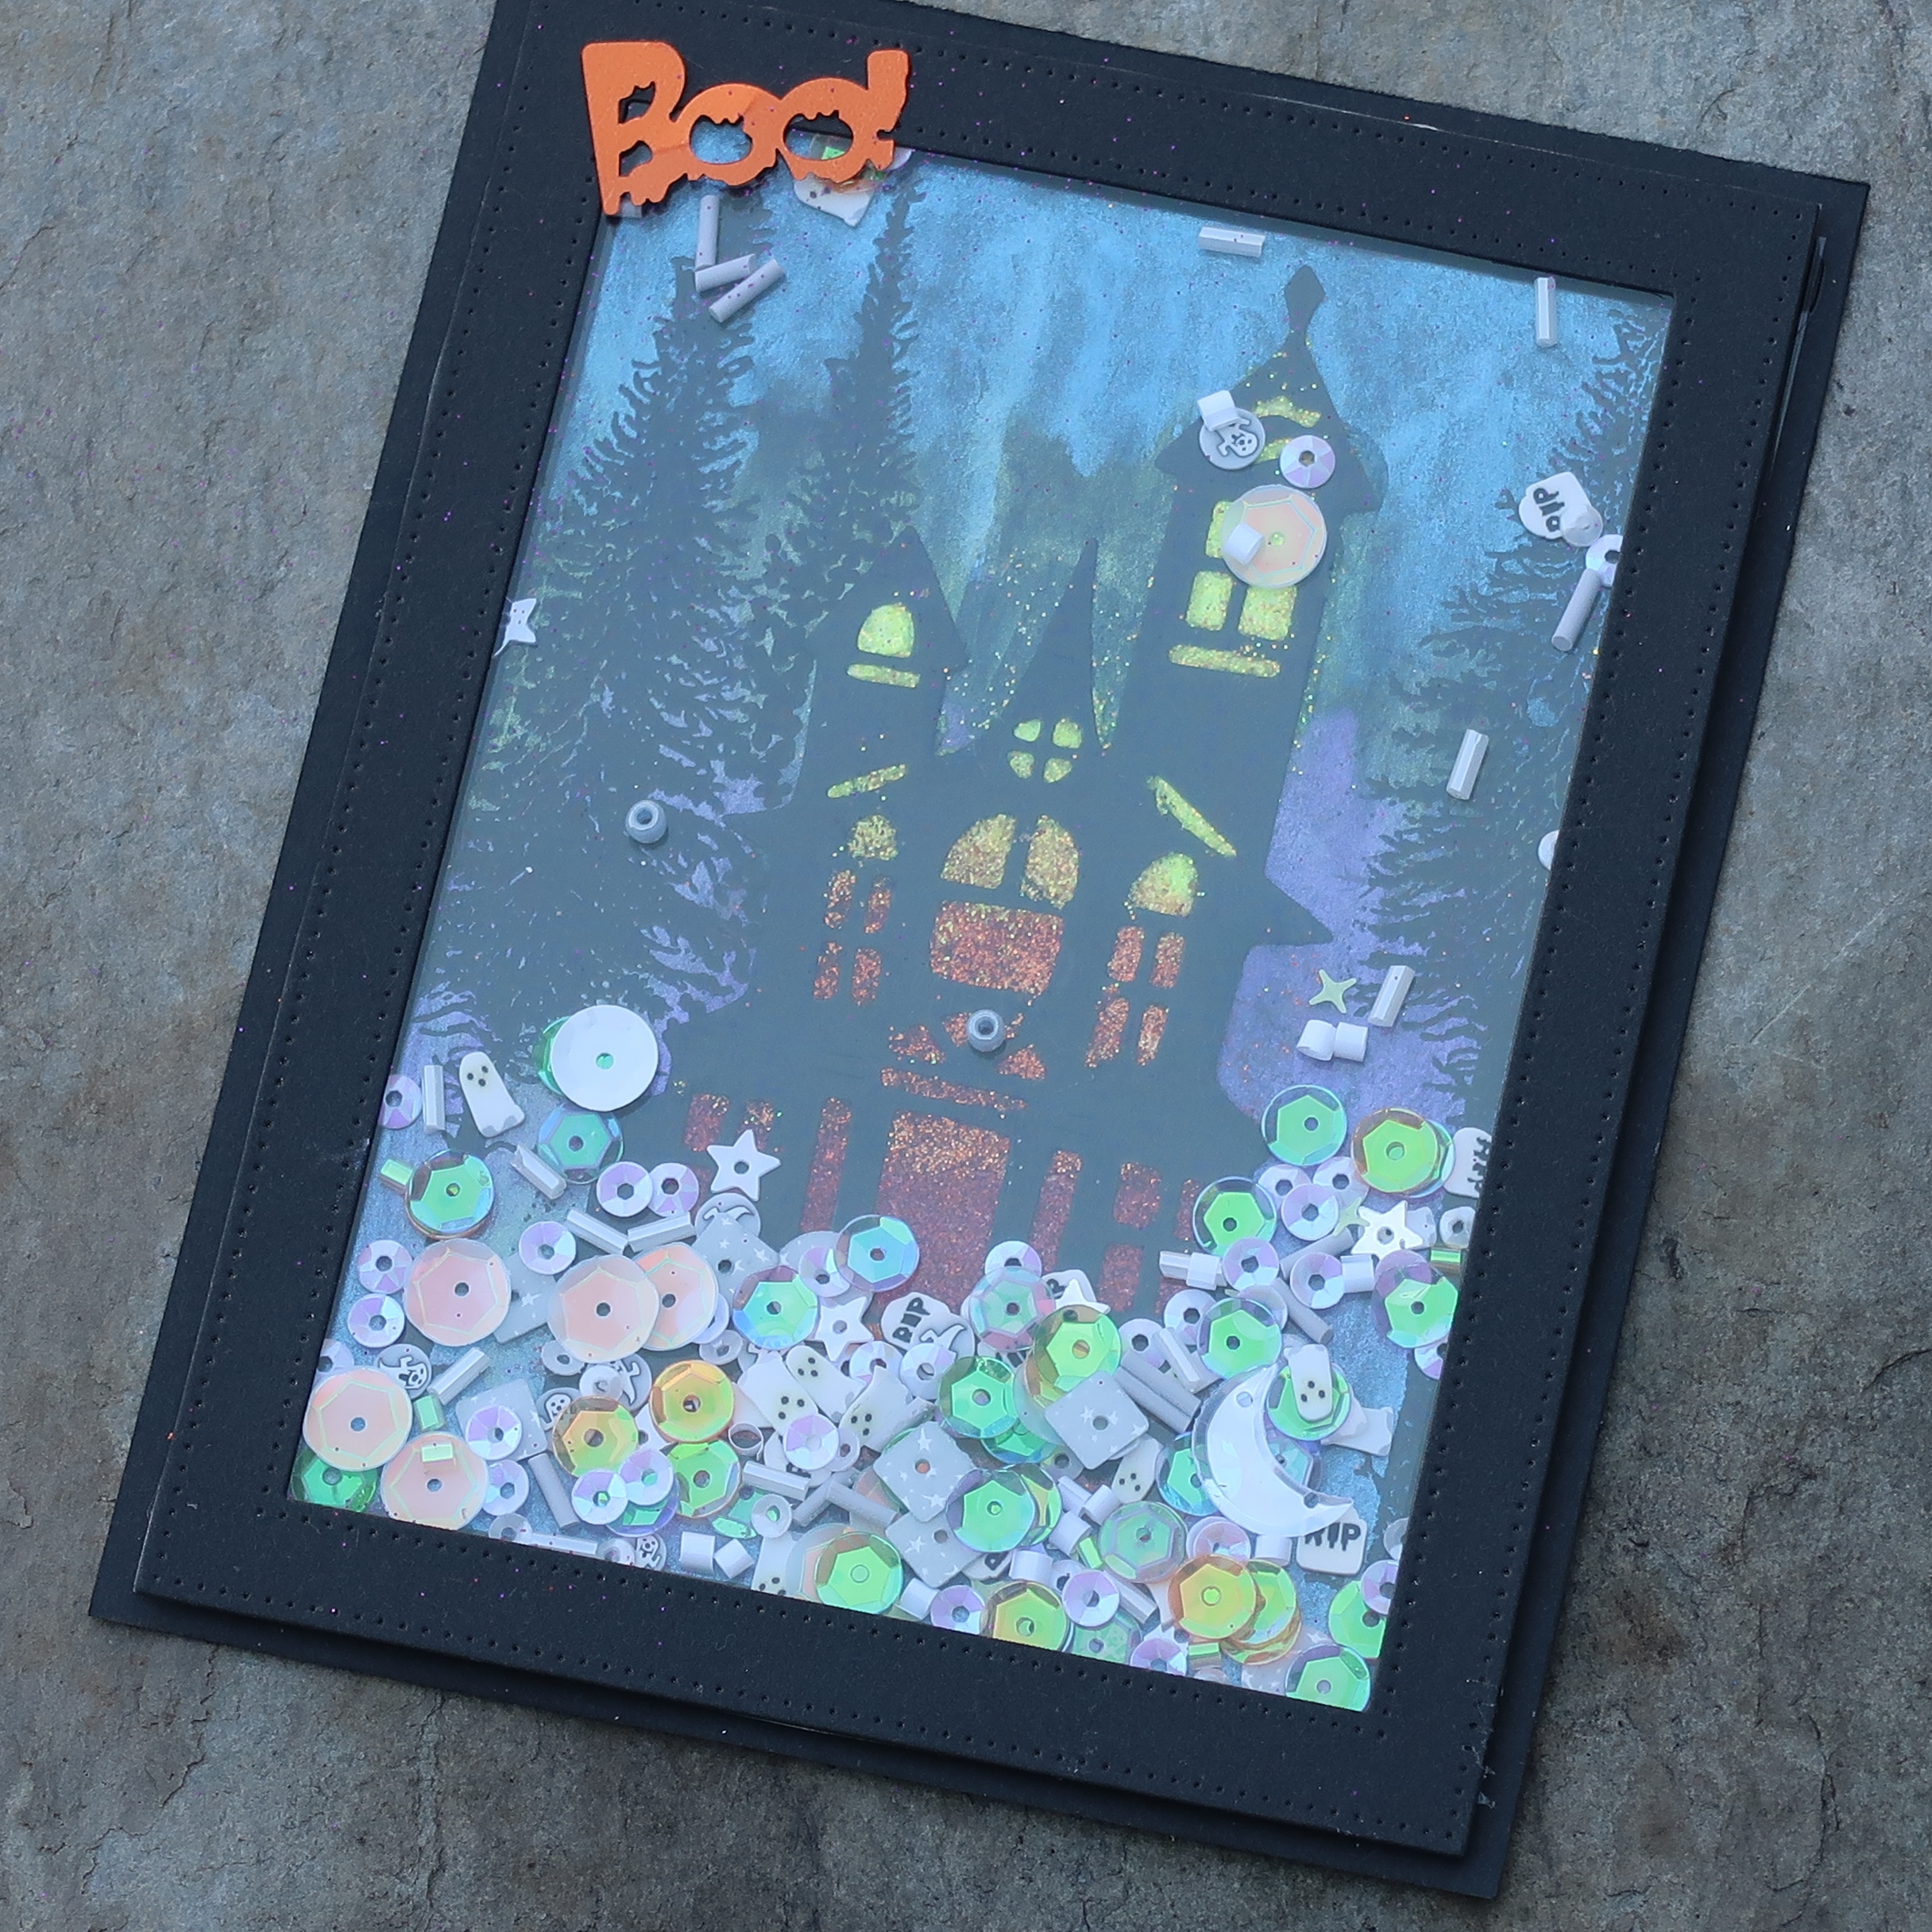
Here is my first creation to help get you in the spooky mood...


OMGosh this was so much fun to make!!  


I started off with this background which I made using my Paul Rubens Glitter Watercolor Paints . I then stamped the Lavinia Fairy Fir Tree on the card using VersaMark ink and embossed with Black MBoss embossing powder.


I die cut the Haunted House then made a backer for it to which I covered with Bumble Bee, Currant and Shiny Penny Fairy Powder glitter. The diecut was adhered over the glittered backing then adhered to the embossed panel. This panel was adhered to a black card base.


I created the shaker element using a frame die from MFT, acetate and filled it with the Spectral sequins mix which was the also adhered to the card.

I hope you've enjoyed my spooky creation for you and it inspires you to create your own Sparkle Blends Spooky Skyline!  I'll be back later in the month with more inspiration for this fun challenge.


Sparkle Blends Spooky Skyline Challenge!

Supplies:


Sparkle Blends - Spectral Mix

Paul Rubens Glitter Watercolor Paints

Imagine - VersaMark, Black MBoss embossing powder

Fairy Hugs - Fairy Powder - Currant, Shiny Penny, Bumble Bee glitter

MFT - Rectangle Frame Die

Lavinia Stamps - Fairy Fir Tree

Gina Marie - Haunted House

Acetate, Cardstock, Foam Tape

Thursday, September 10, 2020

Sweet Vineyard Rose Filled Shadowbox

 Hello my friends...did you know Rinea released a brand new foiled paper variety pack just in time for fall?  Well they did and it's called Vineyard! It's so very beautiful don't you think? It is comprised of Melot, Violet and Ruby in both the shiny variety and Starstruck.


And here is my creation....


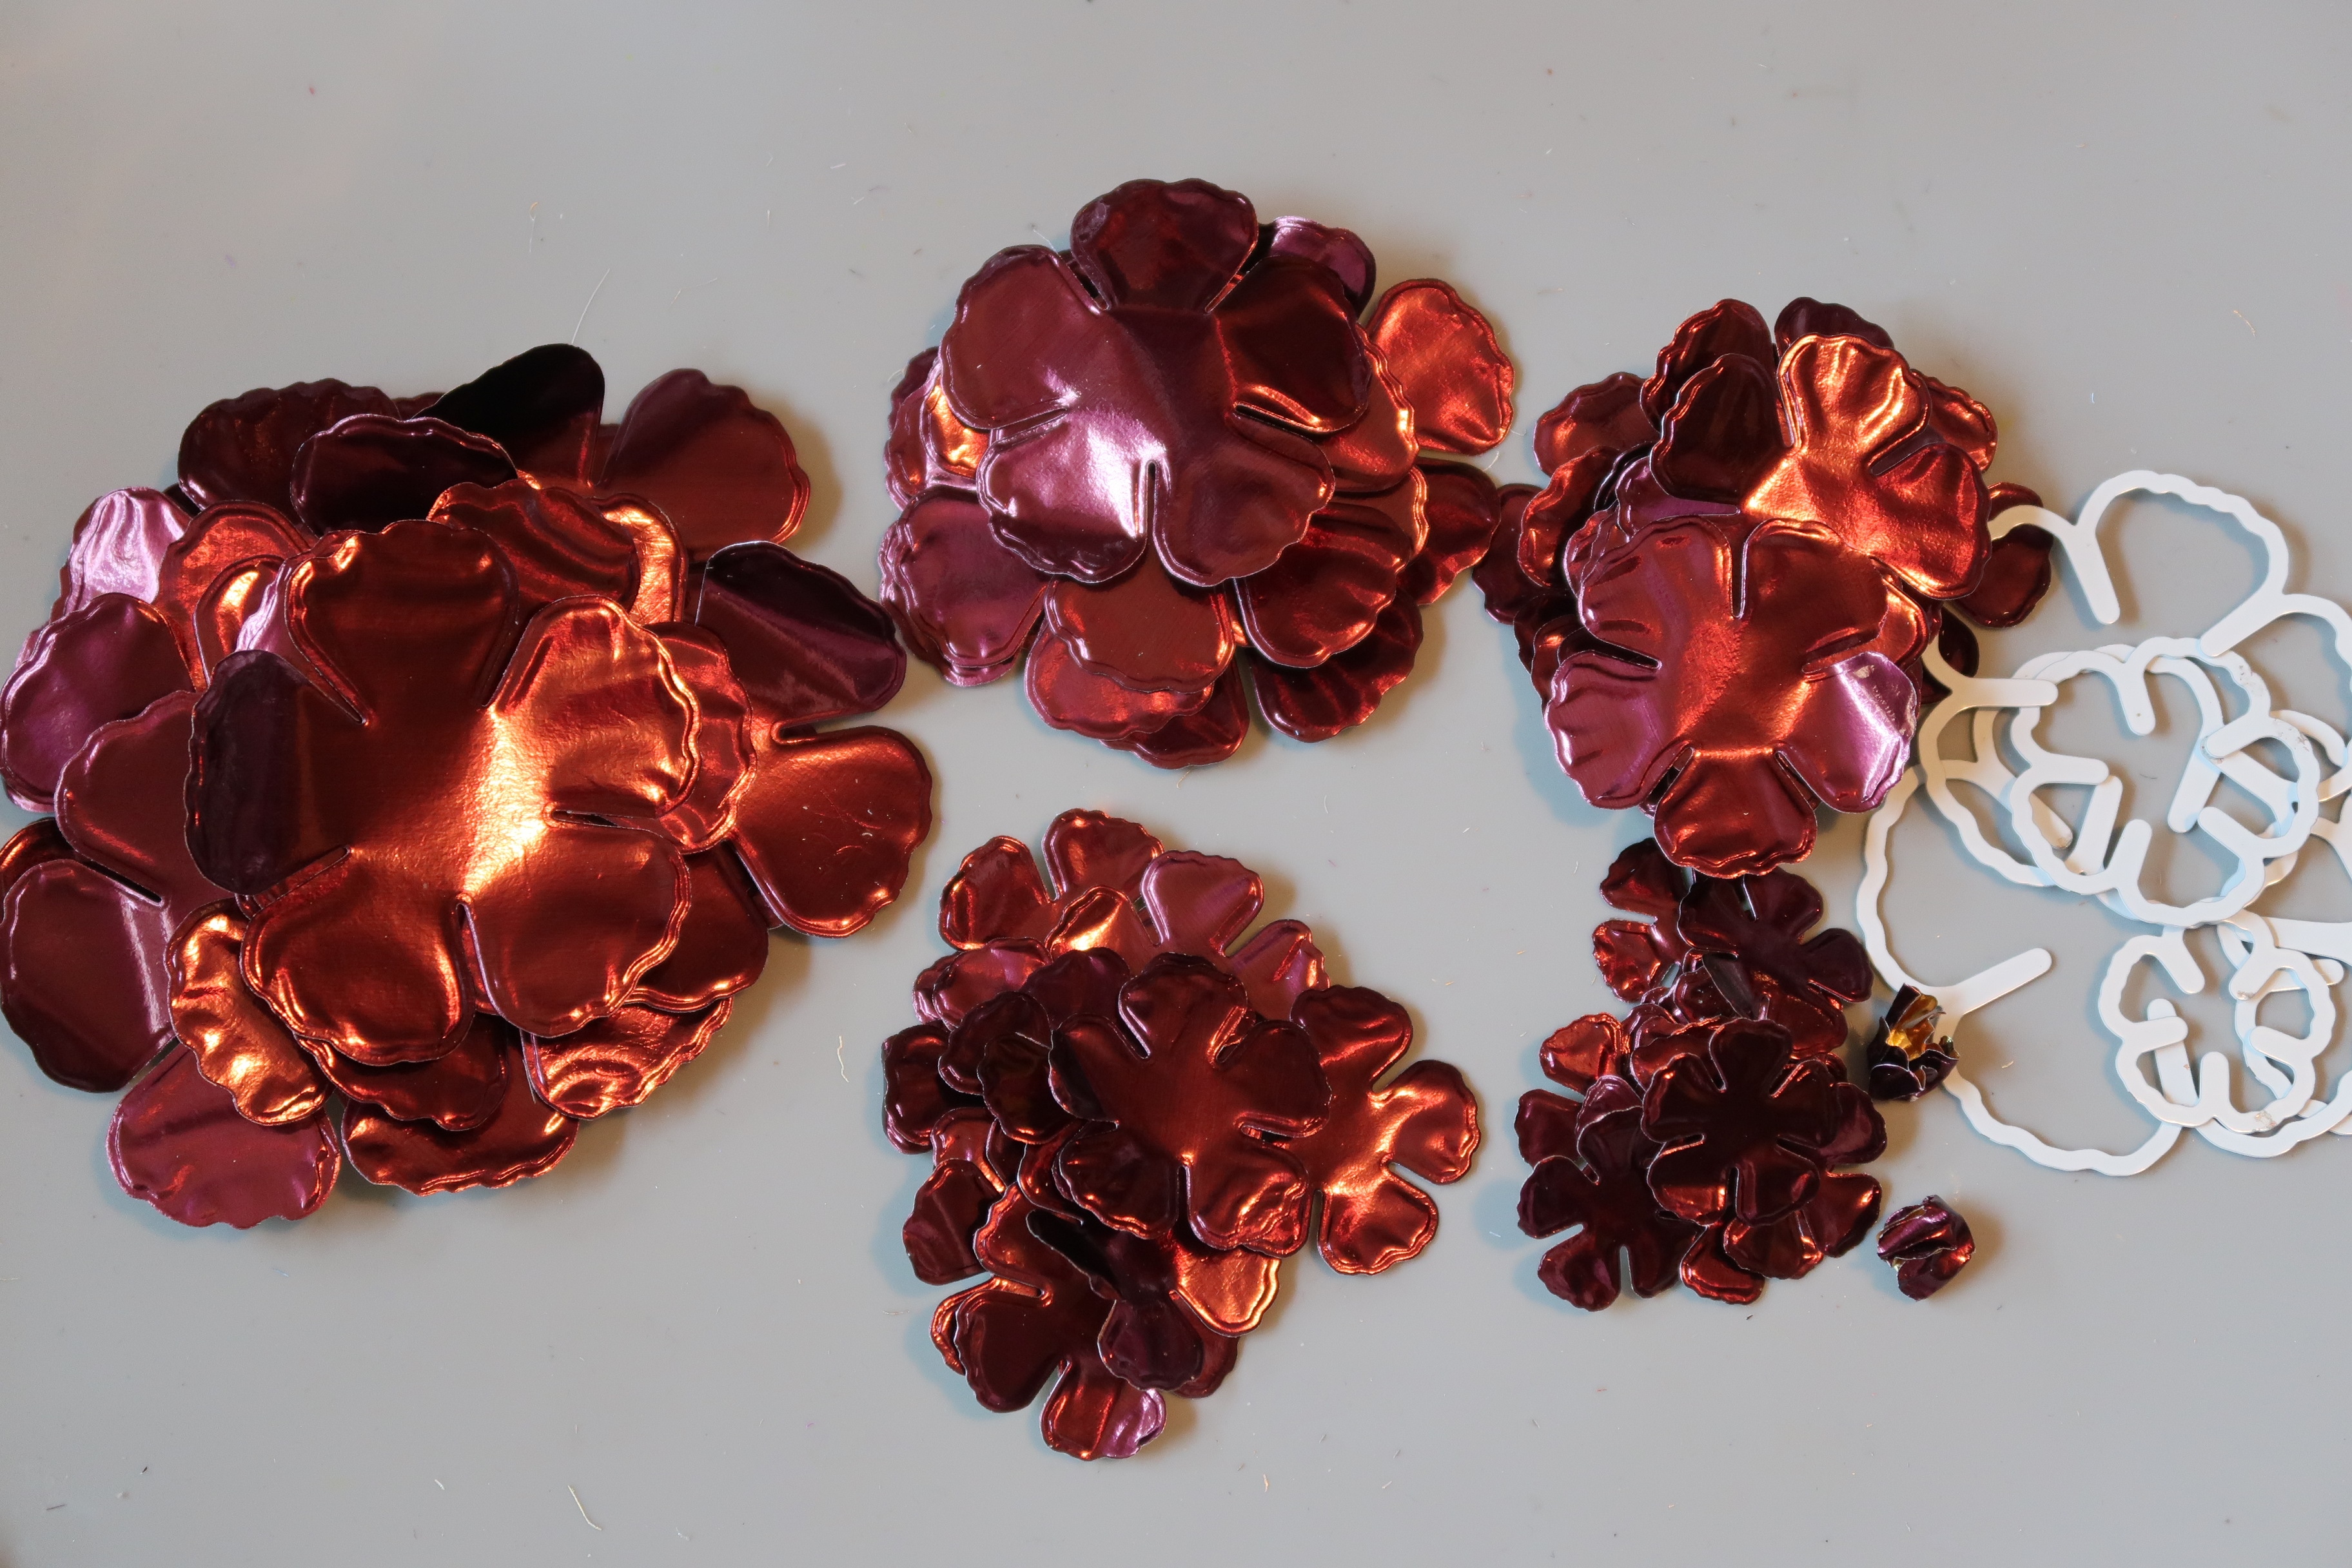
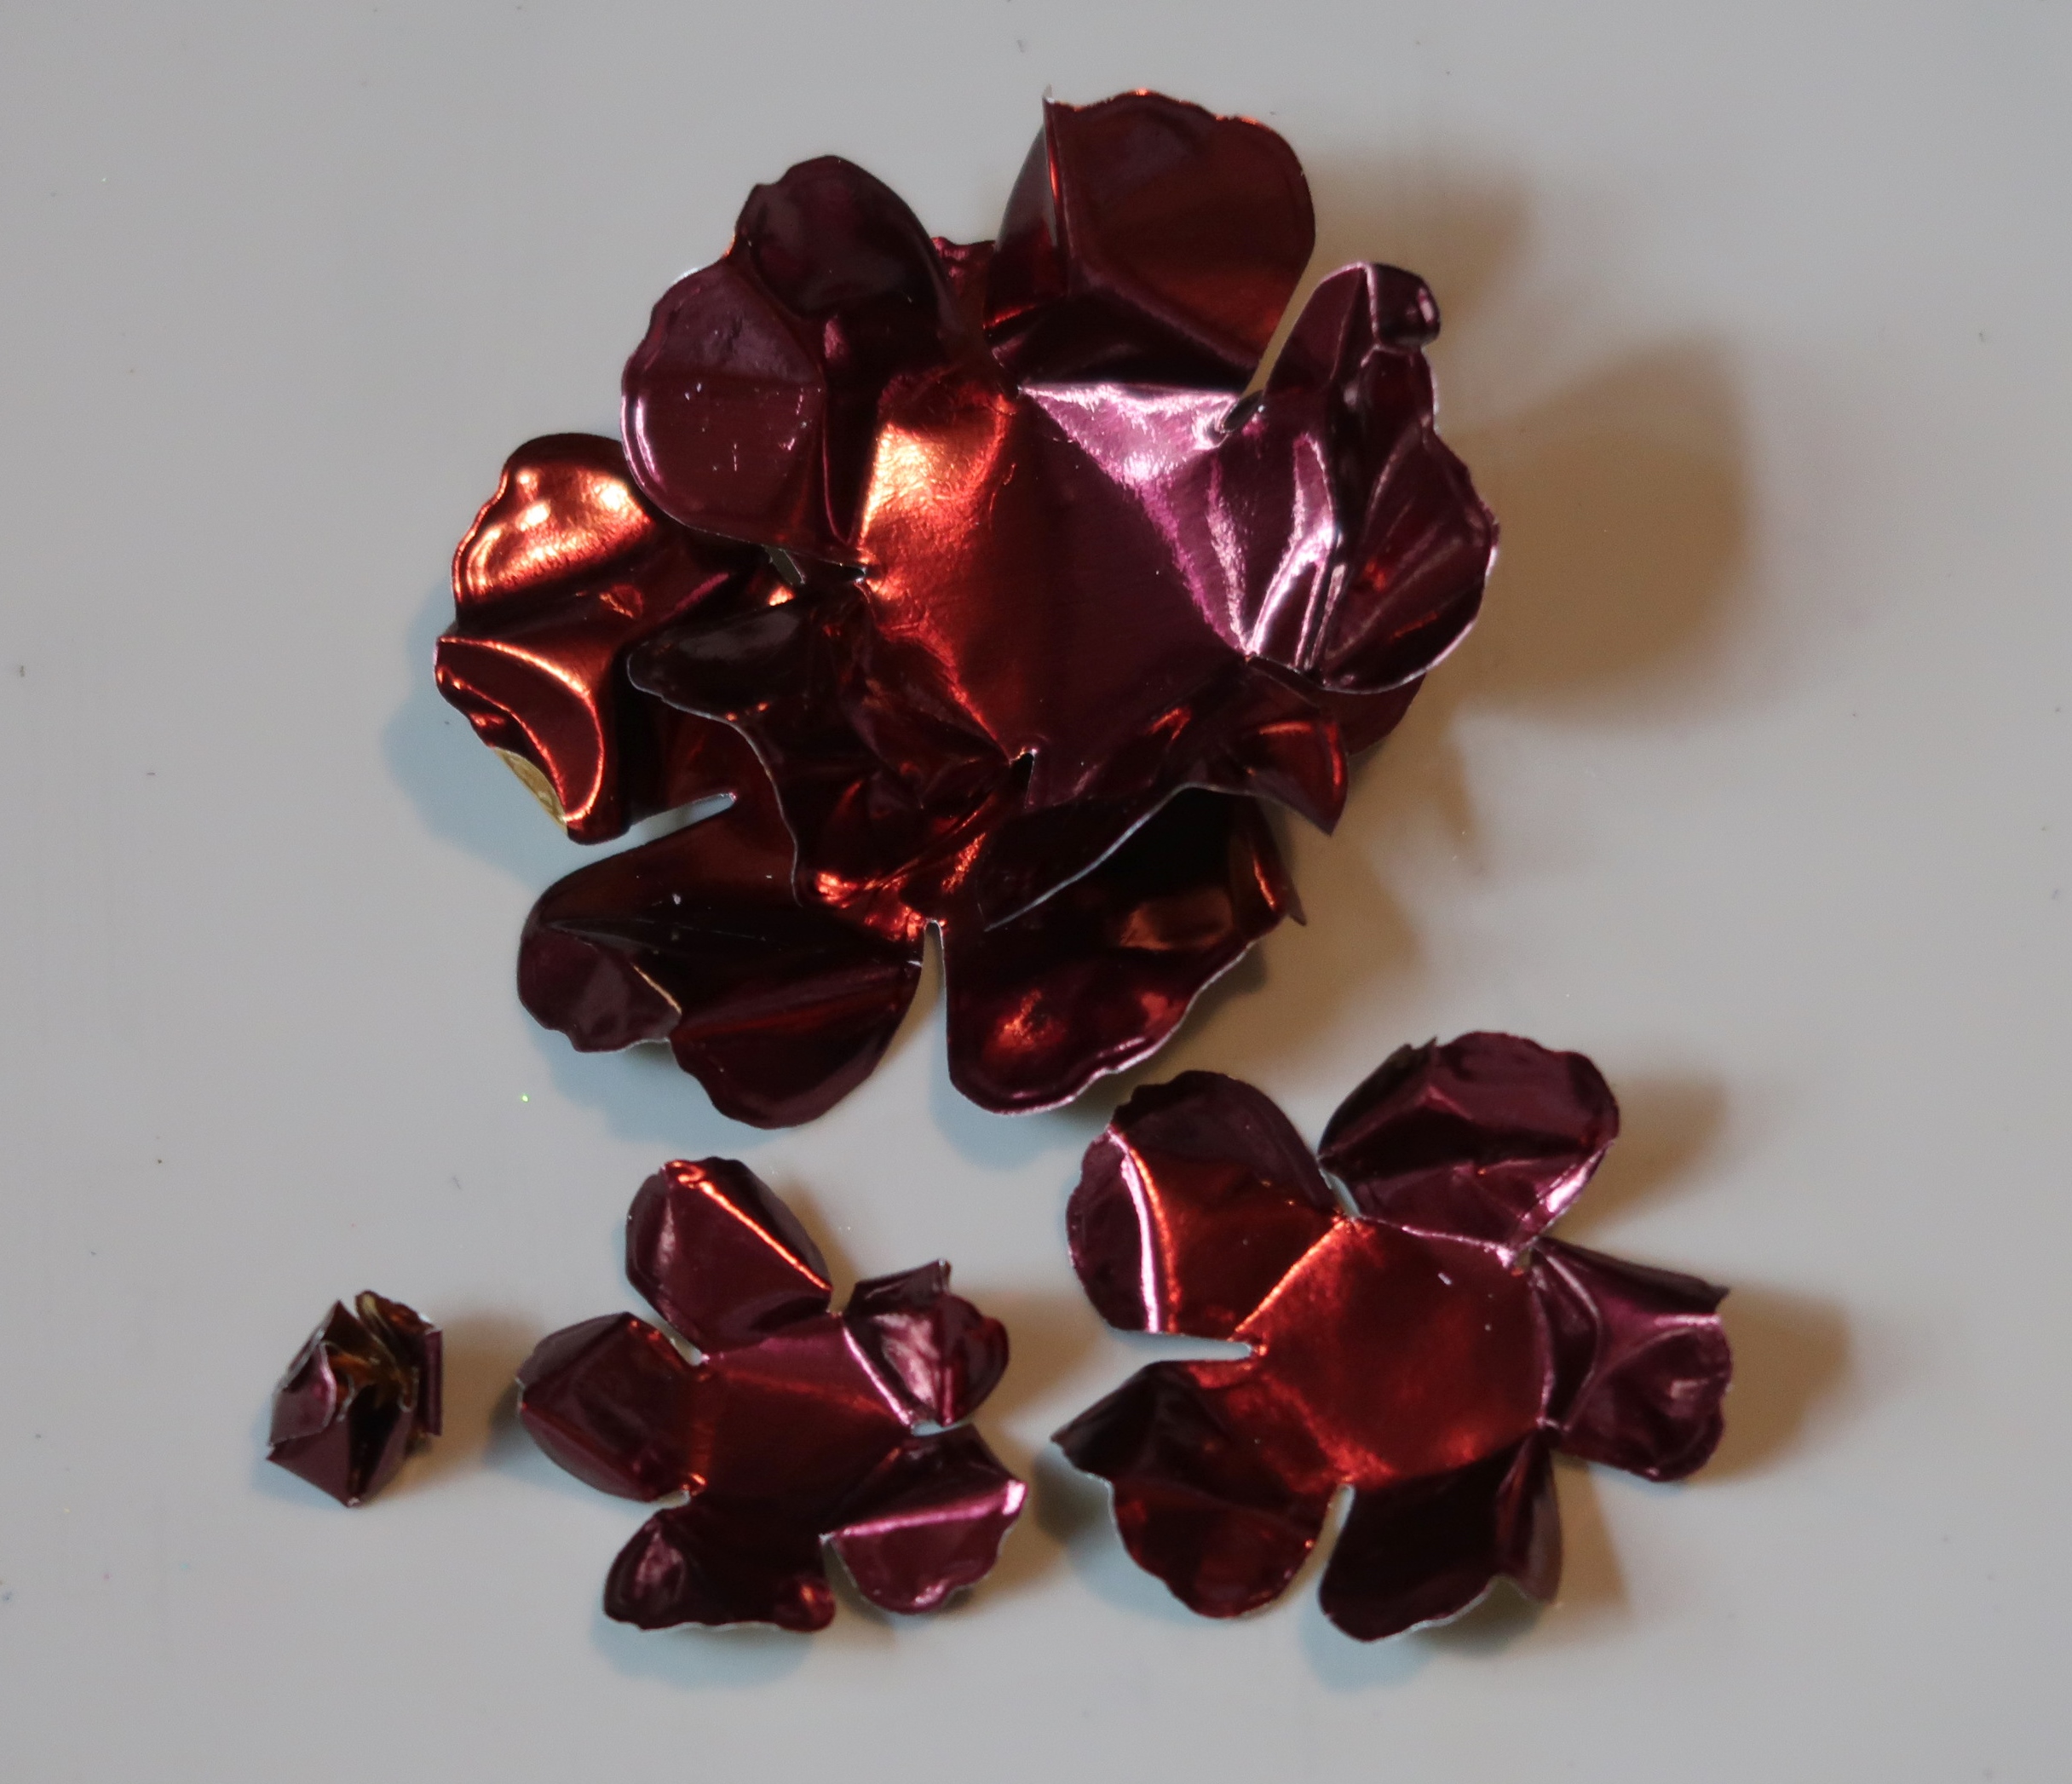
I am simply in love with these roses. I die-cut all of the foiled papers using Lady E's Flowers 001. If you haven't seen her floral dies or what she creates with them you simply MUST check them out. She uses them with Foamiran foam but they work just as well with the foiled papers! The look is simply amazing once assembled.  Here are few of the "in process" photos...


Cut...


Shape...


Assemble!
I used two of the largest sets of petals and one each of the remaining 4 sizes.
Don't they just look simply amazing?


I love them in all of the different colors.


Supplies:


Lady E Designs - Flower 001

Shadow Box, Beacon 3in1 Adhesive


Wednesday, September 9, 2020

Luna's Adventure!


Welcome Friends!!

Today I wanted to share my latest Fairy Hugs creation...


Today Luna and her friend are traveling through the deep blue.

Here's how this card was created.

Directions:

1. I began by trimming a piece of white cardstock 3.5"x 8.5".

2. Mask off a 2" strip the length of the panel approximately .5" from the top using Purple Masking Tape.

3. Stamp the various coral life forms and tiny fish using peg stamps from Rubber Stamp Tapestry and VersaMagic inks. 

4. Use a Sponge Dauber to add a bit of blue to the ocean.

5. Carefully remove the Purple Masking Tape.

6. Affix a piece of 1/4" Tear It Tape above and below the ocean scene. Remove the backing paper and sprinkle OceanLapis and Arctic Fairy Powder to each piece of tape.


7. Stamp Luna twice on a piece of glossy paper using black ink.

8. Fussy cut each whale and affix to the panel using foam tape.

9. Attach the panel to a 4"x 9" slimline card base.

Hope you've enjoyed Luna's adventure....
Have a fairy fine day friends.

Fairy Hugs Store Supplies:


Fairy Powder - LapisOcean & Arctic


Be sure to stop by our Fairy Hugs Facebook Group 


Friday, September 4, 2020

Fairy Hugs Design Team!!!


So excited to announce I am on the brand new inaugural Design Team for Fairy Hugs!! At the moment you will find Fairy-Scapes - lovely backgrounds to help get you started on all your projects, Fairy Hugs Stamps - clear stamps with lots more to come soon and ahhhh Fairy Powder - the softest, lovely glitter you have ever seen! You all know how much I LOVE glitter - well this stuff is awesome. I can't wait till you see the beautiful colors they have.  I hope you pop on over and take a look.

I would also like to share my first creation ....


And here's a bit about how it was made...


Believe it or not the base for the background was a baby wipe that I used to clean up my craft sheet. I had been playing with some pigment powders and I needed to clean off my desk and this was the results. I glued it down to a cardstock panel then added some sparkle using some of the lovely Fairy Powder in Ocean, Parakeet and Arctic.

I then stamped and stenciled sea weed, fish and bubbles over the background.


Next I stamped Oscar onto a piece of transparency with Jet Black StazOn Ink.


I flipped the image over and colored in the various accent areas with a white paint pen.


I trimmed away the excess material then adhered him to the card panel. Next I stamped, embossed and colored the Oyster and added it to the card with pop-dots. This panel was then glued down to a teal card base.


I hope Oscar inspires you and entices you to see more!

Be sure to check out the official Design Team Announcement on the Fairy Hugs Blog to see all of the talented members of our new little team, stop by the Fairy Hugs Store and Fairy Hugs Store Facebook Page.  See you there!

Fairy Hugs  Stamps - Oscar, Oyster 

Fairy Powder - Ocean, Parakeet, Arctic