Thursday, August 13, 2015

Daisies, ATC Swap & More...

Happy Day!!

Today I have a watercolor card for your approval...


The daisy & bee were stamped on watercolor paper using Memento Dye Ink.  I then started adding layers of watercolor paint on both the flower and bee.  I did a light wash of blue for the background and then applied a layer of Clear Pico Embellisher to the bee wings. To cut out the wave side of the card I cut around the lone petal and lifted it above the die before cutting to give that fun look.  I then cut the card blank separately.  The beeeeeeee happy sentiment was stamped then hand cut.

Supplies: 

Club Scrap.com - Stamps & paper
IMAGINE Crafts featuring Tsukineko - Memento Dye Ink, irRESISTible Pico Embellisher
Watercolor Paper 
Watercolor Paints
Wave Die 


***************************************

ATC Swap Update

Just wanted to remind all the ATC swappers out there - the swap is due this coming weekend...if you're not able to play, please let me know.  If your ATC's are in the mail system - jlmk and I'll wait for them.  I've heard from several people that they have been mailed - as soon as they arrive I'll let you know.

2 packages arrived today - Karen B & JB W. your ATC's arrived safe and sound :)

*************************************

The new fall issue of Rubber Stamp Madness is out....


Fun fun fun!

Hope you all have a wonderful day!!


Wednesday, August 12, 2015

Pan Pastel Feathers

Today I decided to dig out my Pan Pastels and play a little bit...  I thought they would compliment this lovely peacock feather brilliantly.  What do you think?


On the first card I stamped and embossed the feather with white ep.  I then applied lighter colors of the Pan Pastels over the feather and background.  I did use a bit darker PP in the center of the feather to make it pop a bit.


On my second card I stamped the feathers with Teal Zeal Memento Dye Ink. I added a few feathers to the background using Sky Blue ink.  I then applied irRESISTible Pico Embellishers - Gold, Purple and Black over various parts of the feathers.  Once that was dry I went over the feathers and background with various colors of Pan Pastels.

Supplies:

Just For Fun Rubber Stamps - All images & sentiments.
IMAGINE Crafts featuring Tsukineko - Memento Dye Inks, VersaMark, White Embossing Powders, irRESISTible Pico Embellishers, Sponge Daubers
Pan Pastels
ClubScrap.com - Cardstock

Hope you're all having a lovely week.  I'm not so much...I've been having a though time of it lately.  My youngest ds moved out into his own place on the 1st which I know is a good thing - it's just trying to convince my heart is kind of hard. We've always been close and I've just been missing him so much...talking to him in the evenings, sharing I-funnies, and just having him around.   How do you do it?  I've been trying to fill my time with other things but every once in a while I'm just sitting doing nothing and wishing he was there.  I'm sure after a while I'll get used to it but for now... well, let's just say you should buy stock in Puffs.

Tuesday, August 11, 2015

Girl Power!

Happy Tuesday...miss me yesterday?  I got really wrapped up making a project for later in the month that I totally forgot to post!  Today I have a fun card for you made with a stamp set from Unity - Girl Power.  The card also has a couple fun and easy watercolor techniques...


GIRL POWER!!


Let's make the card... I stamped the super woman on plain old cardstock and Memento dye ink.  I then began coloring the image using various colors of Memento dye ink and my waterbrush.  To do so I pounced a little bit of each color of ink I wanted to use on a stamp block.  I used the waterbrush to pick up each color and paint it onto the image where desired.


Here's what she looked like after she was finished...


Next I set out to make the background.  For this technique I pounced the desired colors onto a large stamp block.


Then spritzed it with water and smooshed it onto a piece of white cardstock.


And this is how it turned out...  I love this technique, you never quite know what the results will be but it's beautiful every time!


So then I stamped "girl POWER" over the entire panel with Grey Flannel Memento ink.


Next I trimmed my wonderful super woman from the cardstock and mounted it on a piece of Vertigo Film...added a few details with Tuxedo Black irRESISTible Pico Embellisher, mounted it on the card panel and Bob's your Uncle - it's done!

Supplies:

IMAGINE Crafts featuring Tsukineko - Memento Dye Inks, Pico Embellisher, Vertigo Film, Delicata Golden Glitz Ink (for her belt, head band and arm bands)

White Cardstock - Georgia Pacific
Colored Cardstock - Club Scrap


Friday, August 7, 2015

Serendipity...

Today I had a bit of running around to do but I was able to make a card for the August Sketch Challenge at Club Scrap using this month's new kit - Woven Strands.

This is the sketch...

http://clubscrap.com/wp-content/uploads/rtMedia/users/137/2015/08/cs-card-sketch-0815-450x600.jpg

and here's what I came up with....


Supplies:

Club Scrap - Paper, stamps, ribbon, gems  - Woven Strands Kit
IMAGINE Crafts featuring Tsukineko - VersaMark, Gold Embossing Powder, Memento Tuxedo Black ink
Prima - Assorted Flowers

Fun fun...
I think I make one or two more cards using this sketch, I love the finished look of it.

What have you got fun going on this weekend?
I am going to be working on some projects, cards and ATC's.

Hope you all have a wonderful time of it!

Thursday, August 6, 2015

Summer Fun....

time for some sun bathing don't ya think?


This card was made by stamping the images and coloring with my Inktense watercolor pencils.


My second card was made by stamping the images onto a variety of pattern papers!

Stamp Used: Just For Fun Rubber Stamps Vintage Bathing Suits

Hope you're having a wonderful summer day....
sadly some of the schools in our area started back today!!
It sure was a quick summer for them.

Wednesday, August 5, 2015

Rubber Cement, Stencils & Brusho

Today I wanted to share one final Brusho post for a bit...  Just as the title says it includes rubber cement, stencils and Brusho Colour Crystals.


I started off by taping a stencil to my watercolor paper. 


I applied the rubber cement to a Squeegee and carefully swiped it across the stencil in one smooth stroke.  Remove & wash the squeegee and stencil immediately with hot soapy water to remove the rubber cement.


After the rubber cement dries, apply desired color(s) of the Brusho Colour Crystals and let that dry.  Rub away the glue to reveal the nifty design!


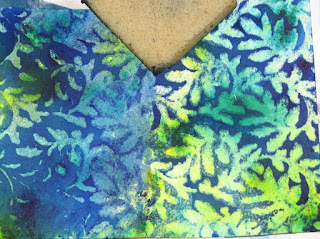
For the above example the watercolor paper was initially colored with Lime and Sea Green Brusho.  It was then covered with a layer of RC and Cobalt Blue Brusho was added over top.


The above red example was made with an initial layer of Rose Red with Crimson over top.


This example wasn't made with a stencil...
Can you guess what was used to make the design???

You'll never believe it - A Feather!!
I dipped the feather into the RC bottle then just started dragging it back and forth across the paper.  The colors are Turquoise and Cobalt Blue I LOVE how it turned out.  

So there you go...
More fun with Brusho & RC.

Tuesday, August 4, 2015

Brusho Colored Faux Marble Technique

Yesterday I shared my Faux Marble Technique using Brusho Colour Crystals, today I wanted to share a variation on that technique - Colored Faux Marble.   A few people asked if this would work with masking fluid and it does but it will give it a slightly different look.  The rubber cement is thicker so the lines created with it will be larger in size.  You will get much finer lines when using masking fluid which is also a cool look.    I used rubber cement because it's far cheaper to play around with and is more readily available in a wide variety of stores.

Colored Faux Marble Technique


1. To begin color your cardstock with one or more lighter colors of Brusho Colour Crystals.  I used Lime Green and Yellow for this first example.  

2. Let the Brusho dry completely.


3. Drizzle the rubber cement (or masking fluid) over the entire paper and let dry.  


This is just a close up of the R.C.


4. Once dry sprinkle on one or more colors of Brusho Colour Crystals over the cardstock.  I used Moss Green and Emerald Green.  Spritz with water and let it do it's thing.  Let it dry completely - and yes, you can speed the drying with a heat tool.  It won't hurt the r.c.


5. Rub off the rubber cement to reveal the wicked design!  


This example was made with a base of Rose Red and Purple and Black over top.


To really kick this technique up a notch, flick metallic paint over the finished cardstock.  It really adds quite a dramatic effect!  This example was created with a Yellow background with Dark Brown and Sandstone over top.  Gold paint was then flicked over top.


This final example was created with Ost. Blue base and Grey, Turquoise, Ultra Marine and Prussian Blue over top.  Silver metallic paint was then flicked over top.


Monday, August 3, 2015

Brusho Faux Marble Technique

I'm sure you've heard me speak about Brusho Colour Crystals - a wicked fun product from ColourCraft - an amazing pigment crystal that reacts with water to create amazing watercolor backgrounds.   Well, I've been experimenting and I've come up with what is to me a new technique and hopefully it is for you as well!

Brusho Faux Marble Technique

This is a riff on a resist technique using one of my favorite glues - Rubber Cement!  This stuff is amazing, you can do so much with it besides just glue things together.  Today I am using it's unique properties to create a lovely marble effect on watercolor paper.  This technique will work with varying degrees of success on plain cardstock but the absorbent nature of watercolor paper makes it ideal for clean crisp results.

Let's begin...

NOTE: It is very important that each step of this technique be allowed to dry completely prior to moving on to the next step.  It may ruin your results if it's not completely dry.


1. Drizzle rubber cement over the watercolor paper...the more the better!  Swirl it, thick lines, thin lines, fast or slow, just get lots of the glue on the paper.    

2. Let the rubber cement dry completely.


3. Spritz the now dry paper with water and sprinkle on the Brusho Colour Crystals.  If desired, add more water and blend or spread it around as desired.  

Alternative: You could of course sprinkle on the BCC first then spritz with water.  It works either way.

4. Let the Brusho dry completely.


5. After the paper has dried, use an Adhesive Eraser ,and begin gently rubbing off the rubber cement.  It will pill up on the eraser, just pluck it off and continue to remove the glue.  You can see in the photo above that the left side has been cleaned off while the right side remains grungy looking where the rubber cement is still on the paper.

And here's how it turned out....


And a few more examples...


A-MAZE-ING!!!!

And it doesn't just stop there.  I've got a few variations that I'll be sharing with you in the next couple days that are equally as fun.  I can't wait - the results just keep gettin' better and better!  I hope you give it a try and if you do, please feel free to link back here so we can see your creations.  I'd also appreciate it if you share your results that you let folks know you saw it here first.

Thanks and have an inky day!

ATC Detail Info Sent

Hello all my Ink Stained Friends!  I just wanted to let the ATC players know the final details + shipping information went out today.  I had it set to send out over the weekend but it was still in my draft folder?!?!  Soooo, it just went out.  If you didn't get it, please let me know and I'll re-send.

Otherwise, just about 2 weeks left!!!

Can't wait to see those little gems start rolling in!


Sunday, August 2, 2015

National Coloring Book Day!

Did you know that today is 
and
National Friend Day! 


Well it is so I thought it might be fun to share some links to a few adult versions of coloring pages/sheets!  Maybe we can pretend we're coloring together!

Dover Publications  - .These folks are the ones who started National Coloring Book Day and they have tons on their site.  If you sign up for their free newsletters you can get lots of beautiful free samples to print and color.

Hello Kids.com has some really beautiful graphic pages.

Adult Coloring Therapy Pinterest Board - Lots of wicked cool page links from here.

What Mommy Does - they have links to some really neat pages.

Color Pages for Mom - hundreds of different coloring sheets on all different subjects - some subjects are very easy but they do have several difficult designs as well.

Have fun coloring!