Tomorrow is the Club Scrap's November Fire & Ice Blog Hop!
If you've not seen this months kit you're going to love it...
It's got a bit of Asian flair to it so I really wanted to run with that theme and create something special. I'm not going to show you my project just yet ~ you'll have to wait till tomorrow for that but it is an ambitious one that incorporates the Origami Kusudama Flower.
Today I wanted to share step by step instructions to create one of these flowers....
Normally origami pieces are made with very thin colorful papers but I used the Club Scrap cardstock which if you've ever seen any of their kits...the paper can be quite thick. I lucked out ~ some of the paper in the kit was printed on glossy cardstock so it was a bit more manageable but I did fold quite a bit of the heavy stuff. Needless to say my fingers are sore & tired but I think the finished project was well worth it.
To begin start with a 4x4 square of paper.
Fold it in half to form a triangle.
Fold the right corner so it's tip touches the existing triangle tip.
Crease the folded line.
Fold the left corner up towards the center as you did with the right side.
Crease that fold.
Take the tip of the right side small triangle and fold it back onto it's self so the center line sits on the folded crease. Crease this new fold.
Repeat the previous step on the left side and crease.
Lift the right side fold and open it up,
now flatten it out so you have a kite shape.
Crease each of the lines again.
Repeat on the left side.
Your paper should now look like you have 3 kites lined up side by side.
Fold the tip of the right hand kite over and crease.
Fold the tip of the left kite over and crease.
Now following the original crease line, fold the right hand kite in half.
Re-crease this fold.
Repeat on the left side.
Apply glue to the right hand flap as shown.
Bring the two sides together,
And clip to hold both sides together until dry.
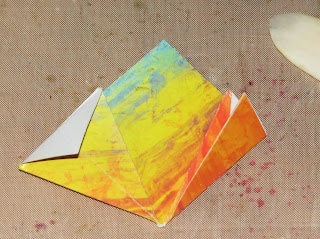
Once it's dry you can remove the clip and pop the flower section open.
You now have the start of a flower.
Repeat the above steps to create 4, 5 or 6 petals.
Once you've got all of your petals assembled you can glue them together.
I'm making a 5 petal flower for this example.
And here's the completed flower.
Front view...
Side view...
Are you interested in seeing the rest of it?
You'll have to check back in tomorrow to see what I did with this little beauty!


Roni, this is beautiful!!! I can understand why your fingers would get tired! I'll have to look for some "thin" paper & give this a try!
ReplyDelete