
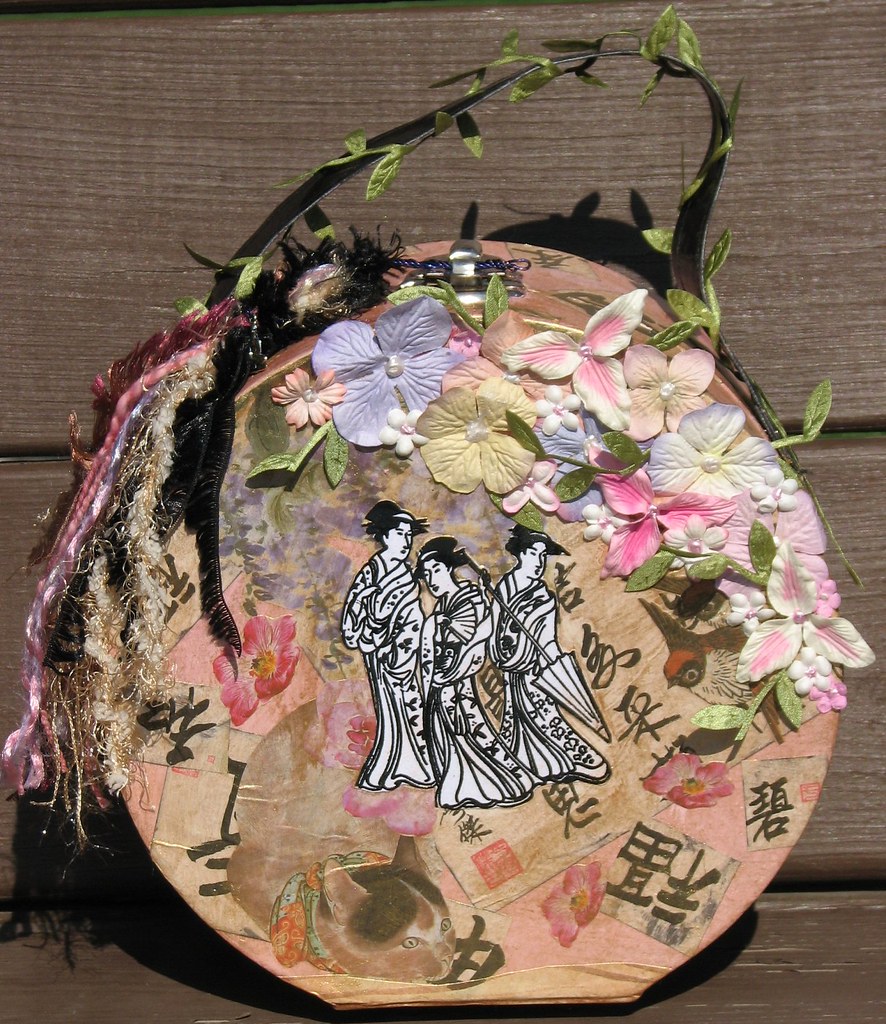
So, today I wanted to share an altered paper mache purse that I made for the Hannah Grey Design Team! Not a lot of ink or rubber stamping but still a fun little altered project! Maybe it will stir some creative juices to cover that paper mache you've had in your stash for ages ;) You know who you are....admit it...we all have some stashed away somewhere - LOL!!
A bit about the Italian Decoupage Paper I used on this project.... This stuff is amazing!! The sheet is 16 x 26 3/4" and has many images on each sheet. I had enough text & images to cover this entire purse, make a card and still have quite a bit left over! It is a light weight paper so no heavy duty cutting involved, has a medium gloss and is very easy to work with. Normally I don't like cutting things out to decoupage but this was a breeze. It comes in 10 different designs filled with wonderful vintage images.
Supplies:
Paper Mache Purse - Hobby Lobby
Ranger Shell Pink Adirondack Acrylic Dabber
Italian Decoupage Paper - Asian Calligraphy, Cats & Tea
Golden Fluid Acrylics - Iridescent Gold Deep
Leaf Ribbon - Autumn Moss
Buddha - Cracker Jack Charms
Fibers - Unknown
Perfect Paper Adhesive or Mod Podge
Embossing Powder & Ink - Ranger
3 Oriental Women - Viva Las Vegas
Prima Flowers
Liquid Pearls - Ranger
Jet Black Archival Ink - Ranger
 Instructions:
1. Paint entire purse with Shell Pink paint. Let Dry
2. While paint is drying, cut several images/text from the Italian Decoupage Paper. Edge each piece with Jet Black Archival Ink (you need to use this ink as it will not run when the adhesive is applied over top.)
3. Once paint is dry, apply cut out images/text to all sides of the purse using your favorite liquid adhesive. I like to use Perfect Paper Adhesive or Mod Podge. Usually whatever is at hand when I begin ;) Let Dry Completely!!
4. Squirt a small amount of the Golden Fluid Acrylic on to a paint tray. Add a couple squirts of water. Mix well (this is going to be a translucent wash instead of a solid coat) and start applying the mixture to the entire purse. NOTE: The acrylic & water doesn't stay mixed for very long so you will probably need to give it a stir each time you pick up additional color. Let Dry (drys quickly...you won't have to wait long!)
5. Stamp & Emboss oriental women & cut out. Adhere to front of purse.
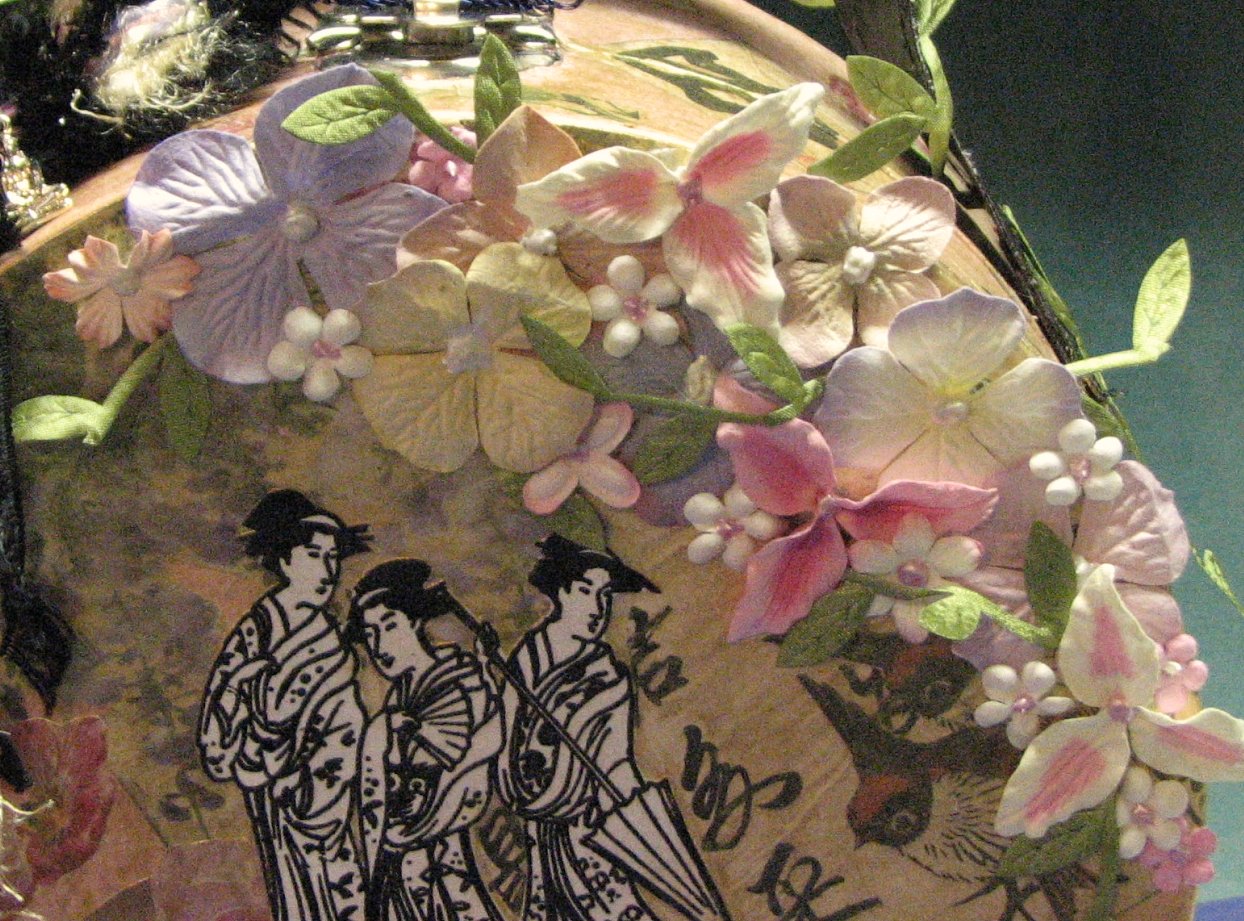 6. Here comes Spring! Add several different flowers in coordinating colors to the top edge of the purse front and cascade them down the right side.
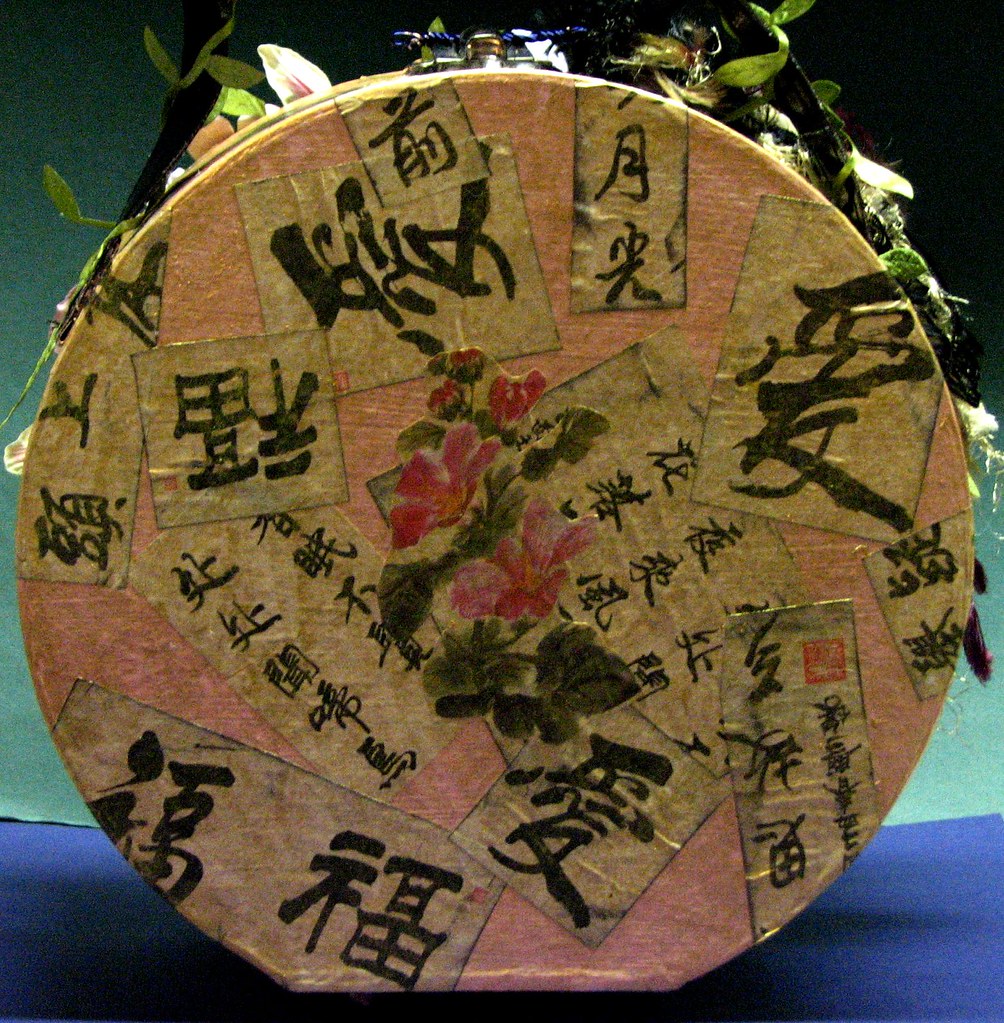
7. Cut up pieces of the Leaf Ribbon and tuck in among the flowers. Wrap a longer piece around the handle.
8. Make a fiber tassel & attach Buddha charm.
9. ENJOY!!!
 Hope you've enjoyed this little altered purse...and maybe it's inspired you to dig out your plain ol paper mache goodies and give em a fresh look!
9. ENJOY!!!
(Back side of purse)
See, I told you it was quick and easy :) Dry time is the longest part of the whole project.
 Hope you've enjoyed this little altered purse...and maybe it's inspired you to dig out your plain ol paper mache goodies and give em a fresh look!
Happy Day Friends!!!
that's special! I especially like the leafy vine along the handles.
ReplyDeleteGorgeous!
ReplyDeleteI love that leaf ribbon, too. I need to get some on my next HG order. You can do so much with it, I bet. Image using it on a card or ATC with a flower stamp and the leaf ribbon trailing down as the stem and leaves. Very cool!
~phinny
Thanks guys :)
ReplyDeleteYes, the leaf ribbon IS awesome!! Not at all what I expected. The ribbon is a very nice satin.
gee!!! this bag is very very exotic! you definitely had the bag rock!!!!
ReplyDeleteWow, that's leaf ribbon?? What a unique look....and a different look from your usual! the leaf ribbon just "makes" the purse!!
ReplyDelete