
This is another really fun technique that incorporates the Acrylic Dabbers and Distress Inks by Ranger. Now I'm using Pitch Black, Aged Mahogany & Walnut Stain today but experiment with your color combos. One of my favorite combinations is Snow Cap (white) or Pearl with a shade of blue! It gives such an amazing worn beachy feel to the finished project! I can't wait to show you one of the examples I'm working on to share with you tomorrow!
Anyway, here we go....
Supplies:

Ink Blending Tool & Foam - Ranger
Distress Inks - Ranger
Adirondack Acrylic Dabber - Ranger
Cardstock
Instructions:
 1. Prime your dabber (to do so, press the dabber onto scrap paper and give it a little squeeze.) and dab off most of the paint until the dabber is fairly dry. This is another "dry brush" technique.
2. Somewhere on your panel, using a light touch, paint an elongated oval as pictured. It doesn't have to be perfect...you're just going for a general shape. This is going to be your starting point...your first "Knot" in your wood grain. As you go along you may wish to add additional "knots" if desired. I like the looks it gives to the finished background so I usually add 3 (I have a thing for odd numbers).
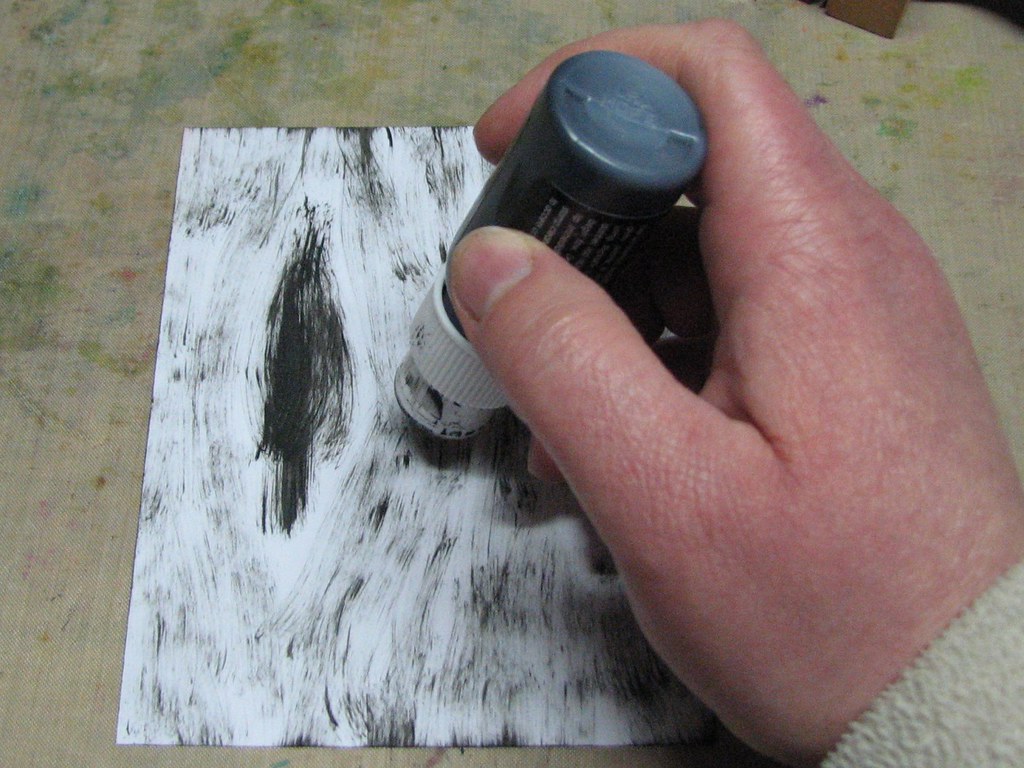
3. Now it is time to add the "grain" around the knot. Lightly drag the dabber back and forth working your way around the knot. Notice how the grain comes together at the bottom & tops of the knot.... If you are having trouble, look at a piece of wood, a bedroom or closet door, or even paneling. You will see how the wood grain follows natural obstructions in it's path. Continue until the entire panel has been "grained".

Your panel will now look something along the lines of this.... See I added another small knot on the upper right hand side and one off the edge on the lower right side.
You will want to be sure to either cut your panel a bit larger than what is needed OR be sure to work off the edges of your paper for a natural look.
4. Apply the Distress Inks with the Ink Blending Tool in the usually fashion. Pounce to pick up the ink and apply in steady circular motions. I like to use at least 2 colors for this technique as it adds a bit of depth. You may choose to use one color, 2 or more. It's totally up to you, experiment and find a combination that you like.
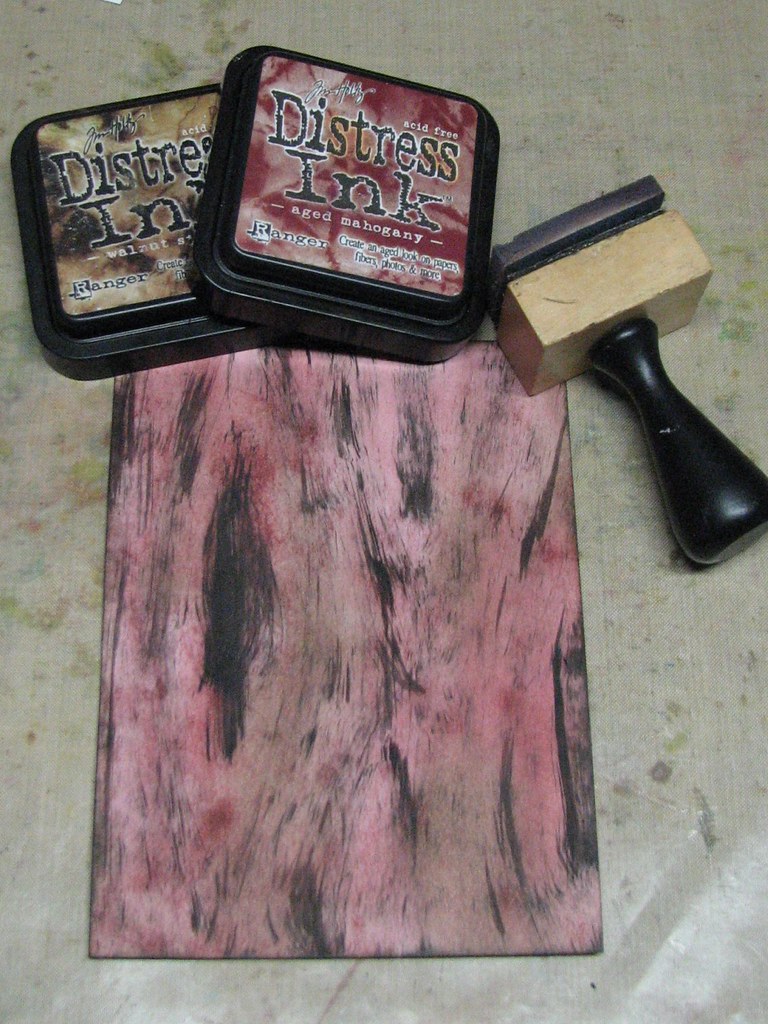
I used Aged Mahogany and Walnut Stain. I first applied the Aged Mahogany over the entire panel and went back and added Walnut Stain in various spots for shadow effects.
5. This step is not necessary when working with darker colors but essential if you are using a lighter color paint. Take a damp cloth wipe off the excess ink from the painted areas. Let dry.
6. Optional - edge your panel with a dark color of ink. I just think this adds a finshed look to your projects.
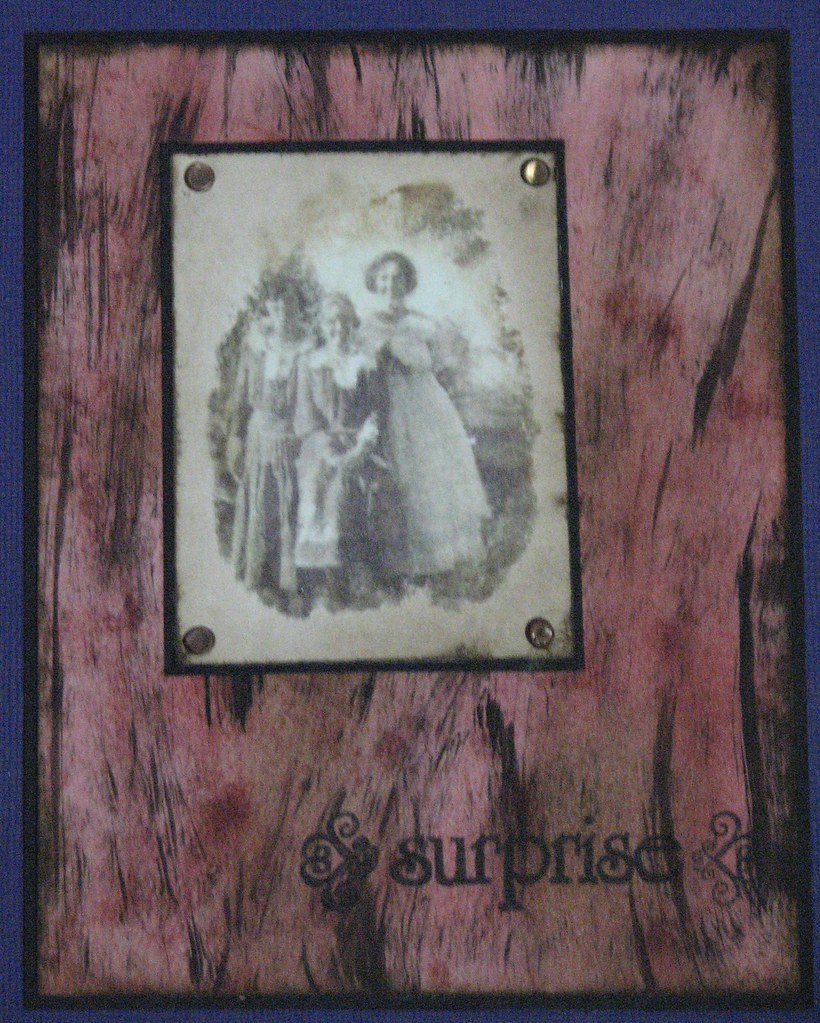
I was short on time today so I only have one finished example to share with you today but I have a few more that are "in process" that I will post tomorrow :)
You will notice a vintage image on the card today. It is a special transfer ink that I will demo probably later this week :) I just LOVE this stuff!! It's way cool and SOOOOOO Easy!!!!
Surprise
Surprise
Supplies: Ink Blending Tool & Foam, Distress Ink, Adirondack Acrylic Dabber, Archival Jet Black Ink; Cardstock; vintage image; brads
So there you have it...some Faux Wood Grain to spice up your life ;) LOL!!!
Hope you enjoy it and give it a try.
I want to thank everyone for your sweet comments about my blog and how much you're enjoying it. I really appreciate it and am glad you're having fun. I really love sharing the information and my work with you all.
Remember....2 contests currently going on....Inkssentials White Pigment Pen Give-A-Way and the Paperbag Studios Rubber Stamp Give-A-Way!! Be sure to check em out :)
Only 3 days left to cast your vote in the swap poll....would you like to play with us?!?!? Come on...you know you would ;)
Hope you had a wonderful Monday :)
Great tutorial - I'm definitely going to have to play around with this. Can't wait to see tomorrow's examples!
ReplyDeleteFab technique Roni, thanks for this...I have done this before with Espresso and Butterscotch..made it look like teak...but yours looks miles better :O))
ReplyDeleteRoni...I need to know. Is there a color of distress ink that you DON'T have??! The faux wood technique is cool, but now you have me super curious about this ink tranfer technique you mentioned!
ReplyDeleteAlso wanted to say that it's just great to see that you have an ever expanding fan base these days! Your tutorials are the best! but I can't figure out how you take the photos yourself when one of your hands is in it?!
ReplyDeletefreaking phenomenal!!
ReplyDeleteAnother great tutorial - thanks so much for these. I need to try these.
ReplyDeleteSusan
Wow - the result looks complicated and hard to do, but the technique you showed makes it look so easy.
ReplyDeleteVery, very cool! Thanks, Roni!
~phinny
Wow Roni, another great technique - I will have to have a go at this one too
ReplyDeleteThanks Everyone :) Glad you like this technique! I've added the additional examples now.
ReplyDeleteKaren - Nope, I've got em all ;) I loved the first set so much (which I bought 1 or 2 at a time) that I just pre-ordered each one of the 2nd set when they became ava. - LOL!! Can't have too much of a good thing ;)
As far as the photos....I have a camera that has a swing out viewer, neck strap & some sort of image stabilizer. I put it around my neck, hold it with my left hand and snap away - LOL!! That's why sometimes they aren't the clearest but for the most part you get the idea.
Very cool tutorial. Thanks for going to the trouble to do these for all of us!
ReplyDeleteI have a question for you. The foam squares don't stay on my ink applicator thingy. They come off when I'm making my little inky circles from the craft mat onto the paper. What am I doing wrong?
Kathi - what does the foam look like on the back side? Does it have a blue fuzzy velcro type material on it? Is it securely fastened to the hook on your handle?
ReplyDeletei have always love your tutorials! i learned so many things here from new ideas to new products used!!! great great blog!
ReplyDeletecabbie lopez
philippines
Fabulous! Thank you!
ReplyDeleteLovely tutorial... like a lot! Thank´s for sharing! Hugs!
ReplyDelete