
I know I've said this before but I really LOVE this technique! When I first learned it out at Ranger I was SOOOOO excited...the look it creates is just amazing and it is soooooo very easy. You will just not believe it!! If you've kept up with the other techniques I've shared you're ready to give this a try because the base for the technique is the same as the last two techniques.
Just a note before we begin...when I was taught this technique we were shown it using Distress Inks because they are stable when used with water. I have tried it using other dye inks and have had mixed results. The problem with regular dye inks is the ink tends to separate when water is added so you're never quite sure what the results will be....you may end up with a green or brownish hue that you didn't bargain for. I don't mind this because it's just an added bit of distressing but sometimes you may not want a funky unexpected color popping up on some of your projects. So, if you don't mind it I say go for other inks and experiment but if you have a specific color scheme in mind then stick with the Distress Inks. They work beautifully with this technique every time!

Supplies:
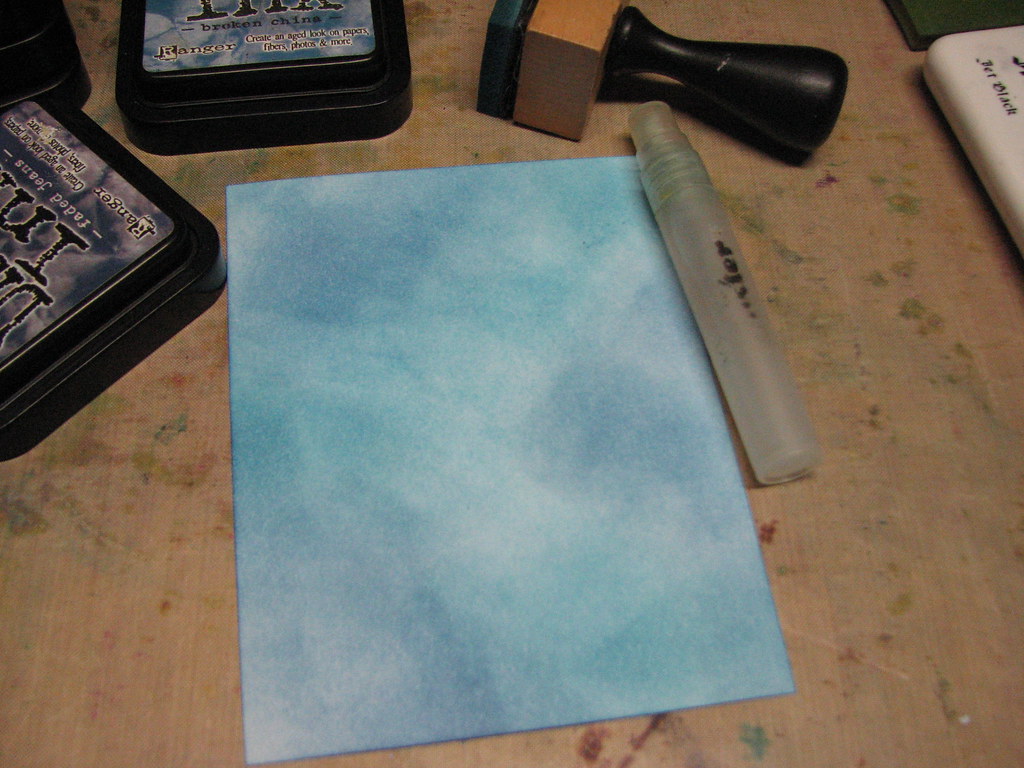
Ink Blending Tool & Foams - Ranger
Distress Inks - Ranger
Mini Mister filled w/water - Ranger
Non-Stick Craft Sheet - Ranger
Cardstock - Bazzill
Instructions:
1. Apply inks using ink blending tool in circular motions. Use any color combination desired. The example was made using Faded Jeans and Broken China Distress Inks.

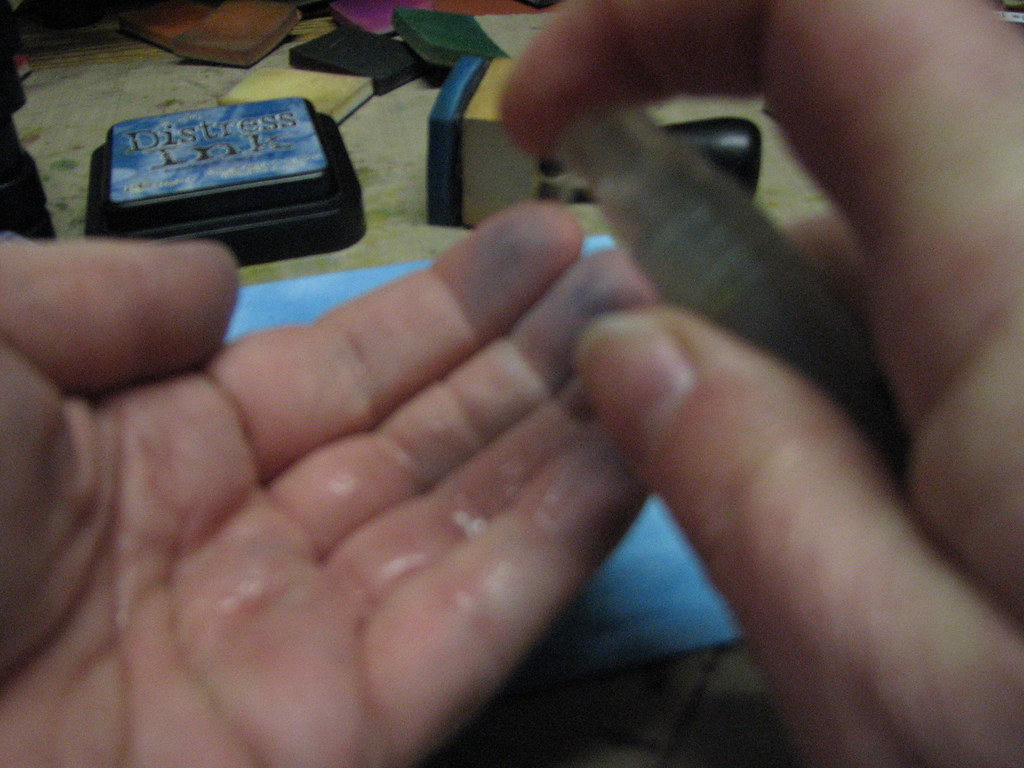
2. Spritz a few shots of water into your hand.
3. Now, flick it onto your inked piece of cardstock. Let the water stand on the ink for several seconds until you start to see the watermarks form. Usually around 10-20 seconds.

4. Dab the extra water off the cardstock and examine your results. If desired repeat steps 2-4 until you have achieved the desired look. Let dry.

You will end up with something like this....
Now, how easy was that? Your fun and funky background paper is ready to use!! Below are some additional examples of color combinations and finished cards using this technique.
Just a note before we begin...when I was taught this technique we were shown it using Distress Inks because they are stable when used with water. I have tried it using other dye inks and have had mixed results. The problem with regular dye inks is the ink tends to separate when water is added so you're never quite sure what the results will be....you may end up with a green or brownish hue that you didn't bargain for. I don't mind this because it's just an added bit of distressing but sometimes you may not want a funky unexpected color popping up on some of your projects. So, if you don't mind it I say go for other inks and experiment but if you have a specific color scheme in mind then stick with the Distress Inks. They work beautifully with this technique every time!
Supplies:
Ink Blending Tool & Foams - Ranger
Distress Inks - Ranger
Mini Mister filled w/water - Ranger
Non-Stick Craft Sheet - Ranger
Cardstock - Bazzill
Instructions:
1. Apply inks using ink blending tool in circular motions. Use any color combination desired. The example was made using Faded Jeans and Broken China Distress Inks.
2. Spritz a few shots of water into your hand.
3. Now, flick it onto your inked piece of cardstock. Let the water stand on the ink for several seconds until you start to see the watermarks form. Usually around 10-20 seconds.

4. Dab the extra water off the cardstock and examine your results. If desired repeat steps 2-4 until you have achieved the desired look. Let dry.

You will end up with something like this....
Now, how easy was that? Your fun and funky background paper is ready to use!! Below are some additional examples of color combinations and finished cards using this technique.

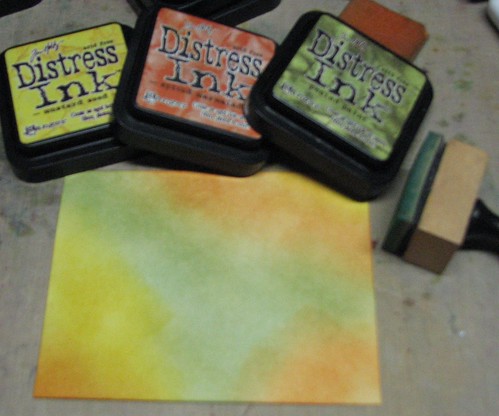 Color combo - Mustard Seed, Spiced Marmalade, Peeled Paint
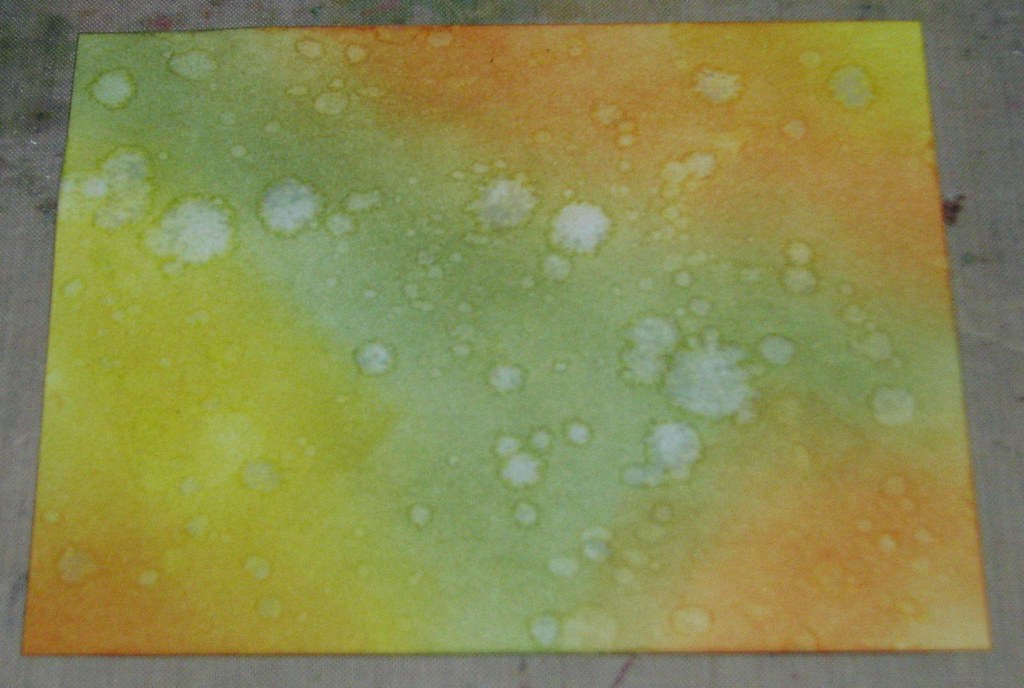
Thank You
Additional Supplies - Images - Fiskars; Inkssentials White Pigment Pen & Stickles - Ranger


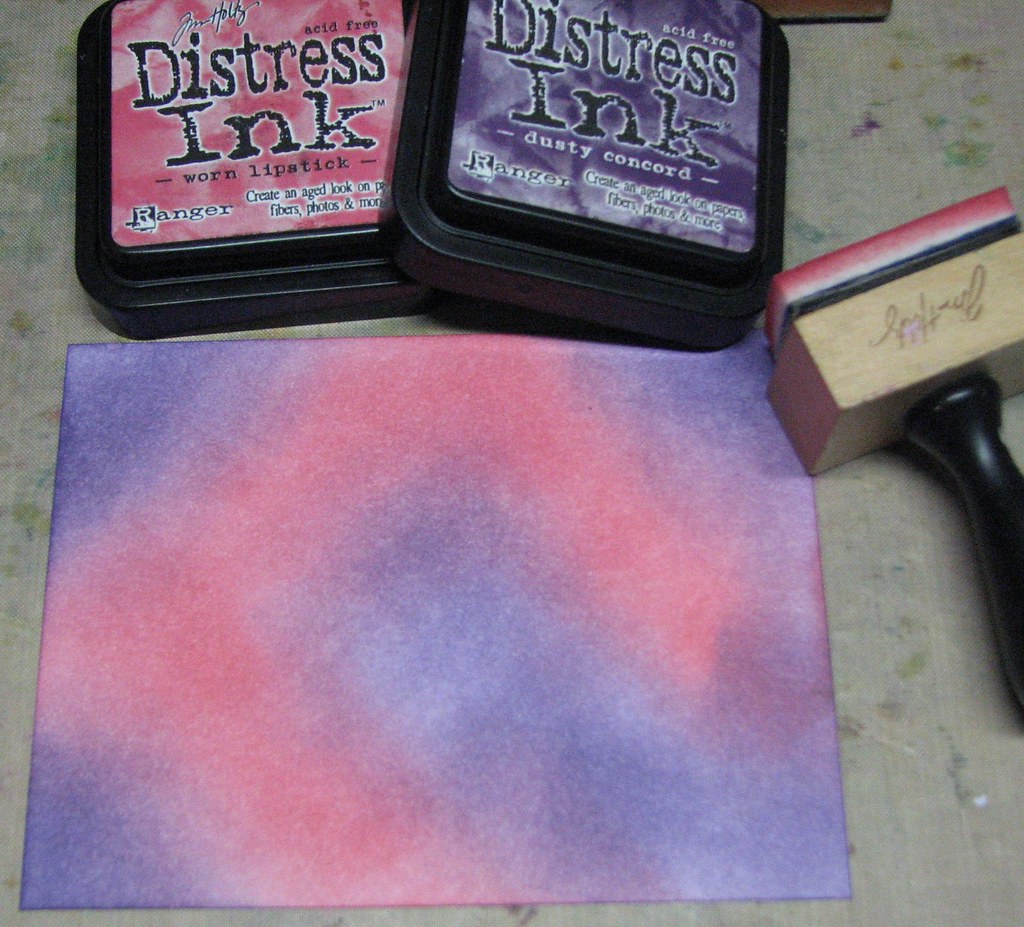
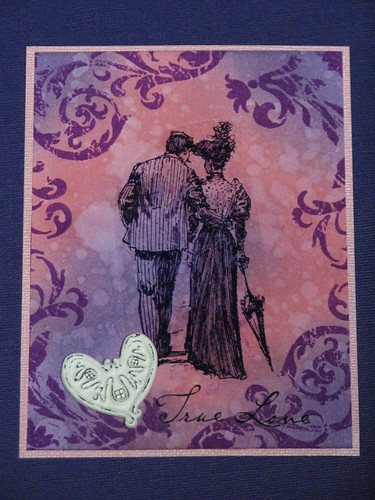
Color Combo - Worn Lipstick & Dusty Concord
True Love
Additional Supplies - Flourish - Paper Studio; Image - Inkadinkadoo; Rub-On Sentiment - Creative Imaginations; Heart - unknown.

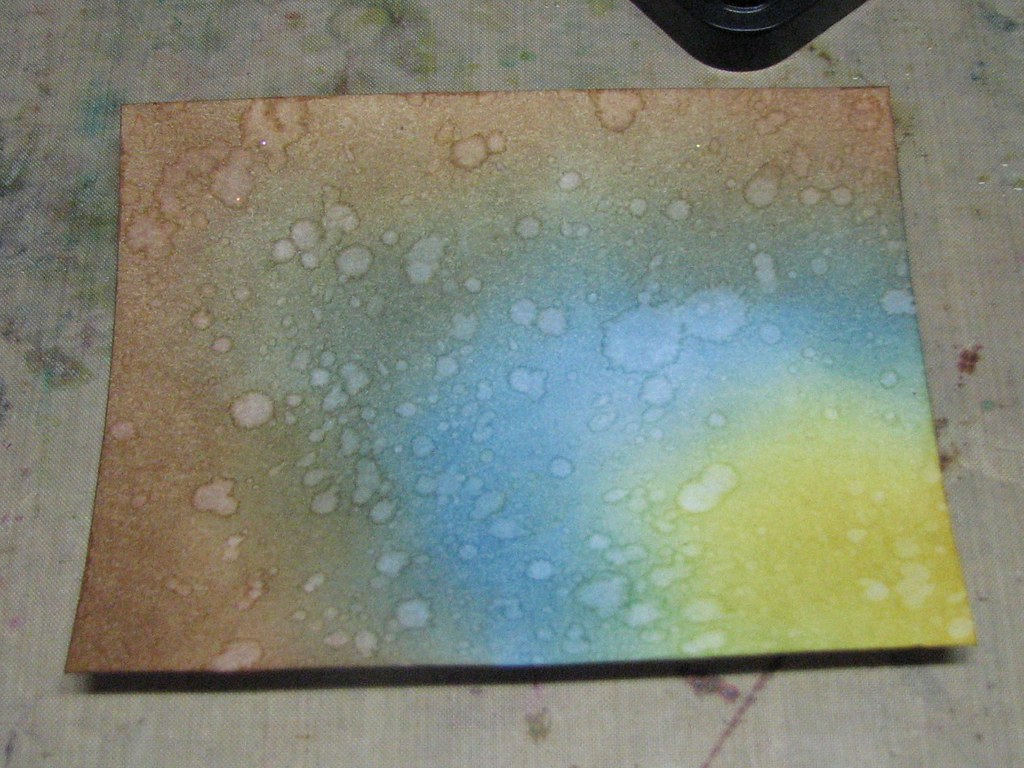
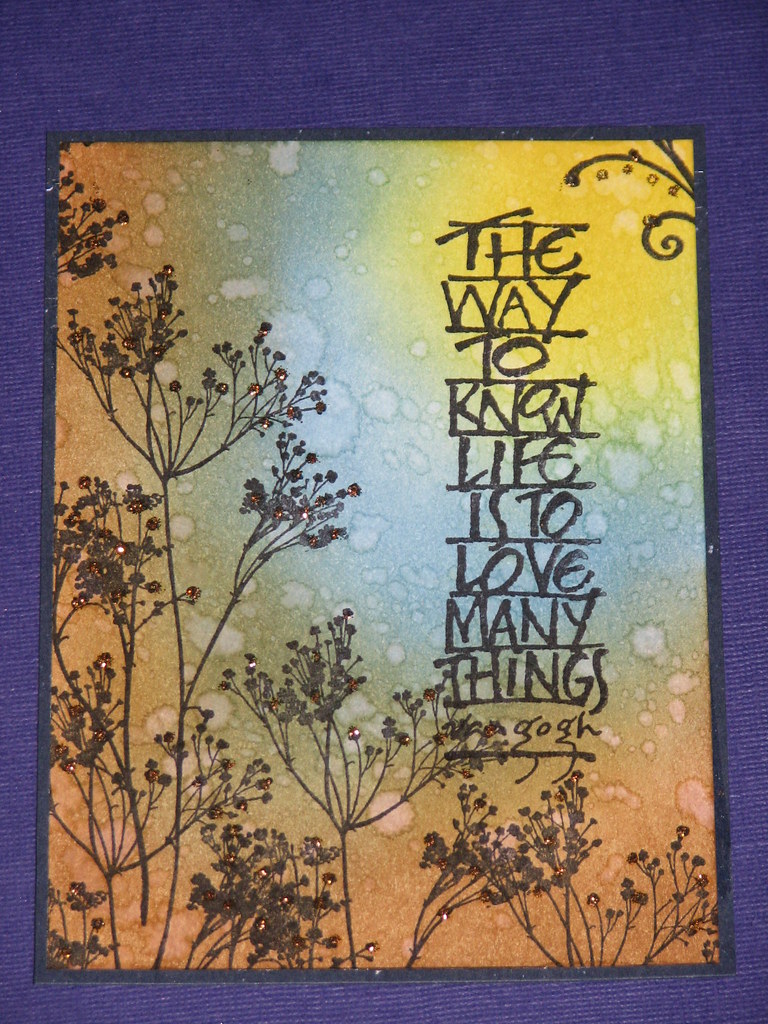
Color Combo - Faded Jeans, Scattered Straw & Vintage Photo
Life
Additional Supplies - Weed - Stampers Anonymous; Sentiment - Wordswroth; Copper Stickles - Ranger
So there you have technique # 4 in my Top Ten Favorite Ink Blending Tool Techniques!! Give it a try and let me know what you think :)
Happy Friday!!!
WOW!! such amazing results. I love this blog!
ReplyDeleteblimey these are all gorgeous! x
ReplyDeleteAnother wonderful techinque!! Love the look of this one. :)
ReplyDeleteWow. Very cool technique. I'm going to definitely try it.
ReplyDeleteMeanwhile, thank you so much for doing these tutorials and for the ongoing inspiration.
Thanks for sharing all these tips and techniques. I love using my Ranger stash - just wish I had it all! :-)
ReplyDeleteChris in UK
Wonderful technique and gorgeous artwork!
ReplyDeleteSuch a simple technique, and yet such stunning results - love your cards
ReplyDeleteRoni, I tried this technique on coated/glossy cardstock, here -->
ReplyDeletehttp://scrappypam.com/index.php/
2008/03/29/spritz_aamp_flick
Thanks for the tutorials!!
That's wonderful Pam!!! I love it on glossy paper :) Really makes it pop!!
ReplyDeleteThanks so much for sharing!!
Roni
Wow what a beautiful project using spirtz of water will give a good look.
ReplyDeleteWill try to experiment it sometime.
Thank you thank you Roni you really makes our day bright.