
 Continuing with Ink Blending Tool Technique # 2 - Monochromatic Gradient Backgrounds we will again be working with the same supplies as previously discussed. The Ink Blending Tool & Foam, three coordinating colors of ink and cardstock.
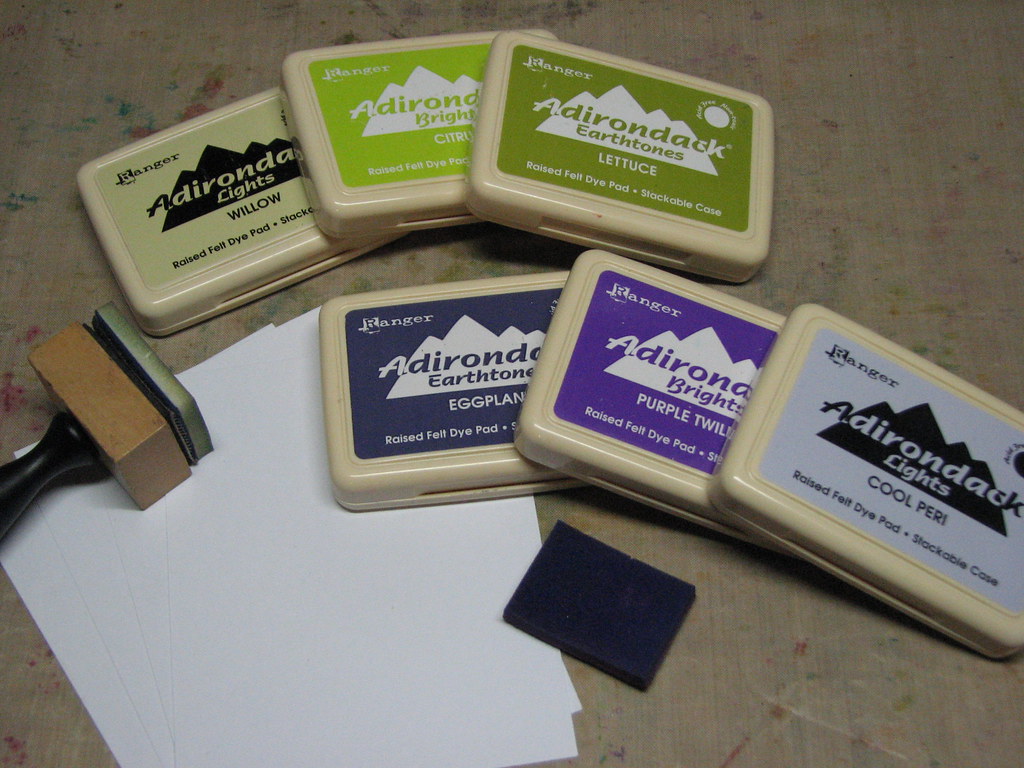
I choose to use inks from Ranger' Adirondack Line of Inks because all of the guess work is done for me. Today's color family includes Eggplant, Purple Twilight and Cool Peri.
Star Burst -
This has got to be one of my favorite techniques using the IBT. I LOVE the highlight effect it gives and it's PERFECT for cards, ATCs, scrapbooks, you name it.
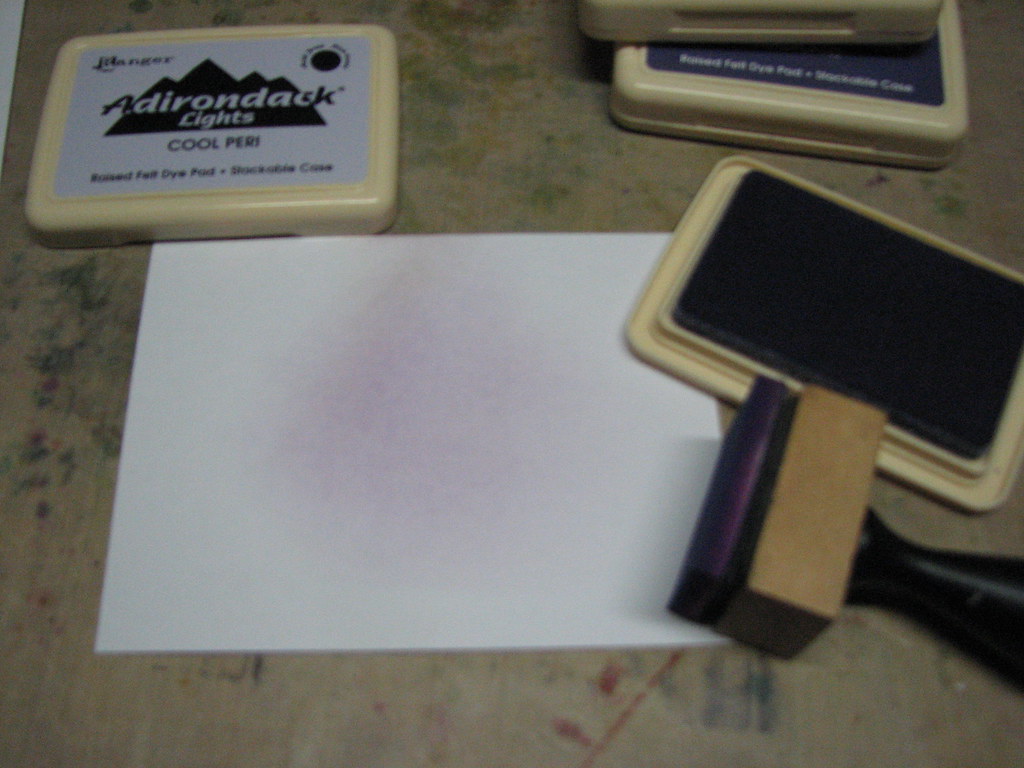
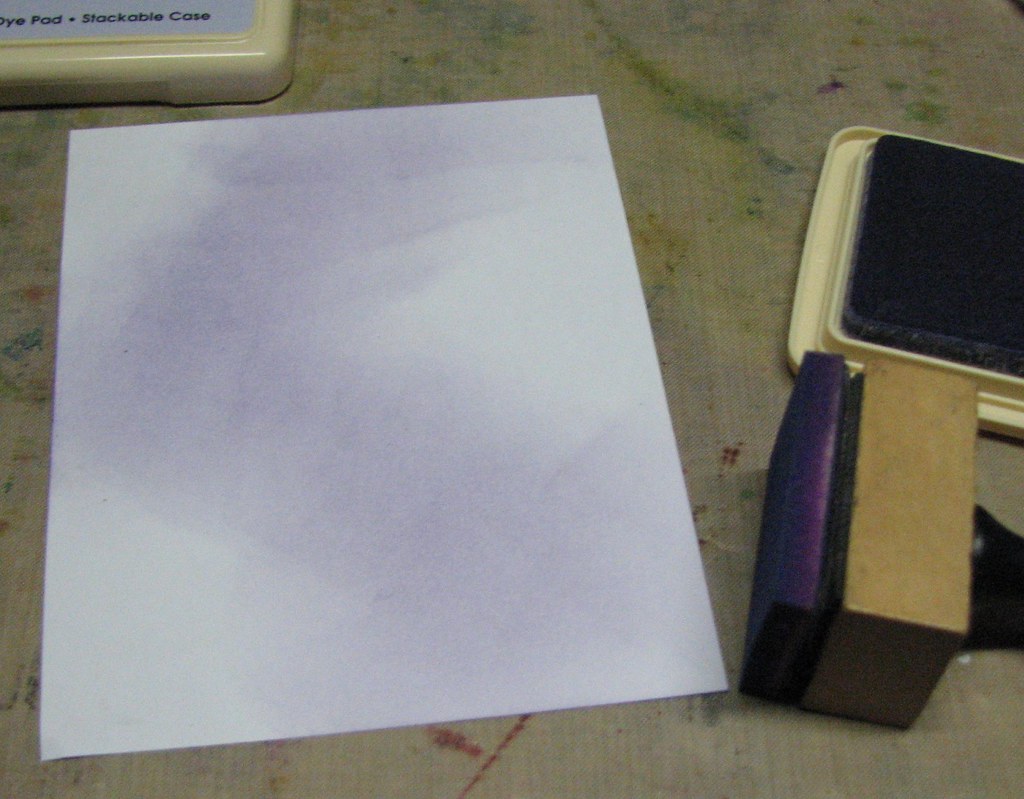
1. You will be working from lightest to darkest colors as usual. Start by pouncing the IBT into Cool Peri and apply it in a circular fashion to the center of your card. (Note- I'm starting in the center on the example but once you're comfortable with this technique you can move your focal point area off center to the left, right, up or down. It's just easier to learn working in the center for now.)
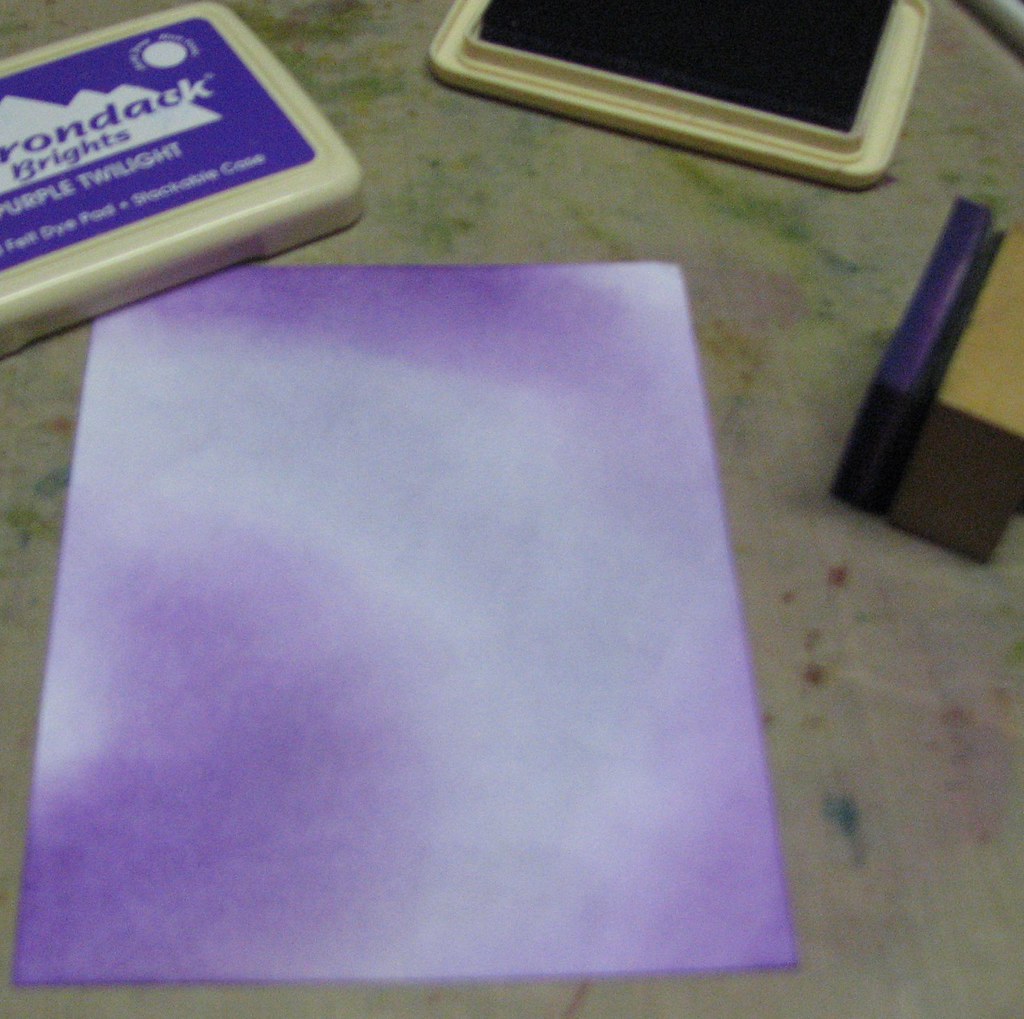
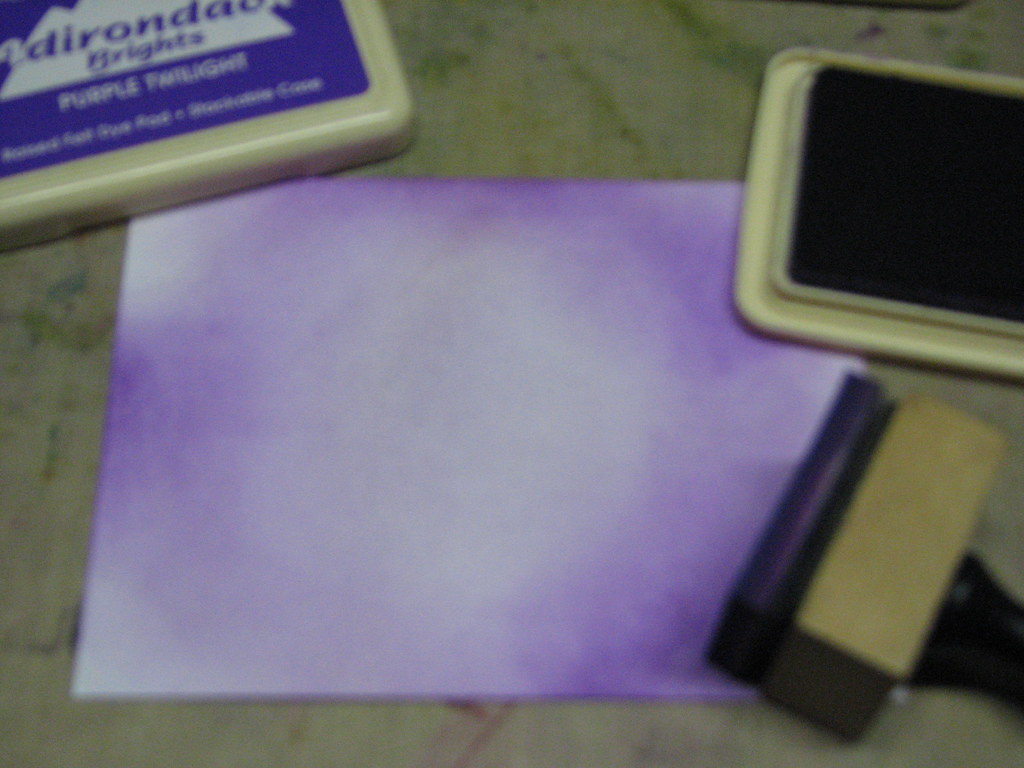 2. Once you're satisfied with your beginning color, ink the same foam with the 2nd color, in this case Purple Twilight. Start by applying ink around the edge of the original Cool Peri circle of ink. When you're applying the ink be sure to blend the edges where the two meet for a smooth transition. This layer of ink should get darker the farther you move from the Cool Peri center as shown.
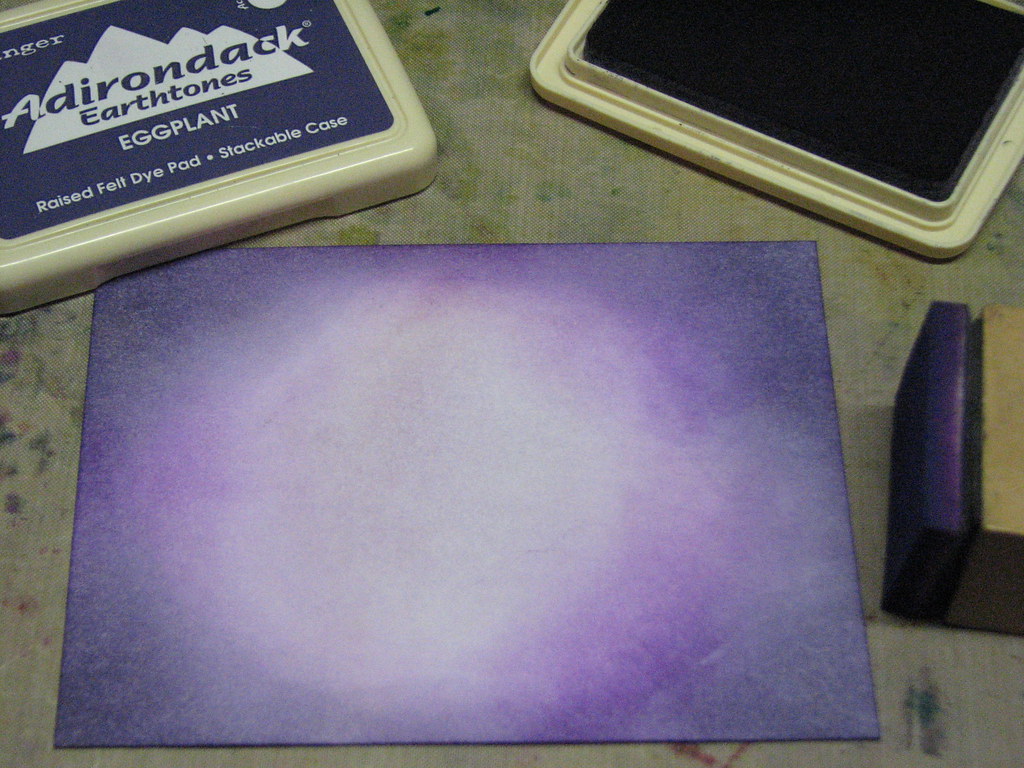 3. Finish off the background by using the darkest of the three inks, Eggplant in the example. Again, pay particular attention to blend the inks well where the Purple Twilight and Eggplant inks meet.
To finish this off I like to edge the cardstock in the darkest ink. Simply run the edge of the cardstock over the ink pad and smooth using the IBT.
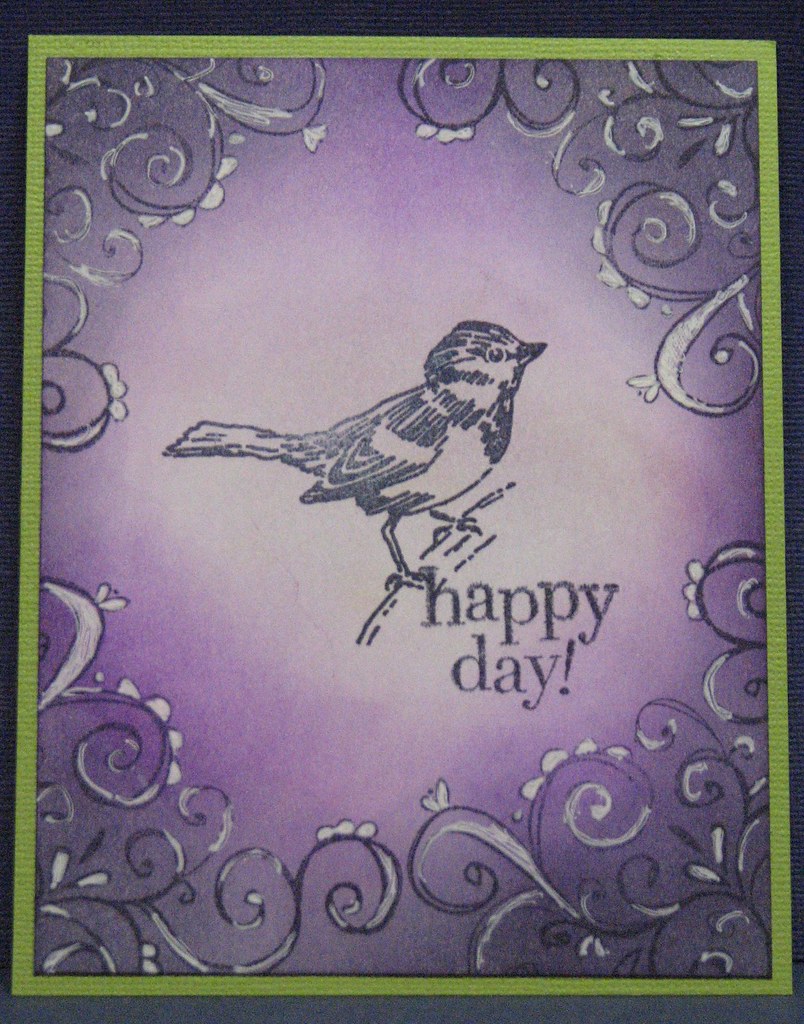
Below is a finished card using this technique.
Happy Day!
Supplies: Adirondack Dye Ink - Cool Peri, Purple Twilight, Eggplant, Archival Ink - Jet Black, Inkssentials White Pigment Pen - Ranger; Bird image - October Afternoon; Sentiment - Fiskars; Flourish - Autumn Leaves; Cardstock - Bazzill
Color Chaos -
This technique is totally free-style. It can be whatever you dream up... You simply layer colors again working lightest to darkest and blend the colors along the way.
1. Apply the lightest color where ever you desire. Remember to work in continuous circular motions.
 2. Apply the next shade right next to the first blending the edges as you go.
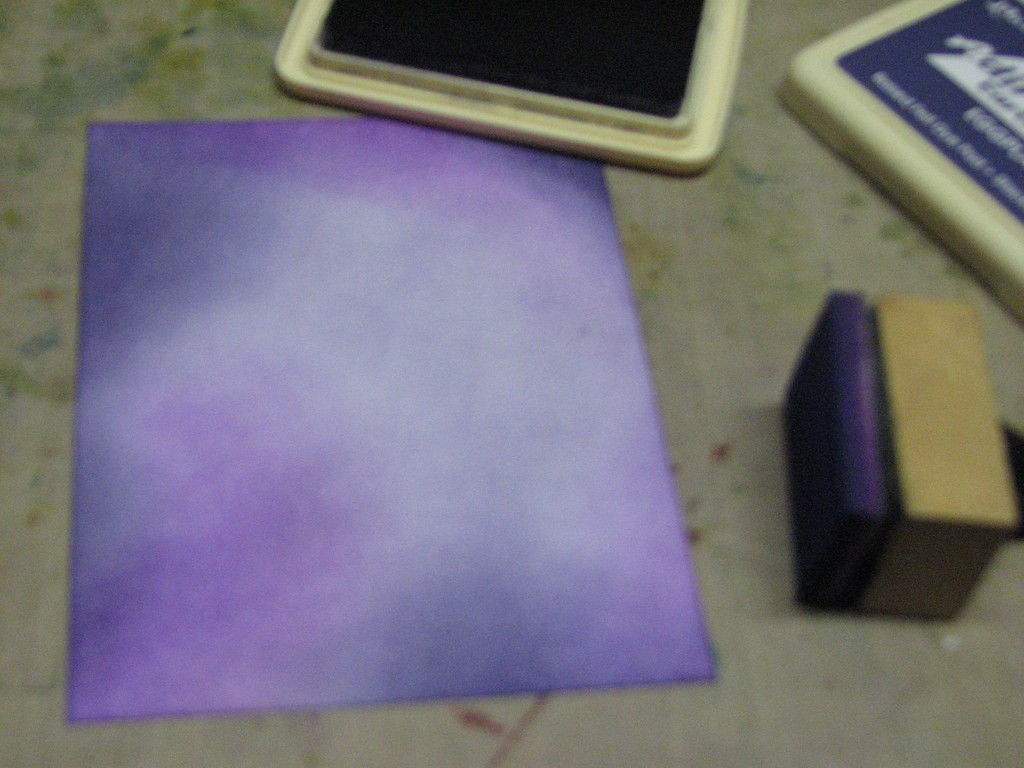
3. Finally add the third and final color next to the previous. Edge the cardstock with the darkest color for a finished look.
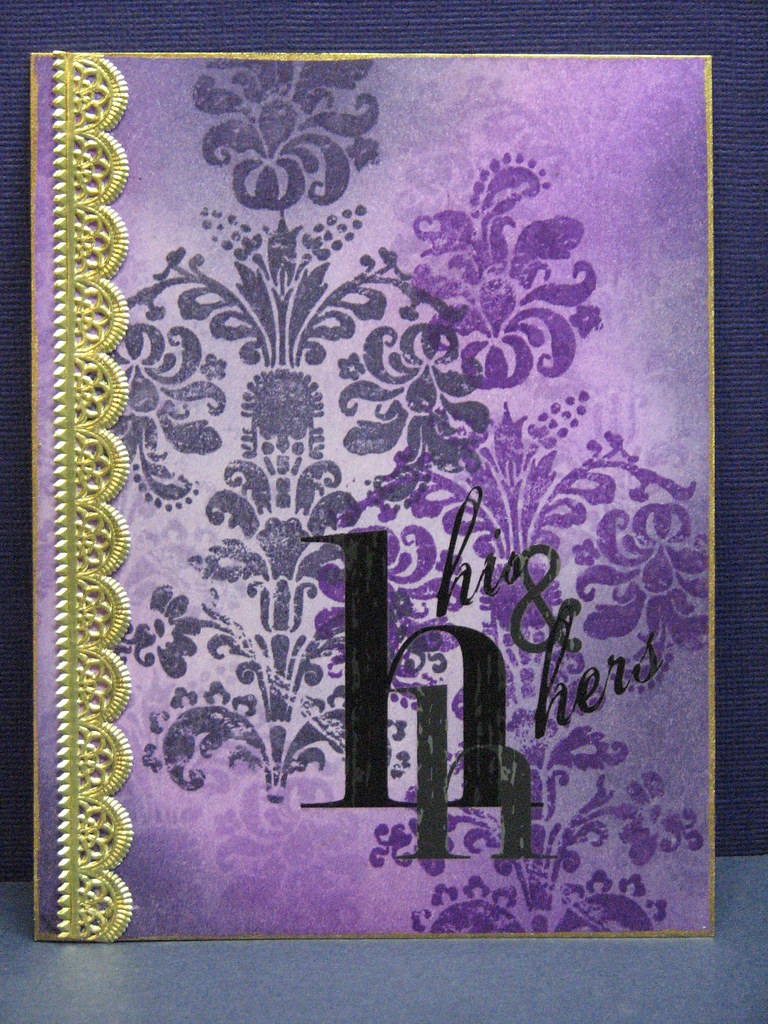
His & Hers
Supplies: Adirondack Dye Ink - Cool Peri, Purple Twilight, Eggplant, Posh Accent Pen - Gold - Ranger; Flourish image - The Paper Studio; His & Hers Rub-On - Creative Imaginations; Dresden Trim - The German Country Store; Cardstock - Bazzill
 So, there you have it....a couple more Ink Blending Tool Techniques to tuck under your belt. Tomorrow I'll be working with the third technique - Multi Color Gradient Backgrounds. It's basically the same as this is but you have to pay particular attention to the blending of colors.
 Hope you have a wonderful day and go ink something up ;)
I think I MAY be able to do that one too... I am growing my ink collection and trying to learn how to use them better. So far I am a master at inking edges LOL. I have done some other things but I truly love to ink the edges of whatever it is i am making.
ReplyDeletethanks for all the ideas Roni
I am so glad that you are showing how to use this... I needed someone to tell me why I needed to buy one....heheheheeh
ReplyDeleteNow, I need to buy one....:0)
reflections:0)
Hey - I think I can DO this!
ReplyDeleteYup - I am gonna practice tonight. For me, when I am intimidated or uncomfortable with a new technique, I just have to first give myself permission to play around with it (make mistakes!) and then practice until I get more comfortable. Like everything else in life, you just gotta practice, right?
Love the purples, too, Roni. Great cards!
~ phinny
All of your techniques are just wonderful. I will need to set aside some much needed creating time and try each and every one!! :)
ReplyDeleteWoW!! Gorgeous card and a great technique ^.^
ReplyDeletegorgeous cards again, the bird card is just stunning. I think I need to have a go at these techniques as the results you have got are great. So thank you again for sharing
ReplyDeleteGreat technique.
ReplyDeleteLove the start burst look, must give that one a go!
ReplyDeleteLoved the cards so inspiring. Can you make one for me just a joke?
ReplyDelete