Happy Monday!
Today I wanted to share a fun and new to me art medium... Marabu's Easy Marble. I have to say I love this stuff. I have always had an affinity for the marble papers found in vintage books and I've always wanted to try to make it but it was a complicated technique requiring various ingredients to make it just right. Well, thanks to Marabu we can all make those pretty marbled papers easily!
To get started all you need are a few bottles of Easy Marble, a pan of water and something to marble. I started out by experimenting with cardstock, bristol cardstock, tags, labels, glossy cardstock, vintage book pages, ledger sheets, sheet music, foam core board, shrink film, MDF shapes and even rocks! They all worked great! It also works on metal, glass, plastic, and even fabric as long as it won't be washed.
NOTE: Wear gloves or be very careful picking your items off of the water - the Easy Marble will stick to your fingers and it can be difficult to remove. I found that an Orange Oil based cleaner works best to remove the film once it has adhered to your skin/nails.
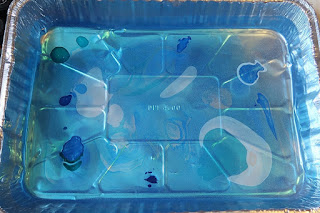
Fill a pan with water - I used about 1 1/2" - 2" of water in my pan - just enough to dunk whatever I wanted to marble. If you are going to be marbling larger items you will want a deeper pan and more water.
Shake all of the colors you want to use vigorously and remove the caps.
Sprinkle your base color until it covers the water in the pan.
Note: You need to do this for more open time to work with the medium. If you don't do this the EM will begin to form a "skin" and adding/swirling the colors after it has made the skin becomes almost impossible.
Sprinkled additional colors as desired.
You may either print as is for large splotches of color or you can swirl the colors around with a tooth pick, skewer or something similar. I used a wood stir stick.
NOTE: you will pick up some of the medium on whatever you use to swirl the colors. It will look like a gloppy mess but a little is normal. If you pick up more than a small amount then you've taken too long and the skin has formed. Stop when this happens otherwise you can pull all of the medium off the water with your stirrer.
Place your cardstock or other item on top of the water and give it a gentle press down until it is dunked under the water. Carefully remove it from the water. Some people use tweezers, I just use my fingers.
Set it aside to dry.
That's it...it is so easy and with 22 colors the combinations are endless! After just a couple hours of play I ended up with a whole pile of fun pieces to use in my art plus a couple nifty stones, a couple pieces of MDF to decorate my room and a piece of really cool shrink film.
This is just a small sampling of the amazing pieces I made....
This is shrink film!! It works amazingly well.
MDF Indiana piece - I'm seein' a Cubs state of mind here ;)
White, Silver and Gold...really pretty IRL.
I worked on several Halloween color combos...
This was made with Autumn in mind but it almost looks Christmasy too.
Blues & purples
Turquoise, green, pink and purple.
The next 3 are Rinea Silver foiled paper!
This is Silver/Gold Glossy Foiled Paper.
Silver/Silver Starstruck Foiled Paper
And Silver/Gold Glossy Foiled Paper
Christmas colors of red, green and gold.
and a bit of Valentine's Day in pinks, reds, silver.
This stuff is just soooooooo much fun...you could spend hours just coming up with various color combos to try. I sure did! I had to stop a couple times in order to let stuff dry. I kept running out of room to put the wet stuff - LOL!!
This stuff is just soooooooo much fun...you could spend hours just coming up with various color combos to try. I sure did! I had to stop a couple times in order to let stuff dry. I kept running out of room to put the wet stuff - LOL!!


This comment has been removed by a blog administrator.
ReplyDeleteOoohh, that looks like so much fun. I will have to give it a try. Thanks
ReplyDelete