Monday, December 9, 2013

Frosty Winter Wonderland Tag - Blended Distress Paints

Today I thought we'd play around a bit with some Distress Paints.
I had several left over poinsettia die-cuts from the plaque I made the other day and I have some beautiful new blue ribbon so I thought it would be fun to take those, the paint and throw in some stamped snowflakes to see what I could come up with!


Prepare the paints by shaking them up ahead of time so they are ready to go. 
You'll want to work quickly so you can blend the paints as you go.

First I applied Antique Linen to the tag in streaks, next I added a second streaky layer of Chipped Sapphire. For the final coat I applied Brushed Pewter which I blended with the two previous colors.


I ended up with a lovely glowing winter scape of colors.
The paints dry very quickly but I gave it a shot with my heat tool to speed things up a bit.


Next I stamped several snowflakes using Archival Inks in shades of blue.


Next I added a few more snowflakes by stamping with Picket Fence Distress Stain.


Once all the snowflakes were dry I sanded the edge to allow for a bit of ink around the edges.


I used Sepia ink but you of course could use your favorite color.


I had this piece of cardboard left over from another project so I inked the edges and swiped it across the top once or twice to tone the white paint down a bit.


I stapled the cardboard to the tag crossing the staples as I went.


I added dimension to the poinsettia die-cuts by drawing on the back of them on my foam pad...


You can see how dimensional it makes them...


I used snowflake brads to secure all of the layers together then toned them all down with a bit of ink.


I inked up a few choice words..


And added it all to the tag!


And there you go!
Do you have snow where you're located?
We got a bit over night so everything was fresh and sparklie this a.m.

Did ya notice - New Feature...

I added a new feature a while ago but I forgot to mention it. 
Maybe you've noticed (or maybe not)...you can now reply to a comment posted on the blog!  If you'll look in the comments section under each comment there is a little reply button!!
 
So now if you read a comment you really like, or have an answer to a question or simply want to say hi you can now reply directly to that person!
 
I'm so excited cause sometimes I'd like to reply to one person but never could before.  I finally went in search of directions on how to change it, made a few adjustments and ta-da!  It works :)

Saturday, December 7, 2013

Pre-Loved Rubber Stamps?

UPDATE: Looks like there is lots of interest so I'll start photographing them.  Once I get the majority of them around I'll post a link to them :)

I was lucky enough to find a whole box full of mostly "Pre-Loved" rubber stamps recently at a tag sale.  The ladies mother was being moved to a retirement home and these were her stamps that she didn't want to take with her. 
 
I bought them because there were a few I really wanted, I was wondering if I took photos and posted on a separate page here on the blog if anyone might be interested in purchasing them.  If yes then I'll go ahead and start photographing them if not I won't bother and just offer them at my garage sale next spring. 
 
Also,  I ordered a surprise box from Club Scrap a bit ago and I have several sets of unmounted and mounted stamps from various kits that are either dups or things that aren't quite my style...  Any interest in those?
 
opinions please!
I won't bug you with them if you're not interested.

Friday, December 6, 2013

Mini Christmas Cheer Book - December Altered Pages Challenge "Colors of the Season"

The Altered Pages Challenge for December
is
Colors of the Season!

Of course the first colors that come to my mind for December are red and green so I ran with it...incorporating Glitz's Hello December line of paper and more!

More Glitz 6 x 6 Paper Pads

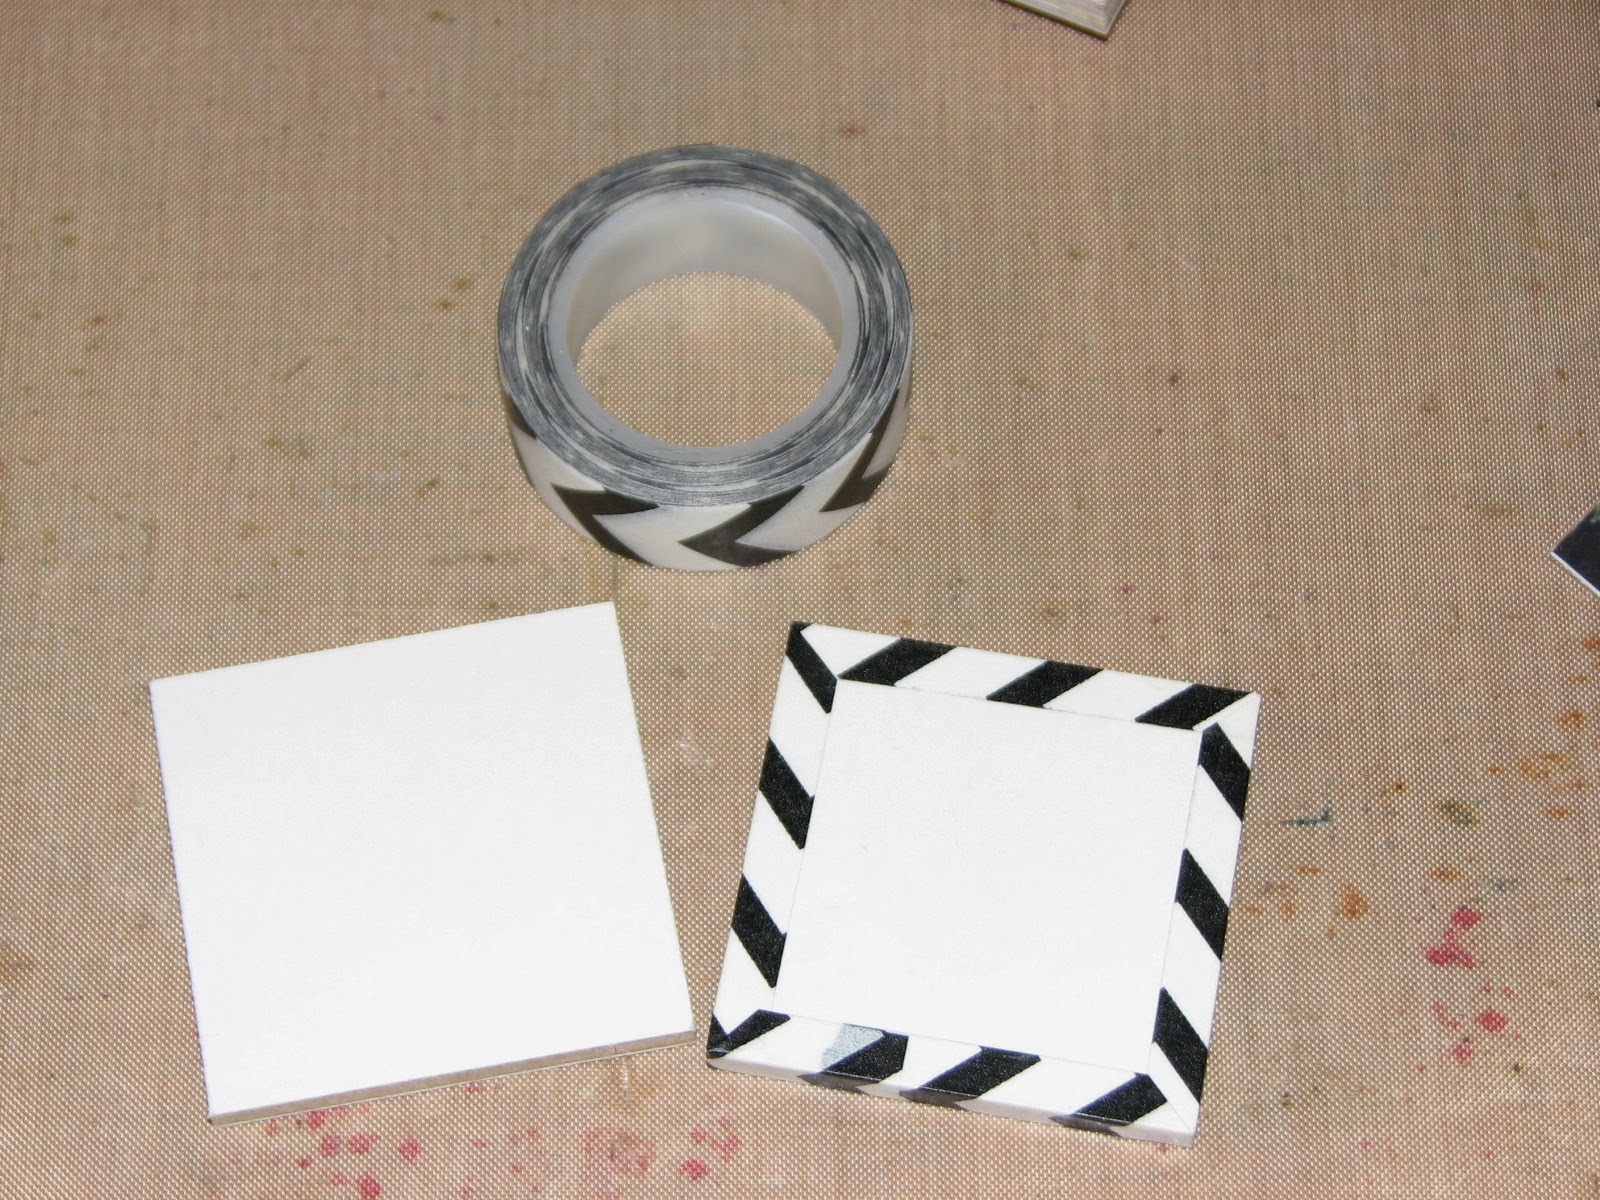
The first thing I did was to take a couple 2x2 pieces of  Eco Board and covered the edges with Glitz's Black & White Chevron Washi Tape. 


I then cut a 2x12" piece of cardstock, 2" squares of pattern paper, print and cut my sentiment and cut out select images from the collage sheet - Holiday Postcards AP1155.


Once I had all of my supplies gathered I began assembling the book.
Initially I layered in a sheet of pattern paper on each section of the book...


I then added the images & text to each panel.
I didn't forget about the back, it was also decorated.


After it was all assembled, I glued the assembled pages to the inside of each tape wrapped page.  I added a piece of ribbon, a square of pattern paper to the front and back, sentiment and a Hello December Image Rhinestone to top it off.


Inside Pages...


Back pages...


Monday this and all of the enchanting ideas from the rest of the team will be posted on the Altered Pages Challenge Page for you to see.

Then it's your turn, make your own creation incorporating at least one product from Altered Pages, post it on your blog, facebook page or other photo hosting site and then come and post a link to it on the AP Challenge Page!

You might be the lucky winner for December!!

Good Luck Everyone!!

Thursday, December 5, 2013

Victorian Christmas Plaque II

Moving right along we left the honeycomb corrugated board to dry so we might as well work on the embellishments for the plaque.
I decided that rather than traditional Christmas colors I wanted to go ivory, white & blues so I could leave the plaque up not only for Christmas but through out the winter season.  So I cut up lots of papers using my tattered poinsettia die, snowflake dies & flourishes....   (You might notice the music die-cuts...those are the ones I made using the Goosebumps Resist using stencils.) 
I assembled all of the flowers I was going to be needing then inked the flowers, snowflakes and flourishes using a touch of sepia archival ink.


Next I took a piece of game board that had a blue back.
I cut it down to size...


Then covered it with a panel of vintage lace
(salvaged from an old wedding dress).


When the honeycomb was dry I rough cut the text, inked the edge and glued it to the cut out oval in the cardboard.  I then applied glue & glitter to the edge.


Next, I printed out the desired image three times. 
This image is from the Blue Traveling Santa from Altered Pages.


I cut out key parts from each image...the first image was the donkey & baby Jesus; from the second image I cut Santa & the Christmas Tree and finally I cut the doll & basket from the third image.

The donkey & Baby Jesus will be adhered with one layer of foam tape, Santa will have a double layer, the tree will have an extra layer over the original and the basket will have another layer as well.  So this image went from being flat to a triple layered image.

You could of course get really ambitious and cut other pieces out multiple times to give it even more dimension but I wasn't feelin' it - LOL!!


I then adhered all of the pieces/layers onto the cardboard.
I tried to show the dimension but it's just not showing up how I'd like... 


I then glued the cardboard to the lace covered game board using my hot glue gun (which broke dang-it!  My handle snapped inside so I had to push the glue stick through with my hand.)

Then on goes an embroidered bit of lace along the bottom and all of the embellishments that were pre-cut, assembled & inked.


I had planned on adding a banner saying Joyeux Noel but I liked how it turned out w/o it.
What do you think????


NOTE: The snowflakes that look really white are actually pearl cardstock or pearl vellum.  All of the paper I used for the snowflakes was pearlized so they glimmer as you walk by.  It also causes issues with the flash.  IRL it's much lovelier than it shows up on the photo.


no flash...trying to show all the layers...


So there you go...
a very fun mixed media collage
breathing new life into of all things
a piece of honey comb corrugated cardboard!

Wednesday, December 4, 2013

Victorian Christmas Plaque - Pt 1

Well, it's time to take down my Halloween stuff I made in October for my entry way and replace it with something a bit more fitting so I thought it would be fun to create a Victorian Christmas Plaque.
Today we'll start the plaque by recycling a piece of corrugated cardboard I got in a package some time ago.  I saved this piece because it was so thick and low and behold when I ripped off one side of the paper check out what I found...  This wicked cool honeycomb design inside!!!


I started off by diluting some white acrylic paint about 50/50 with some water.
I wanted the white but I also wanted the kraft color to show through as well.


I started painting - just dabbing it here and there.  It doesn't have to be perfect, just so most of the corrugated board is white.


I then remembered I wanted to cut an oval out of the center so I figured I'd do that before I started painting there....  I simply took my exacto knife and cut through each fin of the honeycomb and made a rough cut oval.  Again, not perfect but close enough.


I then finished painting the rest of the corrugated board.


As soon as I had finished painting I sprinkled on some Distress Rock Candy Glitter.


Don't know if you can see it here or not but it's a nice sparkle over the whole thing.


I had some paint left so I also painted a page from an old latin book and a regular piece if corrugated board.


This is where we'll stop for the day to let everything dry completely...
Tomorrow we'll work on adding embellishments, images and text....maybe even finishing it off!

Tuesday, December 3, 2013

Stamping on Textured Cardstock - Tips & Tricks

Normally I always stamp on my Georgia Pacific Cardstock or some other smooth cardstock but I was cleaning out my paper stash the other day and came upon some white cardstock that had a bunch of lines as it's texture.  I don't remember where it came from or what I used the original piece for but the lines were very prominent so I thought it might be fun to experiment with it.
It wasn't a really huge piece but large enough that I cut it up into a couple small pieces leaving a section about 4" square that I could use for my card.
I tried stamping various images and finally found a combination that worked great and produced a neat usable image.  I found after several experiments that my Distress Markers (or other dye based markers for that matter) colored directly on a stamp that has some bold areas (like the snowflake border and penguin) yields a great image.   
How I did it - I started off by coloring each area of the image with the desired color of marker.  When I was ready to stamp I huffed (breathed warm air) onto the image to revive the dry ink.  I immediately stamped the image onto the paper using light pressure and it worked!
NOTE: You MUST use a light touch when you stamp on textured paper or the ink will find it's way into the tiny lines.  It took me a couple tries before I figured it out...you can see that I still had some areas where I pressed too hard (in the red postmark and part of the green postmark).  I think that's where my thumb & forefingers rested on my stamping block.
Results - When you use the right combination of ink and pressure you end up with a wicked textured looking image.    Since this worked so well I'm going to sort through some of my other textured cardstock to see what other fun designs I can find.


And here's the finished card....


Stamp Credits: All images Just For Fun Rubber Stamps

So, if you've never stamped on textured cardstock,
give it a try...you might be surprised at the cool results you get!

Happy Inking!!

"Totally Awesome Rubber Band Jewelry" Winner

The winner of the "Totally Awesome Rubber Band Jewelry" book is.....
(drawn by random.org)
 
Deborahdoh!!
 
It is very popular in Ohio as well. I purchased the loom to do crafts with a few kids at work. They love it! I haven't been able to teach them any other style than what is on the included guide due to internet restrictions/access. This book would be a great thing. They make them to give to their friends at school. They range in age from 4 to 10.
 
Congratulations Deborah!
(Please e-mail me your snail mail addy)


Monday, December 2, 2013

6 years, 2500 posts + a Give-A-Way = Lots of "Ink Stains" Fun

WOOO HOOOOO!!!!!!!!

This is a milestone post for me and Ink Stains...

Last Wednesday (11-27-13) was Ink Stains 6th Birthday but due to the blog hop and Thanksgiving I decided to wait to celebrate it and as it happens this very post is the 2500th post since it's inception!

I think that's reason to celebrate!

So, I'm going to be giving away a whole assortment of goodies....
 
Stamps...
lots and lots of stamps


And lots of other stamps....

 
Plus some hand dyed tags,
ATC blanks, and a few other fun tags...

 
Embellishments, charms & tools...

 
Plus
Tim Holtz - 8x8 Seasonal Stash Pad
&
French Industrial Salvage Sticker Book!

 
To be entered to win, simply post a comment telling us all your favorite tutorial, technique, project, idea, etc. you have found on Ink Stains...
and
for an extra entry, tell us how long you've been visiting Ink Stains!
 
You will have until 12-15-13 to post your comment!
 
Good Luck Friends!!
Here's to another 2500 posts...
and many more years to come!