
Hey everyone! I hope you're all having a super inky week. If not, maybe you can find a few minutes to stamp an image or two just to tide you over till you can really get inky.
Today I wanted to share a really fun idea I've had rolling around for a while now - Faux Calico Fabric! If you can't tell I'm a child of the 70's...calico was everywhere back then and I loved it! I have 2 favorite calico memories...the first is a doll that was popular back then - Holly Hobby. She had a pretty little calico dress in blues that I just loved. Had a small doll and a lunch pail with her on it. Still have the doll somewhere...not so sure about the lunch box.
The second memory is about a dress I had. The town we lived in was having a huge 1976 celebration which I believe coincided with our fair. Part of the fun was people dressing up in "old tyme" cloths. Mom made her and I matching dresses in red calico. Loved it! My dad even entered the old tyme moustache contest and had one of those white hats with red/white/blue hat band. Lots of fun!
So on to the technique....
Faux Calico Fabric Stamping


So, these were what sparked the idea...they are mini stamp sets from Rubber Stamp Tapestry. They have several stamps in each set that are meant to be stamped repeatedly to make a frame or image. I thought it would be fun to turn them into faux fabric.

The set I'm using today - Summer Floral - has 5 images shown above.

I am also going to be using a couple stencils from ClubScrap.com and of course my Memento Inks from Imagine Crafts.

I started off by taping off the design I wanted to use...

and chose my inks. I am using 3 colors of pink/red for the flowers; a fun purple for the berries and a trio of green for the foliage.

I started off by stamping the largest flower with the darkest red - Rhubarb Stalk.
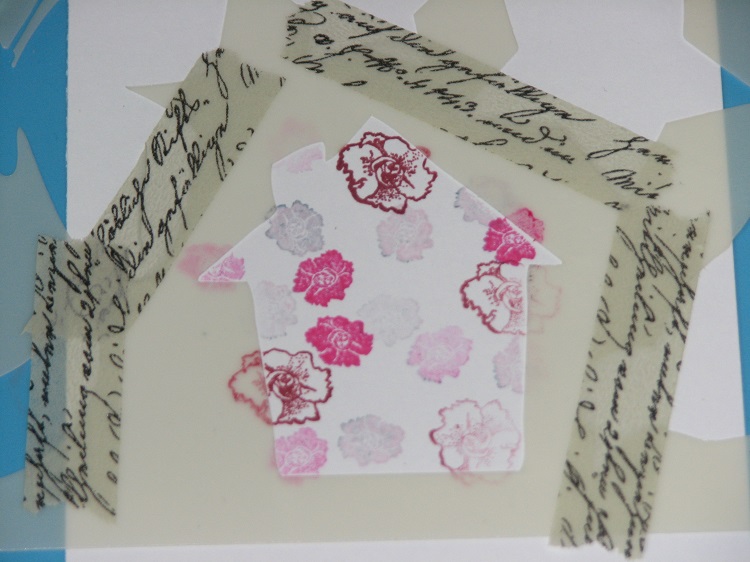
I then stamped the smaller flower using Rose Bud and Angel Pink - which ended up more purple because I hadn't cleaned off the residual black ink from a previous stamping.

Next the leaves - Bamboo Stalk, Pear Tart and Olive Grove.

Finally I added the Berries using Lilac Posies.

I used a sponge dauber and Rich Cocoa around the edges of the stencil to really set the design off.

And here's how it turned out!

Next I made a bird using the same technique using blues and the same set of green inks.

Added the leaves & berries...

And a touch of Grey Flannel around the edges...
And there you go!
Supplies:
Imagine Crafts - Memento Dye Inks; Sponge Dauber
Club Scrap.com - Stencils
Rubber Stamp Tapestry - Stamps
Wow, Roni,this is a great technique. Love the result.
ReplyDeleteWill give this a try soon.
Your pictures in your post caught my eye as I scrolled through my Bloglovin feed! What a great idea! Fun memories Roni. I didn't have Holly Hobby, but I think my sister had the lunch box! Thanks for sharing!
ReplyDeleteWhat a darling combination! I, too, loved Holly Hobby growing up. Thanks for sharing your memories and the technique! :)
ReplyDeleteLove this technique! Have lots of those peg stamps so will definitely give this a try! Anne
ReplyDeleteSuper cute!
ReplyDeleteSuper cute!
ReplyDeleteI have a bunch of their sets but never saw an idea as cute as this...
ReplyDeleteWonderful ideas! I love how it turned out.
ReplyDeleteThanks for the techniques! Love the darker sponged around the edge. And love that I can bring some stamp sets out of the closet and fall in love with them all over again.
ReplyDeleteVery clever technique. Hope to give it a try sometime.
ReplyDeleteOh my gosh super adorable!
ReplyDeleteSuch a very cool technique!! Thanks so much for sharing.
ReplyDelete