
During the month of June Altered Pages Design Team is featuring IMAGINE Crafts/Tsukineko products in all of our projects. They have generously supplied us with a vast array of their new and existing inks, texture sprays, tools and more!

Today I get to share my first project -
Home Sweet Home Metal Pendant...

IMAGINE Crafts/Tsukineko Supplies Used:
Sheet Metal (ATC sized Blank)
Staz-on Midis (Cloudy Sky, Cactus Green, Emerald City, Spiced Chai, Orange Zest, Claret, St. Valentine, Blue Hawaii, Midnight Blue, Jet Black)
Glaz-On (Clear)
irRESISTible Colored Texture Spray (Bronze)
Creative Medium (Vintage)
Ink Blushers
FantaStix
Altered Pages Supplies Used:
Little Spring Birdies Collage Sheet
The BrushStix
Kai Scissors
Aleene's Tacky Glue
Adhesive Dimensionals
Basket Weave Rubber Stamp
Paper Flowers
Lightbulb Safety Pins
Other Supplies:
Rusty Wire, Beads, Moss, Jewelry Findings
Instructions:
1. Start off by making a rough drawing of your dwelling on the Sheet Metal ATC blank. I used a Sharpie* to get my basic pattern, fold and cut lines.
*Please note that once you apply the Staz-On most of these lines will be erased with the addition of the new ink.

2. Make 4 cuts - two along the bottom in towards the floor line and two on the horizontal roof line as shown.
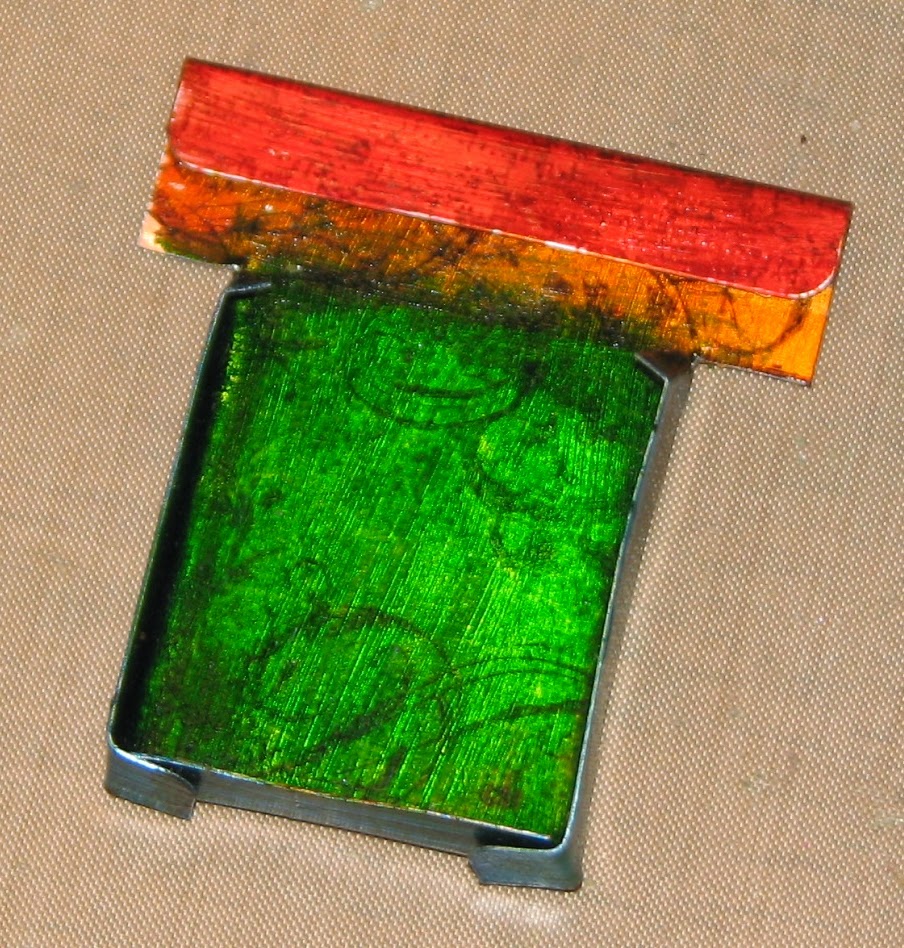
3. I used multiple layers of ink to color both the inside and outside of my house. I used Orange Zest for the inside of the roof (covered with a layer of Clear Glaz-On)...most of this will be hidden in the finished pendant but it's nice for some brightness and contrast.
4. I applied a layer of Cactus Green to the inside portion of the house and after it had dried I covered it with a thin layer of Glaz-On. I then sponged on a bit of Emerald City green using an Ink Blusher for a bit of depth and another layer of Glaz-On.

5. I stamped a flourish using Cloudy Sky Staz-On Midi and added a shadow line in what will be the corners when the walls and floor is bent up (also using Cloudy Sky) and another layer of Glaz-On.

6. Once the inside walls were finished I flipped the Sheet Metal ATC Blank over and proceeded to color the outside of the house. I applied a layer of St. Valentine Staz-On Midi to the roof line and applied a layer of Glaz-On. Next I added shadow using an Ink Blusher and Claret then more Glaz-On.
7. The bottom portion of the house was colored using alternate layers of Blue Hawaii, Glaz-On, sponged Midnight Blue, and Glaz-On.

8. To add a bit of faux texture I stamped the Basket Weave pattern on to the roof using Chai Tea.

9. I then used a BrushStix (you could also use a FantaStix) to create a faux wood texture with both Chai Tea and Cloudy Sky Staz-On Midis.

10. Once the final layer of Glaz-On has dried it's time to turn the ATC blank into a home! Fold up the bottom portion then fold up each side wall bending the extra little tab under the floor section for support. Notice I folded a small triangle at the upper most part of each wall. This is done to better accommodate the folded roof later on.
11. I folded about 1/3rd of the roof over to achieve the desired overhang. You might choose to fold over more or less depending on the look you are going for.
12. To fold the roof you will need to slightly bend the roof forward then into a peak. You can see how the roof "rests" on the previously bent corners of the upper portion of the side walls.

13. I wanted a more rustic look to the finished pendant so I used an Ink Blusher to apply Jet Black Staz-On to all of the bends and edges.

14. Cover the outside of the home with one final layer of Glaz-On to help protect all of the details.
15. Poke a hole in the floor of the house and in the back panel of the roof with a paper piercer or nail.
16. Spritz a bit of the Bronze irRESISTible Texture Spray on the inside of the house and set aside to dry.

17. Trim the desired collage images and ink the edges with Chai Tee. I also inked edges of the computer generated text.
18. Spread a very thin layer of the Vintage Creative Medium over the images and text to give them a rustic, vintage feel. Let dry completely.

19. I had a clear plastic gem in my stash that had a silver wire hanger. I decided to spice it up a bit and color the faux gem with Blue Hawaii and the wire with Orange Zest (which looked like copper once dry!).

20. Once the irRESISTible Texture Spray is dry it's time to turn the house into a home. I used dimensional foam tape to lift the bird next image off the back wall; glued in a bit of green moss and added the mamma bird with 3 pieces of the foam tape.

21. Insert the hanging gemstone at this point.
22. Finish off the inside by adhering the sentiment and add a paper flower for a finishing touch.
23. Add desired findings for attaching the pendant to a chain...in this case I used a bit of rusty wire, a couple beads and a lightbulb safety pin.
And you're ready to enjoy!

In the following photo you can catch a glimpse of how the two tone background really adds dimension to both the inside and out.


Special thanks go out to IMAGINE Crafts/Tsukineko for generously supplying me with their products.
Love that!! Your details and coloring are amazing!
ReplyDeleteWOW!
ReplyDeletestamping sue
http://stampingsueinconnecticut.blogspot.com/
This small 'birdhouse' is so wonderful! I am looking forward to seeing the upcoming projects. Thank you for highlighting products I did not know of before. Especially curious about the GlazOn to seal alcohol inks. Have a super day!
ReplyDeleteYou rock! I love this the colors and everything is perfect. Now I need to go back to the big city to buy the ATC metal which I put back on the rack because I didn't know how I was going to use it. I know someone who would have fun making a pendant like this with my help. Thank you for sharing not only your project but also such concise directions.
ReplyDeleteAs a home-bird-egg-nest girl myself, I LOVE your design and also seeing the Staz-On Midis in action~ way cool!
ReplyDeleteWow, cool project!
ReplyDelete