Tuesday, January 30, 2018

Giddyup Cowboy!

Today I wanted to share some fun cards made using Rubber Stamp Tapestry's stamp set Giddyup!  This is such a cool kit great for any buckaroo in your life, young or old.  I paired the stamps with Imagine's VersaFine Clair for some amazing, clear bold images....


I had a strip of flannel from an old shirt that looked great in place of ribbon for this card.


I love to use corrugated cardboard on my cards - 
this piece was rescued from the trash at work ;)


Finally I used some die-cuts and this fun staying from Club Scrap to finish off this happy card!

Supplies:

Rubber Stamp Tapestry - Giddyup! Peg Stamps
Imagine - Versa Fine Clair, Tear It! Tape, On Point Glue
Club Scrap - Sentiments
MFT - Dies
Cardstock

Friday, January 26, 2018

Having Fun & a Request for Help

I've been having lots of fun as you can see from this photo of what was on my desk last night.  I get kind of scattered and messy but it's how I create best. The ideas start pouring out the more ink I get on my fingers!  How about you?  How do you create?


Last night I found out about something going on during the month of February which apparently has been taking place for a while now ~ International Correspondence Writing Month (you can click on the link to read more about it).  I know of a couple friends who have crafty pen pals because they post their lovely correspondence on the FB pages and it's so much fun to see what they send/receive.  I don't have time to do it every month but I thought it would be fun to participate in February anyway. 

I think hand written correspondence in many circles has become a thing of the past. I think this is a great way to involve people and get them back into writing/sending cards and letters.

There is a section on the ICWM website to add your addy to a master list of sorts but I'm not comfortable doing so...  You know it's the internet and you just really never know who could be reading it or their purpose for doing so. I'm asking you for your help here...if you would like to receive a card with a handwritten message in the mail please e-mail me your addy (to: roni jj (at) g mail (dot) com (no spaces) and I'll add you to my card list! I'd like to send at least one card out each day but I'll send more if there are folks out there that would like to receive some happy mail :)

I promise I won't share your info with anyone...

Do you think you'd like to participate?

Please drop me a line, I'd love to hear from you.


Thursday, January 25, 2018

Sparkle & Shine

Hello my inky friends!

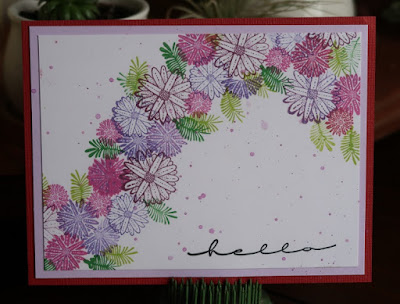
I hope you're week has been going great so far. Today I wanted to share a few cards using one of Rubber Stamp Tapestry's newest sets - Sparkle & Shine!  I love these stamps because the flowers come in multiple sizes AND there are solids and outline images - perfect blend for all sorts of projects.


My first card I made a grid pattern using a pencil and ruler to place dots where I wanted the flowers to be located. I stamped the solid and outline flowers both using VersaFine Clair Warm Breeze then stamped the leaves with  VFC Verdant.  I sprinkled clear ep over the entire panel and embossed.  I added faux gemstones in multiple colors of blue over top.  The sentiment (clubscrap.com) was stamped on a banner which was affixed to the card with double stick foam tape.


I love this card...it's one of my fav's, so easy but it turned out so pretty.  The flowers were all stamped with VF Clair as were the leaves.  I stamped the sentiment along the bottom then flicked a lavender watercolor paint over the panel.


My final example looks a bit tropical don't you think?  It was a total surprise because it wasn't at all what I was going for.  My original intent was to do something similar to the circle card I made yesterday where the circles were "bouncing" along.  When I started stamping I just got carried away and it ended up like this...that sometimes happens - LOL!! Does that ever happen to you?

So there you go - can you tell I was having fun with it?
Hope you enjoyed them as much as I did making them.
Have a great day friends!!

Supplies:

Rubber Stamp Tapestry - Sparkle & Shine
Imagine - VersaFine Clair; Clear Embossing Powder
ClubScrap.com - Sentiments
Prima- Watercolor
Cardstock
Gemstones


Wednesday, January 24, 2018

Perfect Layering Circles

This month Rubber Stamp Tapestry ~ the Peg Stamp people ~ have released 6 brand new peg stamp sets plus 5 limited edition sets designed by Lindsay the Frugal Crafter.

Today I wanted to share some cards I made using the Perfect Layering Circles.  I LOVE these stamps!!  I was actually going to try to carve various size circles but RST saved me from trying to do so.  (WHEW!)


I wanted to stamp "lines" using the new VersaFine Clair inks and these stamps were perfect to do so. These circles start out at about 3/8" up to the largest which is just a smidgen under 1". 


In addition to the Perfect Layering Circles, this card also features stamps from the Sparkle & Shine set (more on those tomorrow).  Initially I stamped the circles using Memento Dye inks then stamped over top with the flowers using VersaFine Clair.


The last example is again made using VersaFine Clair inks but this time on a piece of vintage map text. I wanted to show the translucent quality of the inks, even the darker shades.


Supplies
Rubber Stamp Tapestry - Perfect Layering Circles; Sparkle & Shine
Imagine: VersaFine Clair; Memento Dye Ink; Clear Embossing Powder; On Point Glue; Tear It! Tape
ClubScrap.com - Sentiments
MFT - Die
Cardstock
Sequins

Tuesday, January 23, 2018

Starry Northern Lights

I am so excited...I really like the Northern Lights technique but it always seemed rather flat. Imagine's new VersaFine Clair ink changes all that!!!  Check it out.....


Isn't it stunning?  Well here's the deal, the VersaFine Clair inks dry quickly, just like regular VersaFine inks BUT they have the unique properties of being able to hold embossing powders even after they feel dry. It's wild!!  So you can ink up an entire piece of cardstock with a variety of colors (without rushing) then sprinkle the EP to emboss the entire page!  Now the Northern Lights really knock your socks off!  Check out the comparison below...


With VersaFine Clair & Sparkle EP....


And without...

You can really see what a difference it makes.

For information on how the main card was made, please see:


Monday, January 22, 2018

Leather Carving

I tried my hand at leather carving...


I couldn't finish it all at one time so that's why some of it is darker than other areas. It was fun but I need thicker leather to really get a nice image.   I also needed a couple different tools but I think it's o.k. for a start.


This was just messing around with the carving knife doing it free hand (no patterns).  I was also playing with a couple stamps as you can see.  This is a scrap piece where I was just trying out different stamps and stuff but I like the background of the shamrock. That was fun.

I have to say I like stamping more than carving but both were pretty fun.

Friday, January 19, 2018

Multi Step Rose Valentine's Day Card

I don't know about you but it takes me a long time to line up the multi-step flowers...even the ones that are just 2 steps.  Prior to VersaFine Clair ink I never would have been able to bring the rich texture of embossing these images, the stamping time just took too long.  That has all changed though because the extended "stick" time for VersaFine Clair is a game changer.  


I was able to stamp all of these roses - both the Nocturne (black) and Tulip Red - and still have time to emboss it.  The best part? I was able to stamp these images without having to worry about smudging the inks. You know how most pigment inks stay wet so they can hold the powders?  Well the VF Clair feels dry to the touch in a few seconds but it will grab hold of the embossing powders for 10, 15, 20+ minutes later...while still feeling dry!!!  It honestly seems like it's magic.

For complete directions on how to make the card above please see...


Thursday, January 18, 2018

VersaFine Clair!!! It's Here!!


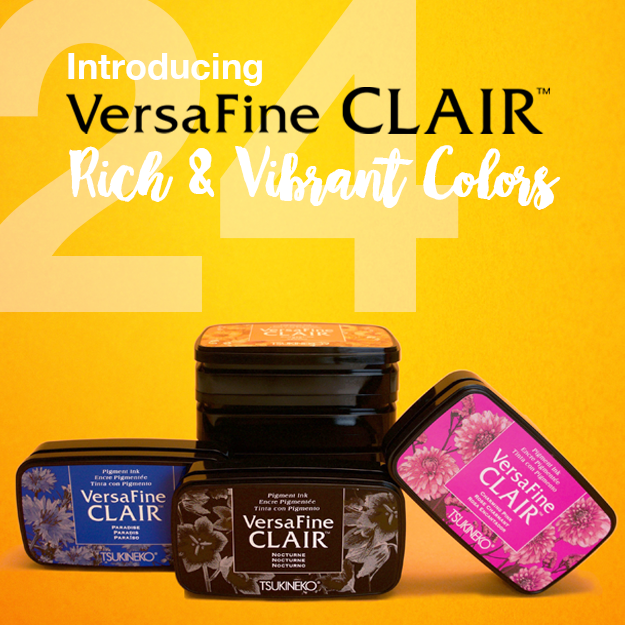
If you like VersaFine you're going to LOVE VersaFine Clair!!  This ink is incredible - superb coverage just like VersaFine but it's a quick drying emboss-able pigment ink...  Yes, you read that right, the embossing powders will stick to the ink even after it's dry to the touch!!  This makes embossing those multi step stamps a breeze!  Want to emboss an entire background?  Stamp away then emboss...no need to stamp, emboss, stamp again and emboss more.  It is such an amazing product, it's going to blow your mind.

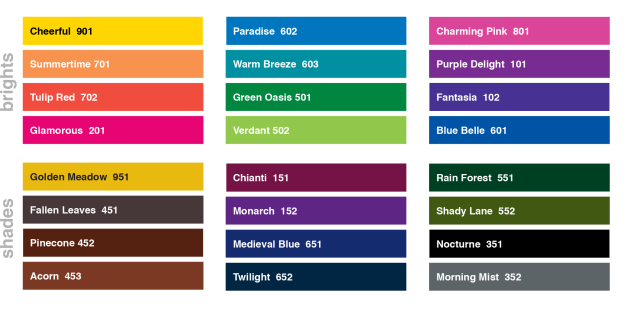
Cheerful 901, Paradise 602, Charming Pink 801, Warm Breeze 603, Purple Delight 101, Summertime 701, Tulip Red 702, Fantasia 102, Green Oasis 501, Glamorous 201, Verdant 502, Blue Belle 601, Golden Meadow 951, Rain Forest 551, Chianti 151, Fallen Leaves 451, Monarch 152, Shady Lane 552, Pinecone 452, Nocturne 351, Medieval Blue 651, Acorn 453, Twilight 652, Morning Mist 352 

It comes in 24 colors at the moment and are they ever beautiful. So far I think Medieval Blue is my favorite but of course you know how much I love blue ;)  I will have a card to share with you tomorrow showing just how much fun it is.  I can't wait to share more about this ink with you!


This is just a sampling of the beautiful colors - stamped above on plain white cardstock, below on a page from a book.  Notice how most of the inks have a lovely translucent quality to them. I just love this feature, it will bring such an amazing depth to the multi step stamps!

The colors are as follows: Charming Pink, Tulip Red, Summertime, Verdant, Shady Lane, Green Oasis, Warm Breeze, Paradise, Blue Belle, Medieval Blue, Chianti, Acorn, Pinecone and Nocturne.


Don't you just love 'em?
Here's a link in case you'd like to check it out further and get your own...


Wednesday, January 17, 2018

Washi Notebook

The other day while I was at Wal-Mart I noticed some neat little notebooks that were a great price.  I bought a couple and knew I was going to personalize them a bit.  Now, I have to admit, I have loads of washi tape, some of which I haven't had the chance to use yet so I decided I was going to choose my favorites and put them to use! 


Here's how it turned out....
I decorated both the outside and inside of the covers.


So this is what one of the notebooks looked like - nice O-ring binding (just like the Bind-It-All bindings) so I already knew it would be easy to take it apart and get it back together.


So the first thing I did was gently pull apart the wire binding and removed the front and back covers.


Next I set about taping all of the washi tape down.  
I used my craft knife to trim the edges.


Once I had the image washi tape in place I went back over it with sparklie blue washi for a bit of bling.  The entire piece was the covered in a layer of Sparkle Creative Medium to seal it all in place because you know how some tapes have a tendency to curl up off the paper.

I then added some printed cardstock on the inside of the page and repeated the whole process with the back cover.


Once both pages had dried I set about cutting tape/paper away from the holes.  Easy enough to do with my craft knife. After I had finished opening up all the holes I slid the pages back on the wire, use the Bind-It-All to close the wires back up again!  


While it was a bit time consuming it was well worth it don't ya think?
I'll bet nobody else has a notebook like this :)


Wednesday, January 10, 2018

All Geared Up!

My first project of the year... yeah!!  I decided that I was going to get back into projects and alter some of the pieces I've bought over the years.  I don't know about you but when I see a bargain I can't pass it up so needless to say I have LOTS of things in my stash that I want to use.


I decided the first project was going to be something for me! You all know how much I love clocks well as it happens I had a clock kit in my stash.  I was a Walnut Hollow kit that was on clearance at Hobby Lobby a few years back.  (Gotta love Clearance...he's a great guy!)  It was about 1/3rd the regular price!


The kit was how to dry emboss using a plastic template and several different tools (included in the kit).  Well you know me, I don't like to follow directions so I immediately tossed those in the trash and did my own thing ;)


I did figure out why it was so cheap...the glue on the wood piece gave way and popped one of the sides loose.  Luckily the rest of the body was very sturdy so it's just a minor set back.


To help hide the defect I decided to paint the whole thing black...


This not only hides the crack but it will look nice as too!


So I decided that the way they wanted to emboss was WAY too time consuming so I used my fav. cuttlebug embossing fold and embossed a couple pieces of the metal included in the kit.  Please note - the dry embossing technique was very popular many years ago - it was before embossing folders became popular making the technique in the kit pretty much outdated.


I inked the entire panel with Orange Zest StazOn ink,


then went over the high spots with Ganache.


I cut the metal into 1" strips. Poured quite a bit of Aleene's Quick Dry Tacky Glue on the frame which I spread out using my fingers.


I then began laying the strips along the edge - aligning them with the outside edge - the inside edge would be covered by the clock piece so it worked out well this way.


Once the glue dried, I put the clock into the frame...this was no easy task mind you - apparently in addition to the crack, it must have shrunk some too because it was a very tight fit. After the clock was in I trimmed off the excess metal and burnished all of the edges with the paper stump included in the kit.  Finally I glued in the glass piece over the clock and added the battery!  It is now residing on my end-table in the living room.

So, fess up...do you have any kits/projects in your stash that you bought years and years ago???  Please tell me I'm not the only one!