Saturday, August 20, 2016

Wednesday, August 17, 2016

Winner, Winner, Winner!

Today I have the winners of a few giveaways....

The winner of the set of peg stamps from Rubber Stamp Tapestry is....

I love tiny stamps, but I haven't ever seen peg stamps. Your wreath is beautiful, and so is the bushel basket full of flowers. A great way to store your stamps to make you more creative!
.
The winner of the Club Scrap - Office Space Envelope Album is....

Oh wow! This is so cool. I've love to see this in person which would mean I'd have to win (wink). Thanks for sharing!

And the winner of the Club Scrap Office Space Pocket Letter is...

Love the interactive details on the ATC cards!

Congratulations Everyone!
Please e-mail me your snail mail addies so I can drop your goodies in the mail.

Tuesday, August 16, 2016

Can You Case It #133

Another challenge today....  
This time I'm using the colors from Can You Case It challenge #133....


As it happens the colors this week match the Sunflower Club Scrap kit perfectly!
Everything you see is from the kit - except the ink which is Memento Dye Ink from Imagine.

CYCI#133


Monday, August 15, 2016

Imagine + Xyron = Fun!

All this week the Artist Teams for Imagine and Xyron are sharing lots of fun ideas on combining products from these two wonderful companies.  Today I am one of the lucky designers to kick off this week of inspiration.


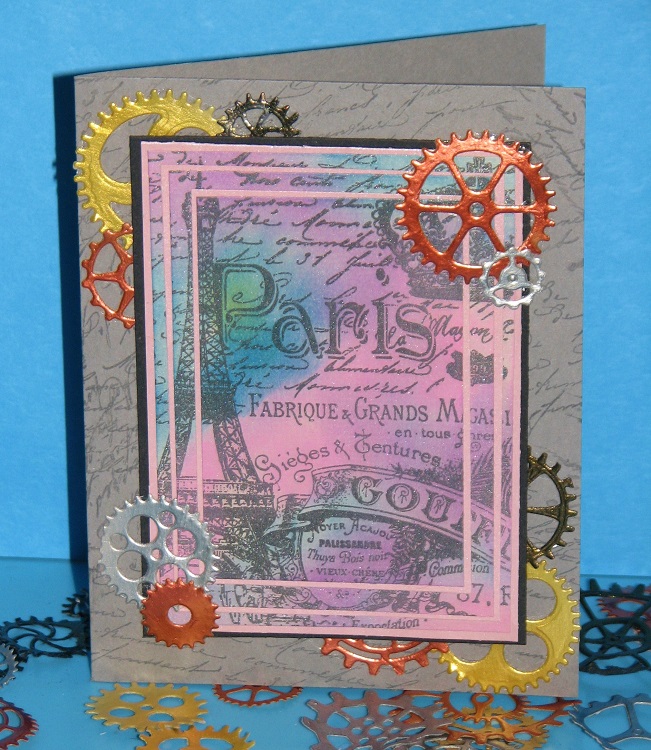
I created this card...Paris Steam.  
It was created by using the "Layered Stamping" technique.
Here's how I did it...


1. Cut three pieces of cardstock, each a bit smaller than the last.  You of course can use fewer or more layers as desired.  It just depends on what you want the finished card to look like.


2. Stamp a large image over the stack of card panels.  

3. While the cards are still stacked, color the image with Memento Inks and Sponge Daubers.


4. Cut 3 mats in a complementary color cardstock.

5. Mount the stamped layers onto the mats using the Xyron Mega Runner.  Adhere the stacked images to a black cardstock mat.


6. Cover 4 pieces of cardstock with the metallic colors of Creative Medium - Bronze, Copper, Gold and Silver.  Let dry.

7. Once the CM has dried, die-cut gears from each panel. 


8. Feed several gears through the 3" Sticker Maker.  Peel off the clear liner sheet and discard.


9. Stamp french text randomly on a grey card base with Grey Flannel Memento Dye Ink.

10.  Peel several gears off of the liner paper and adhere to the corners of the card base.


11. Use the Adhesive Eraser to pick up any stray bits of adhesive around the gears.


12.  Use the Mega Runner to adhere the stacked, stamped image to the card.


13. Finish the card off by adding a few more gears over the image.

Supplies:
Imagine: Memento Ink - Tuxedo Black, LuLu Lavender, Angel Pink, Bahama Blue, Pear Tart, Grey Flannel; Sponge Daubers; Creative Medium - Silver, Gold, Copper, Bronze
Xyron: Mega Runner; 3" Sticker Maker; Adhesive Eraser
ClubScrap.com: Cardstock, Rubber Stamps
Sizzix.com: Gears & Cogs Dies


Sunday, August 14, 2016

Color Throwdown #405

I'm in a slump...as many of you know our son got married last weekend and there were so many last minute details to take care of.  We also own our own business (in addition to farming). We sew covers for a company that sells fertilizer spreaders national and internationally.  In the past I've done mainly office work and sewn a couple days a week helping where needed.  It's a blessing we've picked up more work and are very busy now - so instead of just spending a couple days there I'm working every day and sometimes weekends as well.  I'm not complaining but it has drained my creativity....  I come home from work and just can't seem to get excited about art.  

I have decided to start playing in challenges to give my creative muse a poke and get her motivated again!

The first challenge I've taken on is Color Throwdown #405 -
and here's what I've made....


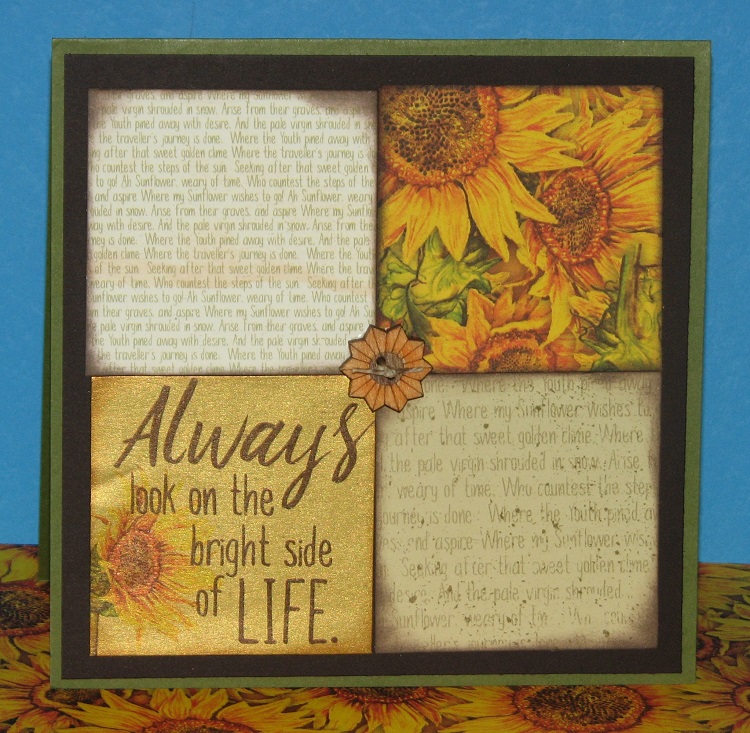
I used the current Club Scrap Sketch Challenge for the basis of my card and used August's Club Scrap Kit - Sunflowers!  I absolutely love everything about this kit because really who doesn't love sunflowers?

I don't know who I'll send this card to but I'm hoping that it will send them some sunshine on their birthday.


Supplies:

ClubScrap.com - Sunflower papers & rubber stamps
Imagine - Memento Dye Ink - Bamboo Leaves, Cantaloupe, Tuxedo Black; VersaMark Ink

Wednesday, August 10, 2016

Good Dog!


Whew, I think I'm finally catching up after neglecting regular chores while playing at wedding stuff.  Today I wanted to share a project that was up on the Imagine blog last week.  My Good Dog Leash Hanger.  One of our challenges for August was the Dog Days of Summer - projects having something to do with dogs.    I knew right away I wanted to do something for our 3 furry friends.  We always have quite the time with leashes so I thought I'd finally get them organized with this fun plaque which I hung by our back door.   These also make great gifts for anyone with pets.

If you hop on over to the Imagine blog here: 


You'll not only find detailed instructions, a supply list but you'll also get to see our fur babies!
Have you made anything for your 4 legged friends lately?

Monday, August 8, 2016

Our Son is Married!!!

As most of you know I've been working on lots of little things for our youngest sons marriage.  Well it took place on Saturday and everything went beautifully!
I have a few preliminary photos to share with you...


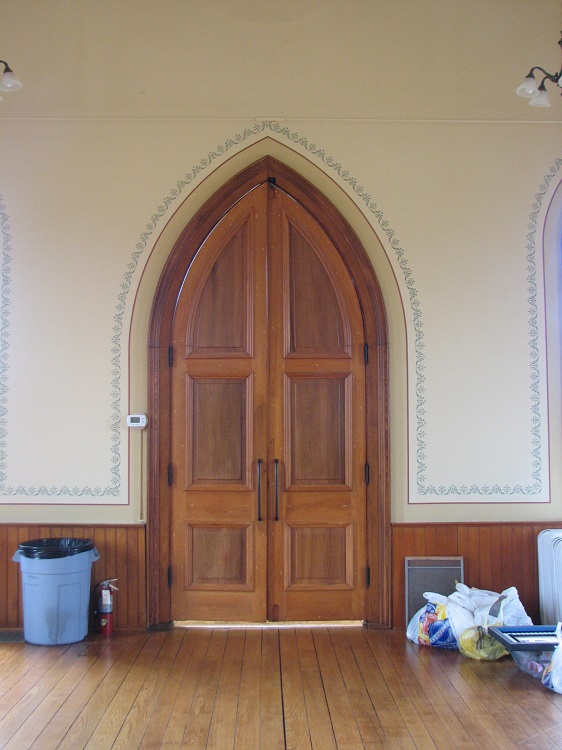
This is the venue - it was an old community church that sat vacant for many years after the congregation moved on.  A group of local farmers came together, bought it and a piece of surrounding land and turned it into a community center.  It is rented out for weddings, family reunions, etc.  It's a lovely old church that they restored to it's original glory.  


Due to the renovations they have pretty strict rules on what you can and can't do so the decorations had to be free-standing - no adhesives at all, nothing affixed to the original wood (windows, doors, etc),  no helium balloons, etc.  So there were several honeycomb decorations sitting around, mason jars & flowers for the tables and she found these wicked tissue balls which were lots of fun.


(Loved this pic!)


And here is the card box I made for them!  These pics show the front but there were photos spanning the 6 years they've been together.  All pictures were in black and white except for the one in the very center on the front.  Everyone loved it and enjoyed looking at how they've changed over the years.


The cake & cupcakes...they were soooooo good!  The person they had make the cake does everything from scratch including the buttercream.  So fresh and so tasty!


My guys ready and waiting. Bob (groom - L), Eric (dh/Dad - Center); Ben (oldest son/best man - R).  It's such a fun picture to have...rarely are all three ever dressed up and in the same place all at once - LOL!  They all looked so nice.


The freshly minted bride & groom!


The wedding party behind the church.


Me and my sweetie!

We of course don't have the official pics back yet but as soon as we get them I'll share a bit more with you.  I'm so happy everything went smoothly and everyone seemed to have a good time.  Such a relief!  

Wednesday, August 3, 2016

Wedding Update....

Several people have asked for updates so I thought I'd post...  Last evening we went and bought dh's and oldest sons clothing - white dress shirts, dark blue denim jeans.  These will be paired with ties & vests (also picked up from the rental store last night) in royal blue for ds and just the tie for dh.    The colors are royal blue (son) and hot pink (dil) - Bob (ds) and his guys are wearing the blue while her attendants and dad will be wearing the hot pink.  

My dress is a navy blue - I couldn't find any royal blue dress that looked nice on me and was appropriate for a wedding.  Most of the royal blue dresses were either prom dresses or sexy cocktail dresses.  So not me in either case!  I hope it looks o.k. in the pics and I'm not too overdressed - it's a casual wedding at a lovely old country church.

We also ordered the bread which I have to pick up on Friday and bought the supplies for 50+ pounds of potato salad.  My mom makes the best potato salad and Morgan (soon to be DIL) asked her if she'd make it for the wedding.  That's my job tomorrow....peeling 50 pounds of potatoes and cooking them - then I am taking them over to Mom's and she's going to work her magic.  I guess in reality it's going to be like 60-75 pounds of ps as there are lots of other ingredients to add to the 50 pounds of taters.  That's o.k. though - I love it and will gladly take some home with me ;)

Friday I have to pick up the buns, take a few things to the church while they are decorating, rehersal and rehersal dinner.  We're having the dinner at Pizza Hut - their choice, not ours.  Dh and I wanted to either cater it or go somewhere nice but the kids decided that they didn't want anything fancy or have to travel too far so we let them choose.  Garden room is all reserved, pizza's ordered - set to go for Friday at 6:30 p.m.

Morgan is getting nervous and Bob says he's not...I don't really buy that but we'll see - LOL!!  Now that we have the clothing and food staples I'm feeling better about it.  Not nearly as nervous as I was.  I like to plan and have things organized way in advance...I had my dress within a week of their picking the date if that tells you anything - LOL!!  

Well, that's about all I know at this point....  I need to take some pics of the card box I made for them so I can share it with you all tomorrow.  I'm very happy with how it turned out - it's simple and elegant - just what they were going for.  


DecoArt Framed Monogram

Last week if you recall I shared the start of a project I was making for my son and soon to be DIL - if you missed it you can find the first part here: DecoArt Americana DECO Chalk Finish Wedding Art.

I have finished it and here's how it turned out....


It's a whopping 18x22" and is quite impressive in person!

I'm going to place it on the gift table at the wedding unwrapped so everyone can see it.
I hope that they like it.


If you recall or take a look at the previous steps I shared I had painted the entire frame and added the blue harlequin.  After all of the paint had dried I went back and sanded the front of the frame - Black only - and distressed it a bit with sand paper.  It make the blue & white background look very crisp against the distressed black.


I then glued on 2 types of black trim to finish off the frame.  A round 1/2" cord around the outside and a flat braided trim around the opening.  Popped in my artwork (Thank you Tracey for figuring out the PS stuff!!!) and ta-da!  Wedding gift ready to give.

Supplies:

DecoArt - Americana DECO Chalk Finish Paint - Everlasting (white), Legacy (blue) and Carbon (black); Harlequin Stencil
Other: Handcrafted Wood Frame (Thanks Dad!); Trim; Hot Glue; Artwork; Burlap

Monday, August 1, 2016

Sand In Our Toes....

Gosh, can you believe it's the first of August already???  I sure can't.  I tell you time is flying.  I suppose because we're so busy at the moment.  As many of you know my youngest son is marrying his high school sweetheart this coming Saturday!  So many things to do and think about on top of being an emotional roller coaster.  This is either going to be one of the quickest weeks of my life or the longest....  Not sure which yet.  I've got a couple things to share with you that I've made but today is the first day of the Just For Fun Rubber Stamp Challenge and yes, the theme is 


Here are my sandy creations....


Have a lovely week friends!