Friday, January 31, 2014

Valentine's Day Mini Mailbox

Yesterday I shared the template and instructions for creating a Mini Mailbox that you could actually fit a card, candy or other goodies in. 

Today I wanted to share one I made ~  I used Bo Bunny's Head over Heels collection of paper to embellish my mailbox.  It was perfect because a few of the papers already had a mail theme to them!


I think I'm going to make another and give the boy's girlfriends 
their Valentine's Day goodies inside them.

Fun Fun!

Hope you all have a safe weekend...
we're supposed to have more snow with some ice thrown in - ICK! 
I don't mind the snow but I could sure do without the ice.

Next week they are calling for another major storm ~
I'm excited... I'm one of the few who is still enjoying the snow :)
Dh, my Mom & Dad and well anybody I admit it to thinks I'm crazy  - LOL!!
Oh well, you're not going to beat it so you might as well enjoy it!

Thursday, January 30, 2014

Mini Mailbox - Template & Instructions

Since Valentine's Day is approaching quickly I thought it would be fun to make a Mailbox to tuck a card, candy or other goodies into as a nice little surprise for your sweetie.

Well, when I went in search of a nice mailbox they were all tiny...like big enough for a Hershey Kiss...  That's not going to do so I decided to make my own!

Here is the basic template....

(jpeg)
Printed on an 8.5x11 sheet of cs.


or here is a link to the PDF

Mailbox Template


Basic Supplies:

Template Printed on Cardstock
1 Extra Sheet of Cardstock
Glue
1 Brad (to attach the flag)

Instructions:

1. Print the template on cardstock or pattern paper & cut out all the parts.  Set aside for now.

2. Cut the extra sheet of cardstock or pattern paper as follows: 

Cut 1 piece - 9" x 5.5"
Cut 1 piece - 3" x 5.5"

3. Score the 9" x 5.5" piece 1/2" on each end of 9" long side.


Here's what it looks like....


4. Now lay the scored cardstock on your table with the tabs facing up.  Fold each tab over and apply adhesive.


5. Take the 3" x 5.5" piece and line it up along the edge of the tab.  Press it into place.


6. Take the second tab and fold it around (carefully) so it aligns with the other side of the 3" x 5.5" piece of cardstock.


You now have the start of your mailbox!


7. Now it's time to finish your mailbox! Score and fold the various pieces where indicated on the template.  You will notice that one end cap has 4 tabs and the other end cap has one tab.    The end cap with 4 tabs will become the back of the mailbox.

Apply glue to all of the tabs.


8.  Slide the back end cap into the mailbox about 1/8 - 1/4" and affix all 4 tabs to the bottom, top & sides of the mailbox.  I found it helps if you slide one hand in the open end to help position and make sure the tabs are adhered to each area.


Here is my end cap in and glued in place....


9. Affix the handle to the front of the other end cap.  This is your mailbox lid.


10.  Slide the front end cap or mailbox lid in 1/8" - 1/4" and press the flap down to the base.


11.  Poke a hole in the side of the mailbox and use a brad to attach the flag to the mailbox.  

And you're done!


This little mailbox is large enough to tuck in a small card, candy or other goodies!
Tomorrow I'll share my finished example!

Wednesday, January 29, 2014

Graffiti Club Scrap Blog Hop & Give-A-Way!

Welcome to 
January's 
Club Scrap Blog Hop
featuring this months kit ~

This months kit was filled with lots of spunk, style and art ~


I particularly loved it because many of the prints were in grey/black and white which allowed for lots of personalization.  The suggested matching color scheme was very bright which really made this kit fun to play with...


When I saw that one of the stamps included in the kit was a Graffiti word - "ART" I knew I wanted to create an art journal filled with a combination of mixed media and watercolor papers.  I wanted the covers to be pretty sturdy so I started off by covering a pair of game boards cut to size.  Those puppies were so thick I ended up having to hand punch the holes...they wouldn't fit in my bind it all.

I like black and grey as you can tell from the blog so I covered the front with a piece of really cool pattern paper in that color scheme.  I added a pop of color by stamping the word "ART" on some white mixed media paper then colored it using Distress Stains which I let blend to create a really bright rainbow of colors.  Once it was dry I used the included American Crafts White Galaxy Marker to add lots of fun highlights to the word.  I then carefully cut around the entire word leaving a tiny white frame.  To finish it off I added a bright pink rubber band to help hold it closed to keep all your precious drawings, doodles & art work safe and sound.


I used one of the really cool color Graffiti prints for the inside and back covers as you can see here....
The book contains mixed media paper in the front....


and a divider of grey/white graffiti pattern paper and a very appropriate stamped sentiment about Art.
Behind that divider is a stack of wonderful watercolor paper just waiting to be inked or painted or whatever your heart desires....


I am going to be giving this art journal away to one lucky reader who leaves a comment.
(Be sure to leave a way for me to contact you)
You will have until 2-3-14 to comment to be entered into the drawing!

I was having so much fun with this kit that I made a few cards as well....
The first two cards were created by using Distress Stains to make some splatter paper.

Art....


and a Valentine's Day card....
Love...


Finally I wanted to share my Gnome card with you...

In December Club Scrap released an extra set of stamps and papers called "Gnome for the Holidays".
I loved that little gnome so much that I decided to keep the fun going and use him with each kit this year.

Here is my "Graffiti" Gnome card.... 
When I read the art sentiment included in this kit it was PERFECT!!!
 I KNEW exactly what I wanted the card to look like,
and it turned out just as I pictured it....


The gnome was actually stamped twice, once on white cardstock which is what I used as the base and a second time on the piece of pattern paper that had a cool graffiti print that faded to grey.  I paper pieced his hat, shirt and boots onto the white body.  

I then trimmed the card panel from the second piece of pattern paper and mounted him so the design on his clothing lined up perfectly with the background.  I when over the lines with a black marker to help him blend in a bit more and finally added the sentiment....


Told you that sentiment was perfect!
I hope you've enjoyed my take on this very fun kit...

It's time to hop on over to 
and remember, if you get lost along the way
there is a complete list of bloggers on the 

Have a wonderfully Artsy day friends!!

Tuesday, January 28, 2014

Brrrrrrr - Never Ending Winter Cards

I hope you're all trying to stay warm ~
It is currently a whole -7 here right now...up from a morning low of -17.  That's the actual temp...it's somewhere around -25 to -30 with the windchill.  They said on the news this a.m. that today is going to be one of the top 10 coldest days on record for Indiana since they started keeping track of it back in the late 1800's!!!!  Nice to know but not such a fun thing to shoot for!

Since we're in the deep freeze rather than trying to fight it I figured I might as well embrace it... so, here are a couple wintery cards to cheer you...

The first card has a modern feel to it with the pale, almost pastel color scheme...


But this card I went for the glitz and glam by using "Snowflake" embossing powder.  
Very appropriate don't you think :)


All of the stamps are from Just For Fun Rubber Stamps. 

Hope you're keeping warm!
Remember that tomorrow is the Club Scrap Blog Hop
featuring this months kit - Graffiti!
See you then!
  

Monday, January 27, 2014

Spritzer Tool

This tool just goes to prove the something old can be new again....
Ranger & Tim Holtz introduced the "Distress Marker Spritzer" at CHA earlier this month and won a spot on CHA's Hot 20 Awards list.  

The air spritzer tool is nothing new, Stampin Up! has in the past offered them in their catalog for several years (not sure if it still is...I haven't seen a catalog in a couple years) and I bought my InkWorx "Air Art Gun" back in 1998.  There is even one NIP on Ebay right now if you can believe it... Vintage InkWorx Air Art Gun ...of course they called it vintage (slapping my forehead...)  Makes me feel old - LOL!!!  Since there are no moving parts and it's hand operated mine still works perfectly.  (shown below)


Anyway, today I thought I'd show you how it works and what it looks like.  These tools are designed so you can insert a marker into the holder, there is a little plastic screw to secure the marker so it doesn't slip out - just tighten it until the marker is snug then squeeze the air bulb!  That's it...  I've used assorted brands of markers in the tool ~ Sharpies, Bic, American Crafts, Memento, Pentel, Distress Markers, etc.  They all work well.  The most important thing to remember is to be sure that the tip of the marker is in the path of the bulb tip - that way when the air is squeezed out of the bulb it's actually misting right across the tip of the marker/ink.   Many people have complained in the past about the air tools not working properly but with a minor adjustment of the marker placement they work fine.


It's a really cool tool to apply color to your projects.  You can vary the look of the dispersed ink by adjusting how much and how quickly you push the air out of the bulb.  You can hold the bulb steady or squeeze the air out of the bulb while moving the tool across your paper and each will produce totally different looks.  Another factor which will change the look of your resulting ink splatter is how closely you hold the tool away from the paper when you squeeze the bulb.  Closer to the paper will yield compact tightly formed splatters and as you get further from the paper the ink spray patterns increase in size and how dispersed they are.  It's lots of fun to experiment with just to see how many different looks you can achieve using one simple tool.

This months kit from Club Scrap is called Graffiti which fits in with this tool PERFECTLY!!!  So, I started off by stamping the graffiti type word "ART" onto my paper.


I started off by holding the tool stationary a couple inches away from the paper...
you can see it created a pretty wide spray pattern...


Next I used the green about the same height but moved it a short distance when I squeezed the bulb.  


I used the yellow a bit closer and made several short bursts (on the left side) and several long sweeping bursts (lower right)...


I used the pink both stationary, upclose as well as a few sweeping motions.


Here are a few close ups of the different looks....


And my finished card!


So, there you have a quick look at a fun air brush type tool that will help you create all sorts of nifty color patterns on your projects.

OH - and if you liked the sneak peek at the Club Scrap Graffiti kit
be sure to stop back Wednesday.
That is when the official Club Scrap Blog Hop is.
You'll see all sorts of fun Graffiti projects and
I'll be giving away the goodie I made to one lucky reader!
I won't spoil the surprise by telling you what it is but I'm sure you'll get lots of enjoyment from it!

Be sure to stop back then for your chance to win!

Friday, January 24, 2014

2014 Technique Calendar - December - Heat & Bond Glam

2014 Technique Calendar
December
Heat & Bond Glam

O.k...you all know how much I love glitter well, in this case I saved one of my favorite techniques for last.  I started out with Heat N Bond which is found in the sewing department.  It's a sheet of adhesive that's usually meant to iron two pieces of fabric together.  I bought it to repair a hem (I know I know....let's not go there) and I had LOTS left over so I decided to play a bit and this technique is what resulted.


Supplies:

Tag
Heat & Bond
Glitter
Iron
Heat Tool
Embellishments to finish off your calendar page

Instructions:

1. Cut a piece of Heat N Bond to the size needed and position it over your cardstock/tag.


2. Iron the Heat N Bond to the tag as directed by the instructions.  Basically you just set your iron down on an area for a few seconds then move to the next section till it's all ironed down.  Let it cool.


3. After the Heat N Bond has cooled, peel off the protective backing.  Your tag will now be shiny with dried glue.


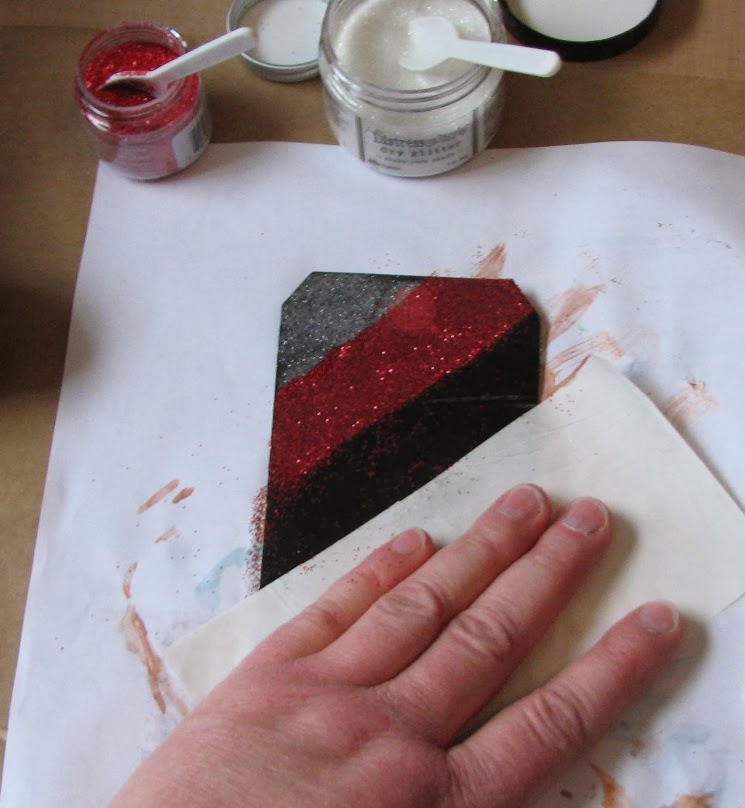
4.  Here's where the really fun stuff comes in.  I am going to be making a candy cane striped tag so I am using the protective backing sheet to mask part of the tag off showing only the first stripe.  Heat that stripe with the heat tool then quickly sprinkle on desired color of glitter and press it with your finger tip a bit.


4. Slide the backing paper over a bit and heat the next strip, add the glitter shake off the excess and continue on until the entire tag has been covered.


Here I am finishing up the very last tip of the tag...heat, glitter, shake & done!


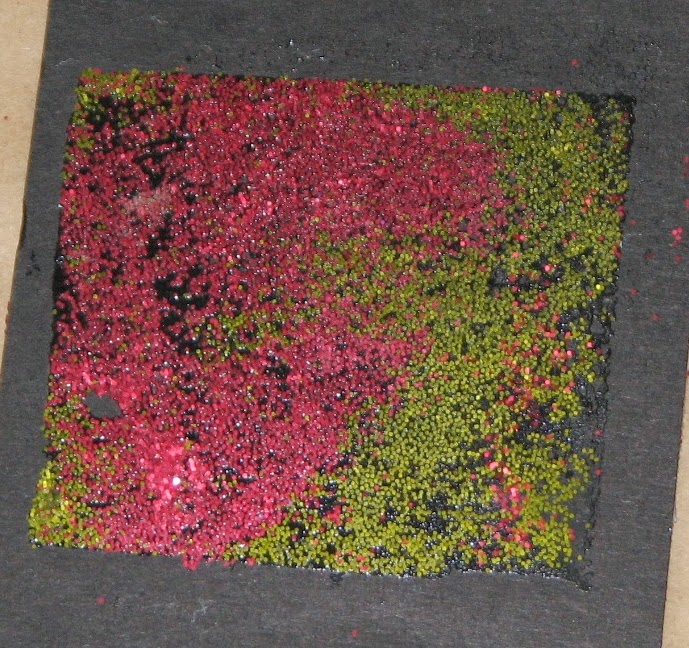
Of course you don't have to work in stripes...here is a sample I was messing around with ~ I thought I was going to use the red & green glitter in just a random pattern but then I thought of the candy cane stripes.  
This technique has so many possibilities ~ think of die-cutting either the Heat N Bond it's self or after the H&B has been ironed down, die-cutting or hand cutting the backing paper.


Here is what my tag looked like once I finished adding the glitter....


And here is my finished calendar page!


A closer look at the image, background & my reindeer...

Stamp credit: Deep Red Stamps

And so we come to the end of our Technique Calendar for 2014!
I hope you have had fun trying each technique and if you haven't had time or supplies remember they will be here in the future for reference.

Of course this isn't the end of the techniques for the year but for some reason making and assembling these calendars are always so much fun.

I'll be posting a recap this weekend with links to each technique post for easy access.

Have you taken time to enjoy a bit of art recently?

Thursday, January 23, 2014

2014 Technique Calendar - November - Rub-On Stenciled Resist

2014 Technique Calendar
November
Rub-On Stenciled Resist

I don't know if you've ever tried Craf-T Products Metallic Rub-Ons before but they are a wonderful creamy medium that adds a shine and shimmer to any project.  These rub-ons have been around for quite some time but they are similar to newer products such as Rub & Buff or Inka Gold type products.  I have several kits but I love my metal metallics the most.  You just can't beat 'em for a brilliant finish.

Normally used to add highlights or a metallic luster to a project I had it in my mind that they might just work for a resist technique so I set out to give it a shot.  Sure enough it worked like a charm so I thought I'd make it the technique for November's calendar page.


Supplies:

Tag
Metallic Rub-Ons (or other similar product)
Stencil of your choice
Dye Spray Ink
Stamps (optional)
Ink
Embellishments to finish off calendar page

Instructions:

1. Place the stencil over the tag, either use a bit of removable tape to hold it in place or simply hold it in place with your hand (which is what I did).

2.  Use your finger tip or a foam applicator to apply the metallic rub-ons over the stencil.  I used a bit of cut & dry foam from Ranger.  I tried my finger but my hands were so cold it didn't want to work - LOL!!


I used several different colors over the entire tag...you could use one color or more for your own.


3. Spray on desired color of dye ink spray...I used Dylusions Squeezed Orange since it's a fall type design I'm going for.


Now, don't waste all that ink, To help sop up some of the excess and resisted ink I used other tags to soak it up....


I was actually able to color two additional tags from the first.  Now I have a start on two more tags!


Here's what the tag looks like once it's dry...I wanted to show some of the shimmer you get from the metallic rub-ons....  It's so hard to show just how beautiful the color and luster is.


4. Optional - If desired you can add a few stamped images over the resist.  I wanted to add a touch of fall to the card since the vintage people stamps I'm going to use aren't really fall-ish.  I love these skeletonized oak leaves from Deep Red Stamps.  They are so realistic.


And here is my finished tag!

All stamps Deep Red Stamps
Stencil - Club Scrap

A closer look at the tag....


Gosh, only one more month left in our 2014 Technique Calendar!
It seems to have flown by and I have so many more techniques to share....
actually, I can't wait to go into some of the techniques a little more in depth. 
They have sprouted so many ideas, I can't wait!

Hope you're all having fun and keeping up!
See you tomorrow for the final page in our Calendar!