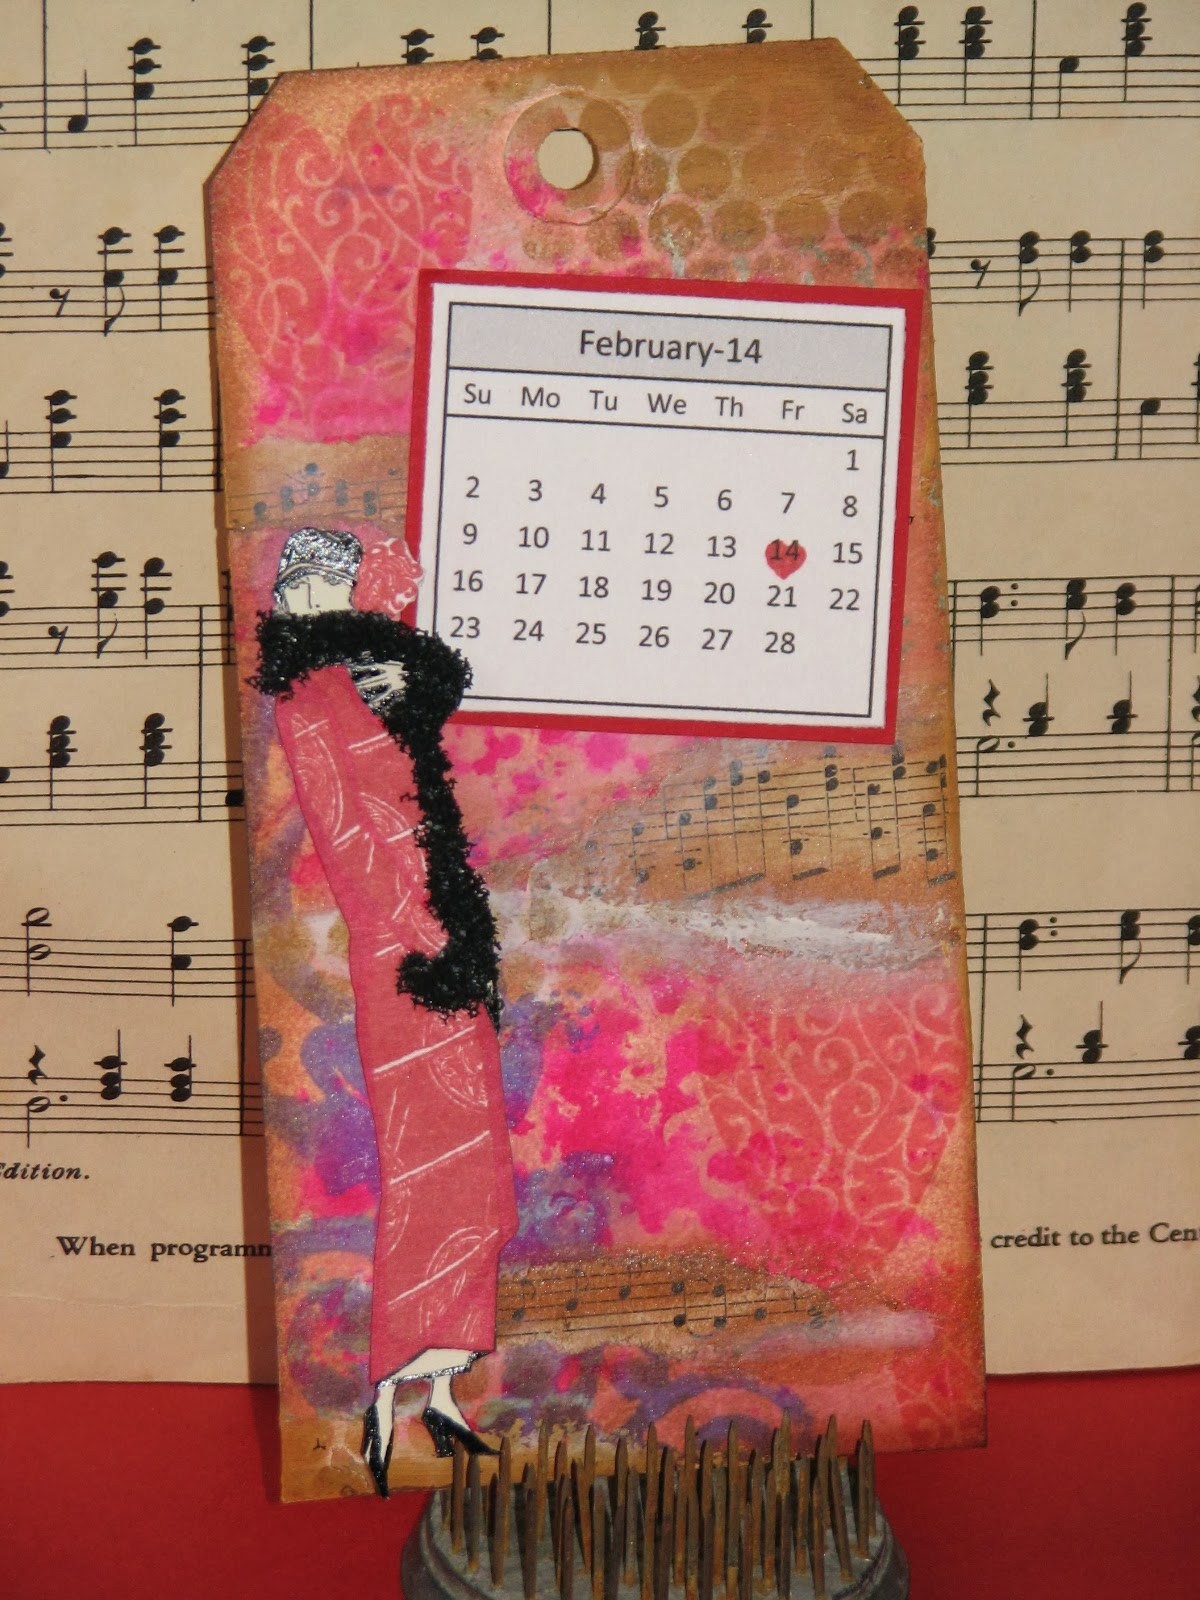
2014 Technique Calendar
February
Mixed Media
(step by step)
I can't tell you how many people ask me for mixed media posts. I've posted a few things but folks have asked for a more step by step approach so here goes...
NOTE: Remember, this is a use what you have, make it work moment...
I'll offer a few suggestions for alternative supplies below.
Supplies:
Tag
Paints
Spray Inks
Stamping Inks
Gesso, Embossing Paste or other thick medium - heck even some really thick paint will work.
Stencils (store bought, hand made, die-cut negative, etc.)
Ephemera - bits of paper from books, dictionaries, sheet music, newspapers, etc.
Stamps
Instructions:
1. Start off by spritzing on a desired base color using a spray ink.
Spray Ink Tip: If you don't have any spray inks you can always make your own by adding a drop or two of reinking ink to a spray bottle mixed with a bit of water.
Spray Ink Alternative: Now, if you don't have spray inks or reinkers you can make a spray using acrylic paint! Simply add a few drops of acrylic paint to your spray bottle, add a bit of water - how much is up to you...the more water, the more diluted the spray. Shake it very well to mix and spritz away! White and Burnt Sienna are my two favorite colors of acrylic paint to use this way...the white of course adds a nice shabby chic feel to a project while the burnt sienna yields a wonderfully grungy antique look.
2. Once the base color is dry, place a stencil over your tag and give it a few spritzes with a second color of ink.
Stencil Alternatives: If you don't have any stencils on hand you can hand cut or die-cut a stencil all your own! It doesn't even have to be made with plastic. You could make a one-time (or 2-3) time use stencil out of smooth cardstock!
Don't waste the ink on your stencil, flip the stencil over onto a clean tag so it absorbs the rest of the ink as I did here.
Here are both the positive and negative (flipped over stencils) inkings. Actually, I think I like the secondary tag (left) better than I do the tag I originally intended to use!
3. If desired, add another layer of ink in the areas that didn't have the original layer.
4. Now it's time to add some stamping! I started off by using one of my favorite stamps... It's an Inkadinkado script stamps I've had for years.
I decided to use a bit of Picket Fence Distress Stain on the image and stamped it a couple times here and there.
Next I stamped a few hearts since it's for February. You could add more if you like ~ I'm going to stop there as I've got other things planned.
5. Now take a bit of ephemera and tear a few strips ~ in this instance I'm going to use sheet music. I found some nice areas that had some cool looking notes
added a bit of glue to the back and glued them down to my tag. Once dry I trimmed off any excess paper hanging over the edges.
6. The next step is going to ground those papers a bit as they just look like they are floating on top of the background. The technique I am going to use is really easy - jut apply a drop of two of paint to the desired area...
then use your finger to swipe it off to one side or another.
You can see here that I used both bronze and white acrylic paint. Now the bits of ephemera actually looks like it is part of the tag rather than just sitting on top of it doesn't it?
7. I thought the tag needed a bit of something so I used a piece of sequins waste (a.k.a. Punchenella), ink and my ink blending tool to give the tag a little something extra. I added this accent in three separate areas - I personally think odd numbers of anything are more pleasing to the eye than even numbers. Of course this isn't a hard rule, just something I like to use in collage & mixed media. I'm sure you can find other artists who prefer even numbers. It's a personal preference thing. Do what feels good to you.
8. Finally I inked the edges with Distress Ink. This is optional but I think it gives the tag a finished look.
Once you are satisfied it's time to decorate the tag with your embellishments.
In this case the calendar page and my vintage lady.
Stamp Credits: Heart - Stampin' Up; Script - Inkadinkado; woman - Hampton Art Stamps
I finished her off with a bit of Black Flower Soft where the fur on her coat was located.
So does that satisfy your curiosity about dipping your toe into mixed media?
Of course there are all sorts of different media you could use but this gives you an idea of how open this type of art really is. The possibilities are endless!
So, now it's your turn...
pull out your inks, paints and stamps and dive in!


Thanks Roni, enjoying your calendar.
ReplyDeleteTwo fabulous ideas so far! Feb & Jan.
ReplyDeleteThanks! It is great to see your process for this piece. Love your calendars each year!
ReplyDeleteWonderful tutorial...thanks.
ReplyDeleteWonderful tutorial...thanks. ABSOLUTELY I love working with mixed media. I take a weekly class on mixed media and would love to share your ideas and blog with our class. The cards/tags/paper take on a whole new look with mixed media supplies. I love it. It's new and different. Keep it up!!!
ReplyDelete