Tuesday, March 31, 2015

Club Scrap - Nice to See You Design Challenge

Wow, don't know where the month has gone but today is the end of the month and time for another Club Scrap Design Challenge.  This month we are challenging you to use the "Nice to See You" kit.

If you recall out challenge last month was to use the Stacked Book components - I made a Stationary Book box that JeniRuth won :)  I wanted to use the left over components for my project this month as I already had something in mind.  With a bit of trial and error (the first box lid I made was 1/2" too long!) it came out just as I envisioned it.  

Here it is....it looks a box covered with the Nice to See You papers....


O.k.... still looks like a box...even from this angle...


Wait a minute - nope, still a box...


Oh but wait!  Would you look at that...


The lid is attached to one side of the box....


And let's See what's inside....


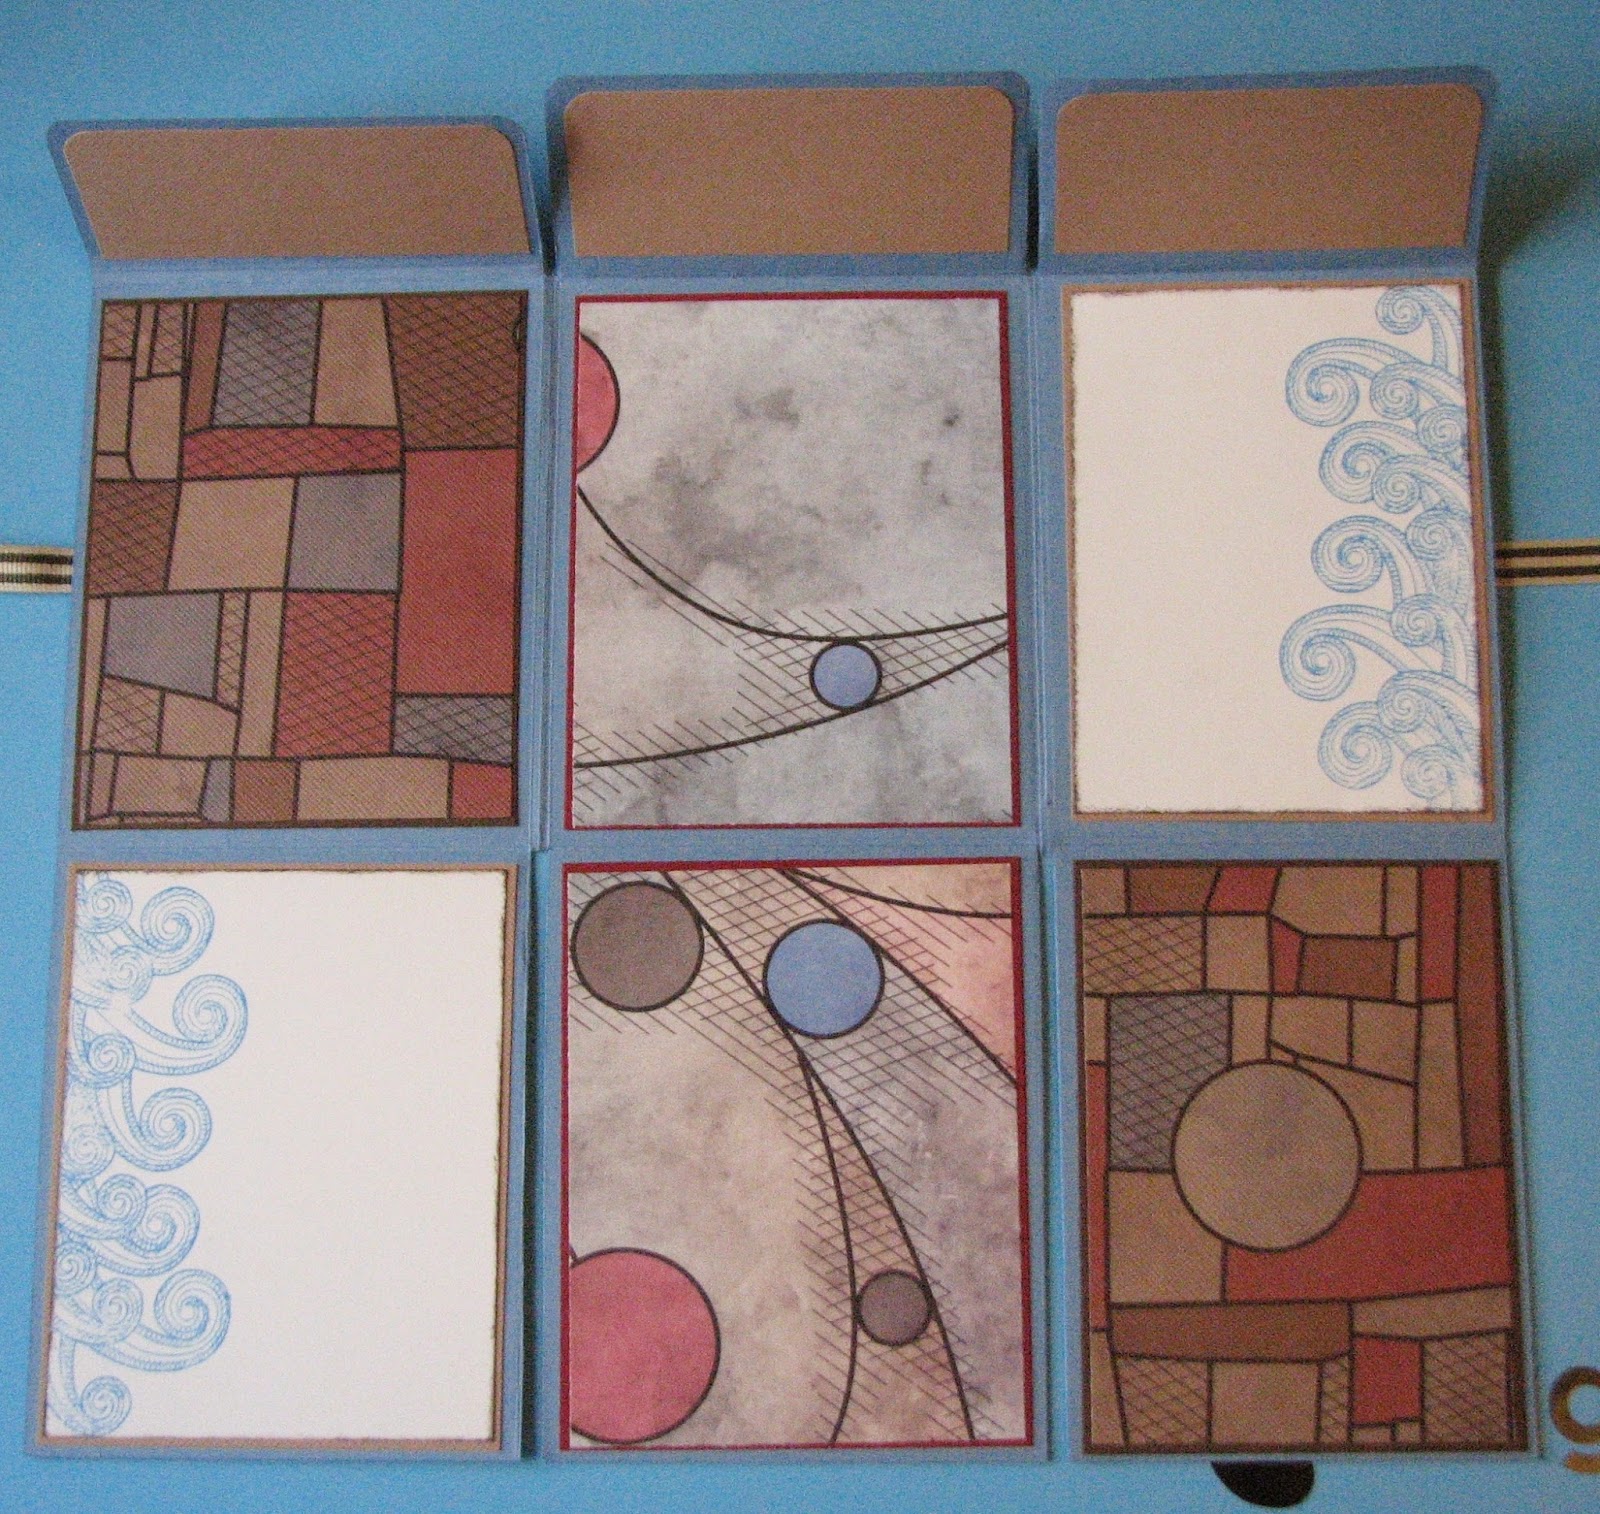
Two sides of the box fall down to reveal a mini album attached to the 4th side!!


Here are the pages in the mini album ~ (you can click on any to enlarge)


And what's this???  A surprise tied up on the bottom???


Let's open it up to see what it is....


Why it's a nifty little box for hiding love notes, bits of ephemera or any other little goodies that you might want to tuck away for safe keeping!


How's that for a fun transformation?

Give Away Time!!!  Would you like to win this box/album/keepsake holder for yourself or to give as a gift?  Simply leave a comment here or "share and like" it on FB (be sure to let me know if you've done so) for your chance to win.  You'll have until April 14th to enter to win!

I hope you're inspired to play along and create something with the Nice to See You papers or stamps!  If you do, be sure to link your creation to the Nice To See You Challenge Post on the Club Scrap Blog!  You might just be the lucky winner!

Supplies Used:

Nice to See You Papers & Stamps
IMAGINE Crafts featuring Tsukineko - Memento Inks
Remember Ribbon (from my stash)
Book Binding Glue

Monday, March 30, 2015

Metal Mania - Altered Pencil Case & Pencils - Part I

Happy Monday!  I hope you've all had a great start to the week.  Today I am carrying on with one of the promises I made to myself at the start of the new year...Alter More!  Well, actually not necessarily to alter more but to start using up some of the alterable goodies I have in my stash - LOL!!  I admit it - I am a hoarder and a sale shopper so I can't resist when I find really cool goodies (to alter) at really great prices.  

The first of what I hope will be many altered projects this year is something that I received in a Mystery Box from USArtQuest sometime last year....paper mache pencil case w/pencils.  There were two in my box so I figured I could alter one and give one away ;)  


The pencils in the cases are also covered with a layer of paper mache and they fit into the case pretty snug so I can't do anything too drastic to them or they won't fit back into the case.  I decided that since everyone seems to be into metals and metallic finishes I would go that route since I always have loved using metals on my pieces.  


 The first pencil I wanted to decorate will be covered in metal leafing.  Now if you haven't tried this stuff you really should - it's wonderful!  I love it and all it's little pieces and yes, I do have quite a bit of it - I told you I like metallic's ;)  LOL!!  Many people think you have to purchase leafing in sheets which is far more expensive but I prefer leafing flakes.  They are just as pretty, easy to use and are far less expensive than a book of leafing sheets.    My favorite brand is Sepp Leaf Products (Sepp Leaf Tsmise Leafing) which can be found both on-line and in stores that carry leaf products.  It's about 15.00 per box but it lasts forever...a very little bit goes a very long way.  There are many other "crafty" brands out right now but you get a very small about for 6.00 - 10.00 (which is why I prefer the Sepp leaf).  


Next comes the leaf sizing...these are the two brands I have - Mona Lisa Products offers Metal Leave Adhesive Size which is what I normally use but USArtQuest also offers the Duo adhesive which works almost as well.  


The key to this adhesive is that it is painted on, left to dry to a tacky consistency....


It's then ready for the leafing...larger sheets I just place on the object to be leafed and spread it around pressing it in and burnishing it with my fingers to work off the excess leaf.   When I say burnish you're simply rubbing your finger back and forth over the leafing.  This does two things - it presses the leaf into the adhesive making sure you have good adhesion and it also rubs off the excess leaf leaving a smooth gleaming metallic surface.

NOTE - Don't throw the excess away - it can be reused for other projects.


If you happen to have a spot that doesn't get covered simply apply more glue, let it dry and cover it up.  Works like a charm.


I made a copper example from the "scrapings" what was left over from other projects works just great for something like this... I have found that it's easier to use these smaller bits by sprinkling the flakes onto a sheet of paper and roll the pencil through them letting the adhesive pick up as much as possible.  Once it's covered, again burnish with your fingers. 


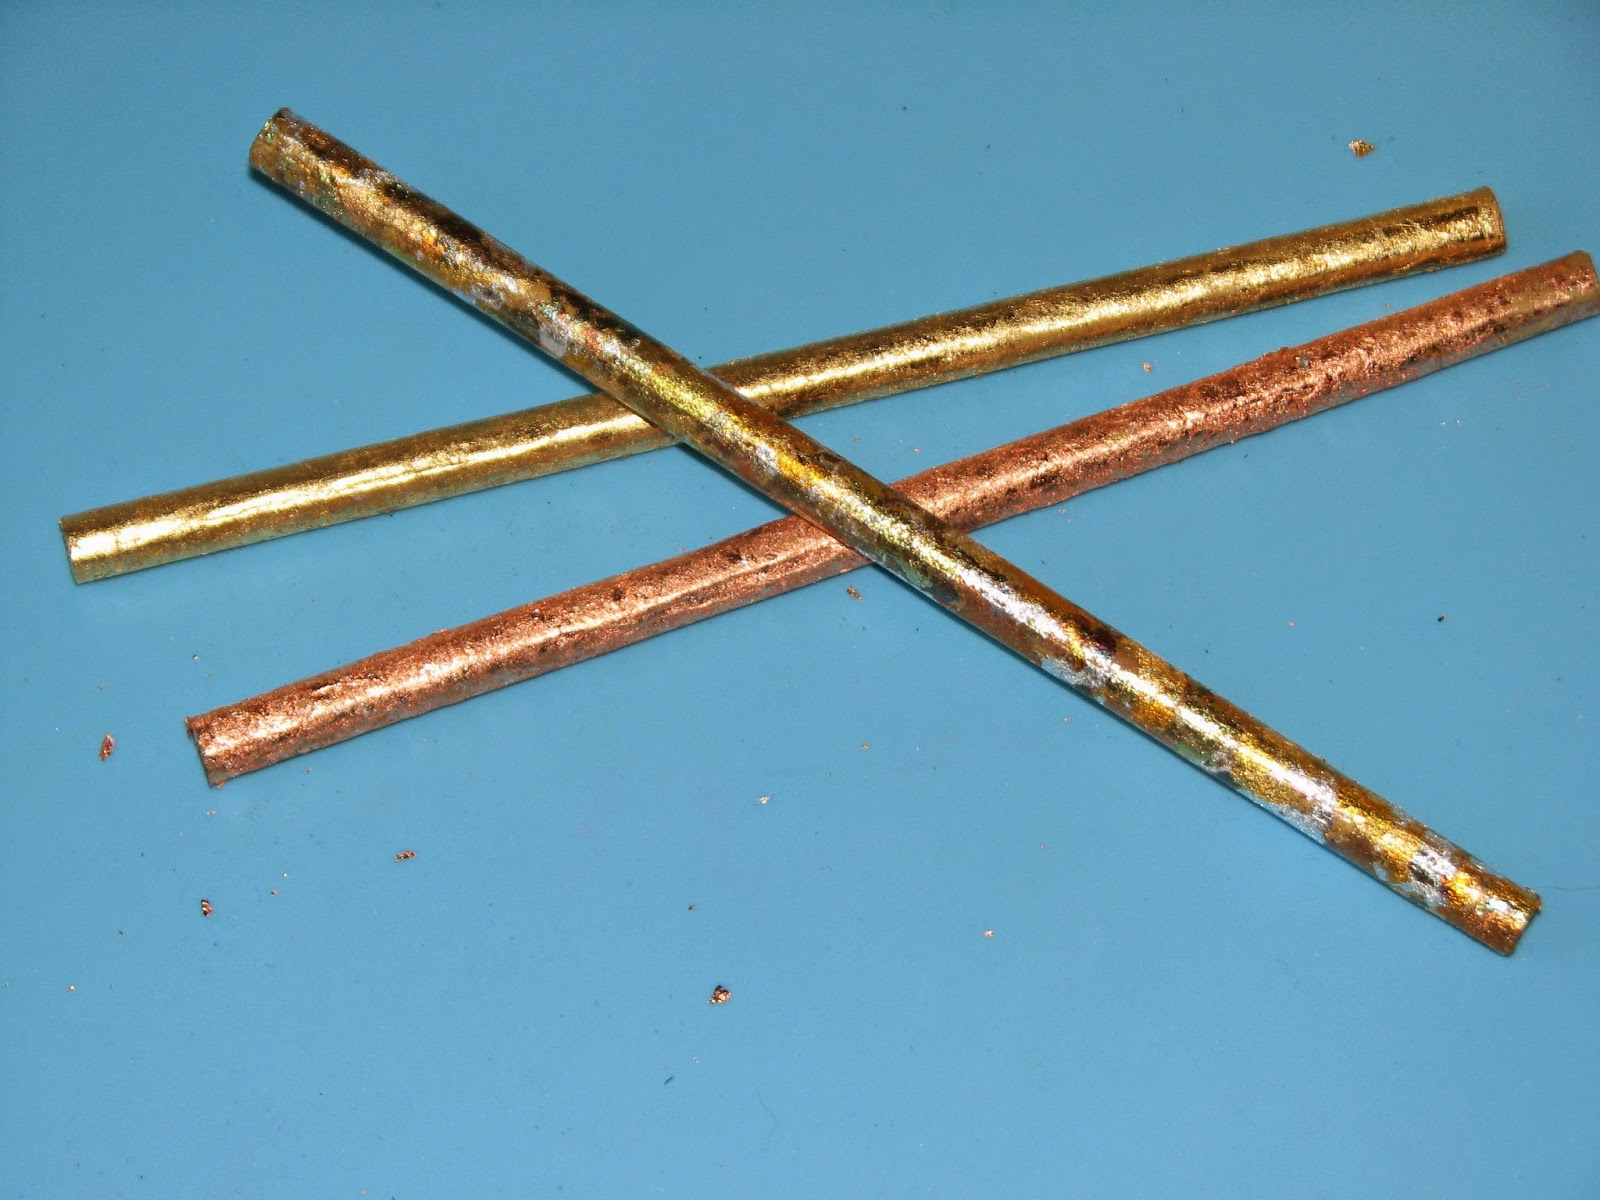
I actually made 3 pencils covered with leaf just because I was having so much fun.  The third pencil was made with a leaf mix which has several colors of leaf in one box - I love the randomness of it.


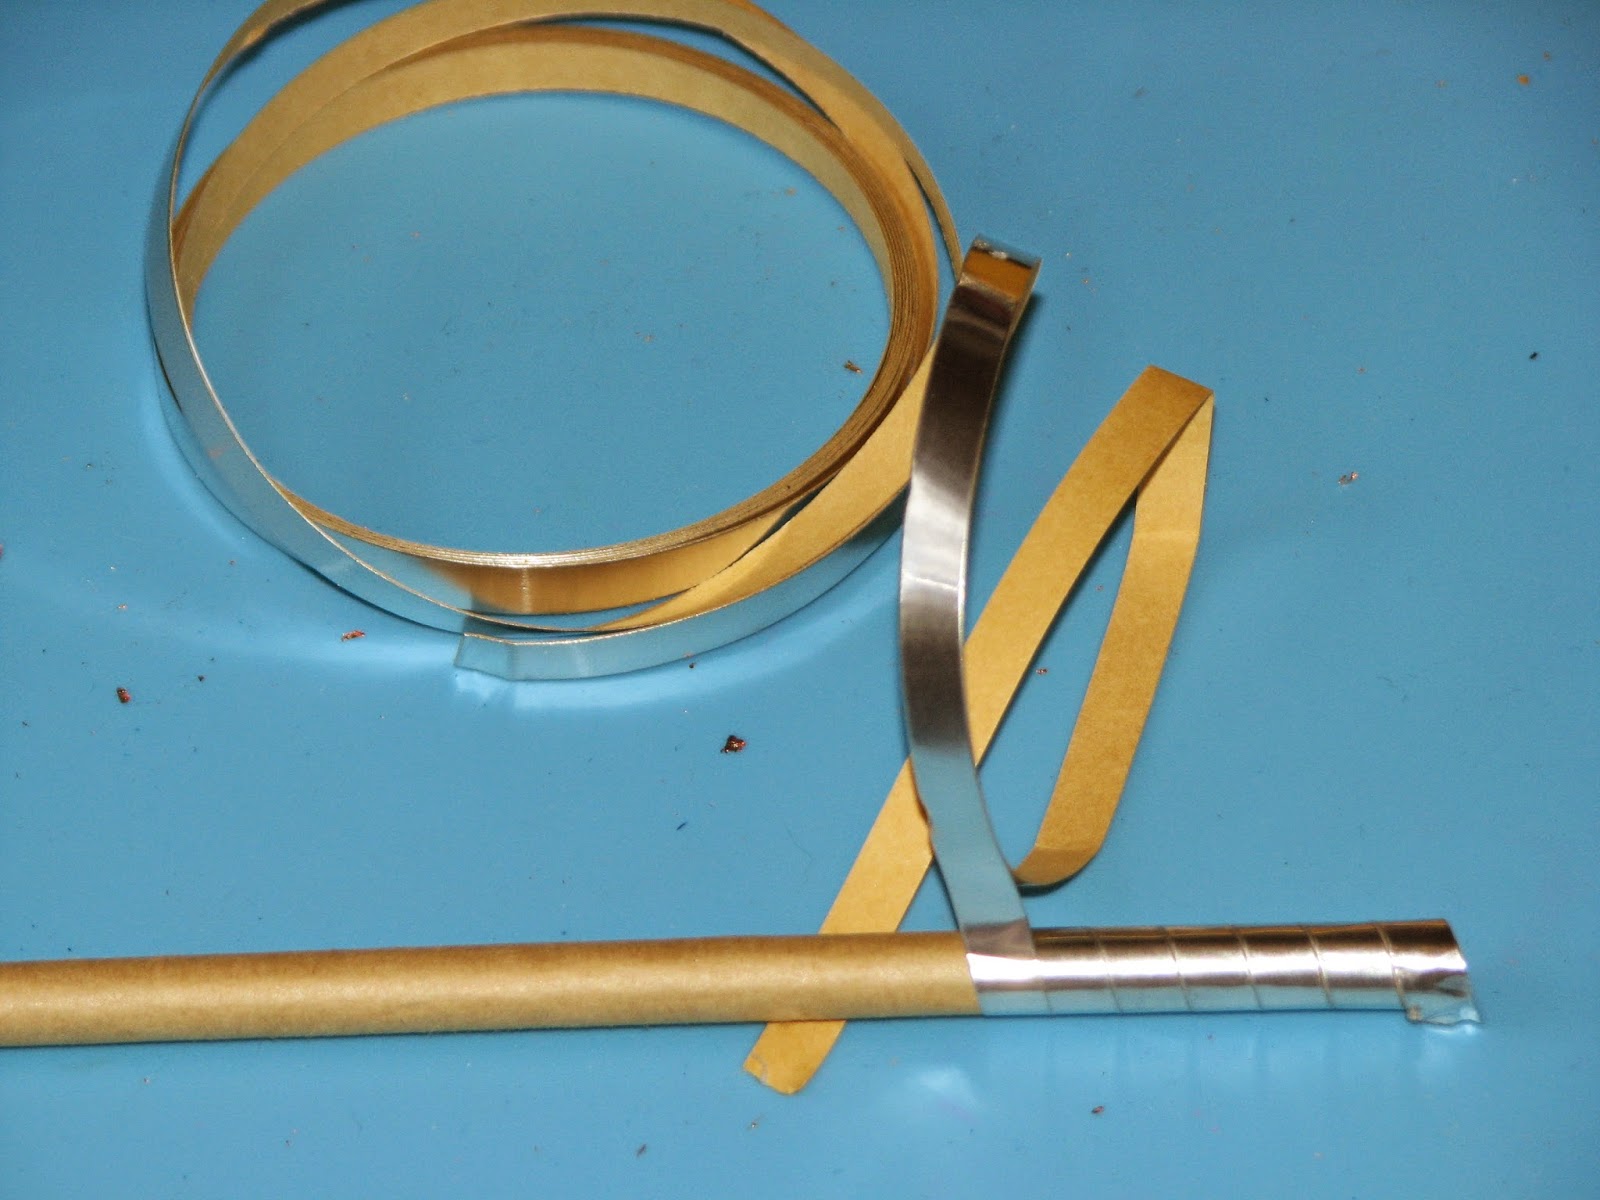
My next pencil is covered with metallic foil tape.  Just wrapped around the pencil right off the roll.


I then used my Delicata ink from Tsukineko to cover another pencil.  I love the new colors - Celestial Copper and Bronze Burst.


I covered the next pencil with a layer of Silver StazOn Studio Glaze!  Wait till you see the finished pencil!  Looks like a silver rod.


And for my last pencil I thought it would be fun to stamp onto tissue paper with Golden Glitz Delicata metallic ink.  I stamped, dried then glued the tissue to the pencil.


And here's how they all turned out...from top to bottom - Tsukineko Bronze Burst Delicata Ink; Golden Glitz Stamped Tissue; Sepp Spring Leafing Mix; Silver Foil Tape; Sepp Copper Leafing Flakes; Silver StazOn Studio Glaze; USArtQuest Gold Leaf


We'll continue this project on Wednesday by completing the pencil case at which time I'll also be giving away this set of pencils plus I'm going to offer up the second set of unfinished pencils to another reader that they can finish on their own!

Tomorrow is Club Scrap Design Challenge - I've got a really fun project to share that I'll also be giving away to one lucky reader so be sure and check back often...so much fun going on!!

Brusho Crystal Colours - Great Deal!

Hi All!

I know I've talked to a few people who like me have been wanting to play with the Brusho Crystal Color powders from the UK but have found them difficult to get hold of.

WELL - I was on e-bay this a.m. looking for something totally different and when I was about to sign off I thought that I would give it a shot and see if I could find any of the Brusho's for sale.  I DID -  Brusho Crystal Colours - AND the best part is that they are cheaper than I've been able to find anywhere here in the USA.  Woo hooo!

I know some people are fearful of ordering products from outside of the US but I have bought (not from this seller) items from EU, UK, AU several times without any issues.  Of  course you will have to wait a little bit longer due to shipping across the ocean but it's worth it.

Anyway, I thought I'd share since I know many people are interested but couldn't find them either.

Friday, March 27, 2015

Color Burst Watercolor Flower Experiments


So I've been very inspired lately by FB posts from Karen Faulkner.  If you've never seen her watercolor flowers before they are amazing!!  You really should check her out.  Anyway, I thought I'd play with my Color Burst powers just to see what I could come up with and let me say this...these powders are HIGHLY pigmented which is great but I'm having a hard time getting that translucent quality of Ms. Faulkner's flowers.  (That's why I'd like to try/get some liquid watercolors)

Anyway I have been having fun experimenting with the Color Burst.  Here are a few experiments with different colors, flowers, brushes, etc.  

 The first few flowers were mainly brush experiments.  I was using a really tiny brush for the scrolly leaves, stems, dots and a larger filbert brush for the main flowers.


These three flowers were experiments on how the colors can be over laid to achieve more depth.  Again, this is all practice, experiments, etc so they aren't very good


Now I have to say I am VERY pleased with how my poppies turned out!  To be honest I was very surprised as well - LOL!!  They started out looking awful but I just kept adding layers of water and color and they turned out like this...  When they were dry I wished I had made them on something other than scrap watercolor paper because I don't know how I can salvage them to make them look good on a card or plaque.  Oh well...guess that means I'll just have to keep at it on non scraps!


Do you have some craftyness planned for the weekend?  Not sure what I'll be doing but I hope it includes something inky or painty!  Have a wonderful weekend everyone!

Watercolor Preference?

Hello Friends...

Note: Aqua Tints are different from the Aqua Markers.  Aqua Tints are actually little jars of liquid watercolor medium.  If you click on the link below you can take a look at them.  I've watched several of Sheena Douglas's videos using them and they look like SUCH fun.

I am thinking about buying some new liquid watercolor medium.  I would really like the Spectrum Noir Aqua Tints but alas they are only sold in the UK :(  I e-mailed and asked and they don't have any indication they will be sold in the US anytime soon.  I *thought* about ordering them from the UK BUT the shipping was going to be almost as much as the watercolors - whew - with exchange rates and such almost 275.00.

Soooo I also had on my list Dr. Ph. Martin's Bombay Ink or Hydrus Watercolors.  Anyone out there ever use these before?  Likes, dislikes?

Do you have other suggestions besides these?  I'm open to all suggestions.

Also, on that same note what do you think of Brusho powders?  I'd really like to purchase some of these as well but can't find them in stock anywhere here in the US either.

Thanks for your input - I like to hear what you've tried and your thoughts.

Thursday, March 26, 2015

Inspire Your Heart with Art Give-A-Way

Not sure if you were aware that January 31st was Inspire Your Heart with Art Day.  I tried to find out a little bit more about this celebration of the arts but from what I could find nobody really knows when it started or by whom...  What I do know is that it is a day to celebrate art - be it in the form of visiting a museum, concert, or something more hands on like taking an art class or making something of your own.  

I participated in that by sharing this canvas I made... Create Art


In February, I was inspired by Patience Brewster, an artist and designer of unique gifts, to reflect on "Inspire Your Heart With Art Day".

Well, I've been thinking about it ever since.  Let me back up a bit...quite a few years ago someone that I thought was an art mentor to me told me that I should never "give" art away.  I had to put a price on everything I created or I wouldn't go far.  As it turned out that person did put a price on everything and has gone on to bigger and better things.   

For me though the joy is in sharing art - both the making of and the art it's self.  That is why I share product info, techniques, tutorials and the art I create with you all.  I just can't put a price on something that comes from the heart which I suppose is why I'll never be rich and famous.

SO I have decided that periodically I am going to inspire my heart by giving away some of the Art I have created and today is the first of I hope many!

I will be giving away LOTS of art...  I have gathered the following pieces I've made over the past months and will be giving each piece away to one of my Ink Stained friends... all you have to do to enter is leave a comment telling us all what about Art inspires your Heart.  I will give you until April 11th to post a comment to be entered to win one of these goodies!


Beach Canvas Album 001


I also have an assortment of Ice Resin charms in my pile of goodies as well!

So, if you'd like your chance to win some Art to Inspire Your Heart simply leave a comment to be entered for your chance to win!  Be sure to leave a way for me to contact you.  Please be sure to share on your blogs or facebook pages as well.

Have an artful day friends!!

Tim Holtz Stamps - Sold Out Thanks!

Hello All -

During my recent cleaning spurt switching my stamps from cling mounted to TIOO I came upon my stash of Tim Holtz stamps that I don't use anymore.  I'm offering them up today - the prices are marked by each photo + whatever shipping is.  I prefer Pay Pal if possible.  E-mail me ( roni jj at gmail dot com)  with whatever you're interested in and if I still have them available they are yours :)

Be sure to check back because I still have several boxes of stamps to go through and will probably be going my mfg.  

Here you go....

The only thing I have left at this time are the cling sheets....

10 sheets of 9x12" Cling Mount Foam - $35.00 
(I paid 50.00 for it about a month ago).


Thanks Everyone!

Wednesday, March 25, 2015

Club Scrap - 50's Kitchen Blog Hop!

Welcome!  I hope you're ready for some retro fun with this blog hop...Club Scrap's 50's Kitchen!! This is such a fun kit with bright retro themed colors, prints and stamps!  I really enjoyed making this recipe pocket file book...


I started off by cutting (3) 10 x 13 in half...


Then I taped up the open edge with regular shipping tape and a layer of the decorative washi tape included in the kit.  Each half of the envelope had the closed in bottom cut open and they were folded at the 5" mark up from the bottom.  This creates a 5" square pocket which I'll be tucking a pull out page into and an 8" envelope with a flap...more on that later.


I went ahead and taped up every exposed edge of the envelope because it looked so nice.


I made a book cover from the pizza box and covered it with various prints.  The files are held in the book on a small accordion spine.  You can see that I trimmed up the existing flap, covered it in pattern paper and added a twine closure with a couple of brads, punched cardstock circles and a length of red and white bakers twine.  Really fun and easy.


And here' what a few of the inside pages look like...  one of the 5" pocket pages & it's pull out...


And front and backs of a few other pages...


And I didn't forget our friendly neighborhood Gnome...  
This month he's offering up a bit of sage advice....


Hope you've been inspired to create and play!

Your next stop on the hop is 

Remember if you get lost along the way you can find the entire hop list on the 


Supply List - everything for both the book and card were made using supplies from the 50's Kitchen Collection with the additions of: Memento Inks & Markers (IMAGINE Crafts featuring Tsukineko);  (6) 10x13 Mailing Envelopes; (12) Brads; Red & White Bakers Twine; Circle Punch.