Hello Friends...
Each kit comes with materials to make 12+ cards. There are 3 sets of 4 cards which they provide instructions for making the basic cards...as a guest designer we can kick it up a notch or two and do our own thing. This is what I came up with...
My first card was made using the flip open design that was designed in the kit - I used the stamps and stone stencil for the front and one button instead of two.
The second card was made in the same format but I left off the buttons and turned it on it's side.
My next card was a Z on it's side fold with a little metal leaf charm tucked inside.
I decided to incorporate a flip panel on the get well soon card.
Don't you just love the Cut-A-Parts included in the kit?
The next set of cards were Double Z folds which I decided to spice up a bit...
I wanted to use some embellishments from past kits. I found this lovely canvas tag that took stamping very well using VersaFine Clair Verdant ink. Inside I used a grey envelope and tucked another tag inside. The stone in the corners was made using the stone stencil and Bronze Creative Medium...gives a wonderful texture and a lovely metallic glow.
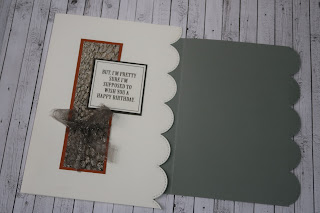
I went all out with the stamping on the second Double Z card... I stamped all sorts of goodies on the grey panel and added a corrugated tag and fancy medallion with a bit of deep blue ribbon to accent the grey.
The next two cards are quite a departure from the Double Z.
I wanted to keep with the double theme here but made the two panels open opposite of each other.
With a nifty message inside.
I know...this looks nothing at all like the Double Z. I actually used the cream card from the Z to create the brick wall. It was colored initially with a variety of Brusho Color Crystals then I ran it through a brick embossing folder. I added a few inks on top here and there to create a more realistic look. A few gold threads and die-cut ivy and you've got yourself a pretty cool looking card.
The final set of cards were new to me...Brick Cards - they actually looked like bricks when they are stood up! I made the first 2 cards following the directions but with lots more stamping added and a mix and match approach to the Cut-A-Parts. I also again added embellishments from my stash.
See - a stand up brick...pretty cool huh?
This one was stamped and die-cuts added...
Again for the final 2 cards I veered away from the instructions and did my own thing.
These two cards were what I initially envisioned for the cards...vintage southern charm. I actually made the final two cards with New Orleans in mind.
The first is a shaker card with the front of a vintage brick home in mind....side walk, stone work, ivy, the whole nine yards.
And this to me is a night on the town.
Stamping, watercolor, and glitter...all rolled into one.
I hope you've enjoyed my version of the Cobblestone Card Kit and find inspiration here and there for your own cards.
Supplies:
Club Scrap - Cobblestone Card Kit & Stamps; Embellishments, Fibers, Tags, etc.
Imagine Crafts - VersaFine Clair Inks, On Point Glue; Tear It! Tape
Sizzix - Die-cuts
Gold Thread
Marabu Aqua Inks
Extra Fine Glitter
Sequins


