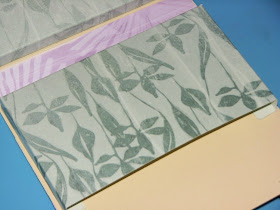
Hello Friends! Yesterday was the Botanicals Club Scrap Blog Hop and I shared these darling little Purse shaped card holders. Today I am going to share how I made them. These purses are sized to accommodate A2 (4.25 x 5.5") cards.
Cut a piece of cardstock 6" x 12" and score at 5.5" and 6.5" - set it aside for now.
Flip the cardstock over and determine where you want your ribbon handles to be, mark with a pencil. Cut several pieces of double stick tape and position where your pencil marks are.
Remove the backing tape and affix each end of the ribbon to the holder. I cut my ribbon approx. 12-14" long.
Add desired pattern papers to cover the ribbon and decorate each side of the purse. Repeat on the other end.
Cut (2) pieces of cardstock 4.5" x 7.5"; score the long side at .5", 1", 7" and 7.5". Turn the cardstock and score at .5" and 1". Trim off the two corners where the lines intersect as shown.
Crease and fold along each of the score lines. Place a strong double stick tape over the folded lip on each of the three sides.
Remove the liner and carefully position the pocket on one side of the "purse"/card holder. Repeat on the second side.
If desired cut a strip of coordinating cardstock .85" x 6" to cover the center strip between the 2 pockets....it's not necessary but it just looked like it needed something.
Pounce ink directly onto the wood veneer embellishments then spritz with water, gently massage and blend the inks with your finger tip and let it dry. The colors will lighten a bit as they dry.
Add the dyed veneer pieces and any other embellishments desired.
Cut a 1" x 3" strip of cardstock; score at 1" and 2". Affix one side to the back of the purse and add a Velcro dot closure to the other side.


Your purse is now ready to be filled with cards and envelopes! You could comfortably fit 5-6 flat (no lumpy embellishments) cards into each side along with their envelopes.
Supplies:
Club Scrap Botanicals - Cardstock, Embellishments, Ribbons
IMAGINE Crafts featuring Tsukineko - Memento Inks
Scor-Pal
Velco Dot (for closure)


Thanks so much for concise directions. This will be perfect filled with note cards and envelopes for a gift. Also thanks for showing how you did the wooden pieces.Like usual you rock girl!
ReplyDeletethanks for the pictures along with the tutorial. These are darling, I can think of many ways to use them for gift cards, etc.
ReplyDeleteAdorable!!
ReplyDeleteRoni, this is adorable. I am always looking for new ideas on packaging my cards and this is a little different from anything I have done before!! Thanks, as always, for sharing.
ReplyDelete