

Directions:

1. Cut Book Board to length and gently bend and form the top of the arch. This is all personal preference. You can bend it more for a wider arch or just a bit for a tall skinny arch.

2. Miter the top edges at an angle where the two pieces of book board meet. This will make the point of the arch come together nicely once glued in place.

3. Glue the two arch pieces together and then glue on the bottom of your arch. Let it set and dry completely.

4. Cover the inside of the arch with desired color of paper.

5. Place the arch frame on a piece of book board and trace - this will be the back of your arch.
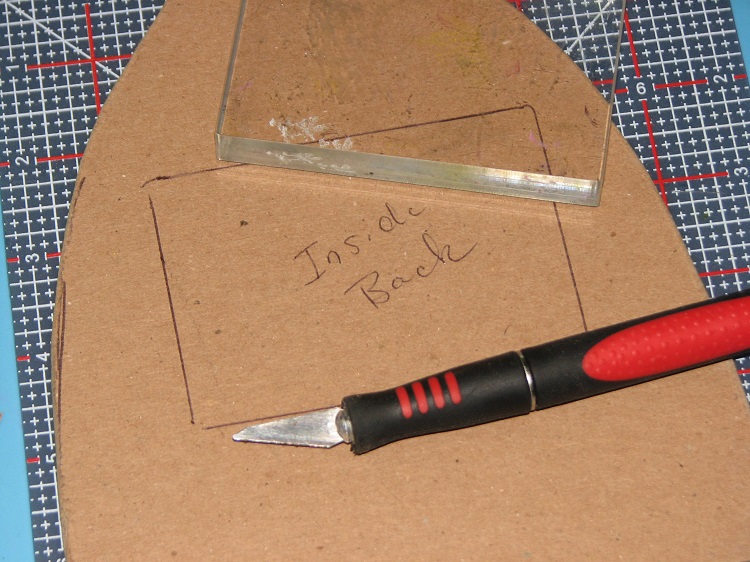
6. Trace a little door on the back piece. This will give you access to the clock mechanism once finished.

7. Cut the door, sand all edges and make a little crescent at the bottom for access.

8. Flip the arch and trace on a second piece of book board to create the frame. I wanted my frame 1/2" wide so I used a ruler and marked 1/2" increments out along each side.

9. Cut out the excess book board. Sand all edges of the book board.

10. Finally trace the inside of the arch on a third piece of book board. This will become the inside panel of the clock arch where the clock mechanism will be mounted.

11. Cover the bottom. of the Arch with desired color of pattern paper.
12. Punch 4 holes in the bottom of the arch.

13. Insert feet - and screw them on tightly. I am using Steel High Crown Acorn Nuts & Screws. There is a story behind those but I'll share that another day.

14. Determine how much room you are going to need between the center panel and the back of the arch. Build up 3 or 4 "risers" out of left over book board. I needed 1" risers to allow the clock mechanism to clear the back of the clock so I glued together 5 pieces of book board to get the correct height. Once they dry, glue them to the Gothic Arch Frame.
Now I know these don't look the best but nobody is going to see them so it's o.k.
Now I know these don't look the best but nobody is going to see them so it's o.k.

15, Cover the inside panel with desired paper.

16. Install clock mechanism, clock hands and add any embellishments as desired.

17. Glue the clock face into the arch frame.

18. To cover the seam between the clock and frame I glued in a bit of fiber.

19. Cover the back panel and access door with desired color of paper. Use a mini hinge to attach the door to the back panel.

20. Glue the back panel to the arch frame and let it dry completely.

21. Cover the front frame with desired color of paper. In order to make the curve you'll have to put several relief cuts along both the inside and outside edges of the paper.

22. If desired, stamp and emboss the frame.

23. Trace and cut a piece of acetate to act as a "glass" front of your clock. Glue it to the frame.

24. Glue the frame/glass to the front of the Gothic Arch.

25. Cover the sides of the frame with desired color of cardstock.

26. Make embellishments as desired for the sides of the arch.

27. Affix the embellishments to each side of the Gothic Arch Clock frame and YOU'RE DONE!!! Pop in a battery and enjoy your new clock!!
I know it sounds like a LOT of work but
it's really very easy and the results are well worth it.
So much so I may make a couple more for Christmas gifts!!
I hope you've enjoyed this project and give it a try yourself.
Supplies:
ClubScrap.com - Papers, Book Board, Glue, Rubber Stamps, Fiber
IMAGINE Crafts featuring Tsukineko - VersaMark, Gold Embossing Powder, Memento Dye Ink
Hobby Lobby - Clock Mechanism
Personal Stash - Acetate (from left over packaging), Mini Hinge, Mini Screws, Acorn Nuts & Screws
Love this....
ReplyDelete