
2014 Technique Calendar
December
Heat & Bond Glam
O.k...you all know how much I love glitter well, in this case I saved one of my favorite techniques for last. I started out with Heat N Bond which is found in the sewing department. It's a sheet of adhesive that's usually meant to iron two pieces of fabric together. I bought it to repair a hem (I know I know....let's not go there) and I had LOTS left over so I decided to play a bit and this technique is what resulted.

Supplies:
Tag
Heat & Bond
Glitter
Iron
Heat Tool
Embellishments to finish off your calendar page
Instructions:
1. Cut a piece of Heat N Bond to the size needed and position it over your cardstock/tag.

2. Iron the Heat N Bond to the tag as directed by the instructions. Basically you just set your iron down on an area for a few seconds then move to the next section till it's all ironed down. Let it cool.

3. After the Heat N Bond has cooled, peel off the protective backing. Your tag will now be shiny with dried glue.

4. Here's where the really fun stuff comes in. I am going to be making a candy cane striped tag so I am using the protective backing sheet to mask part of the tag off showing only the first stripe. Heat that stripe with the heat tool then quickly sprinkle on desired color of glitter and press it with your finger tip a bit.

4. Slide the backing paper over a bit and heat the next strip, add the glitter shake off the excess and continue on until the entire tag has been covered.
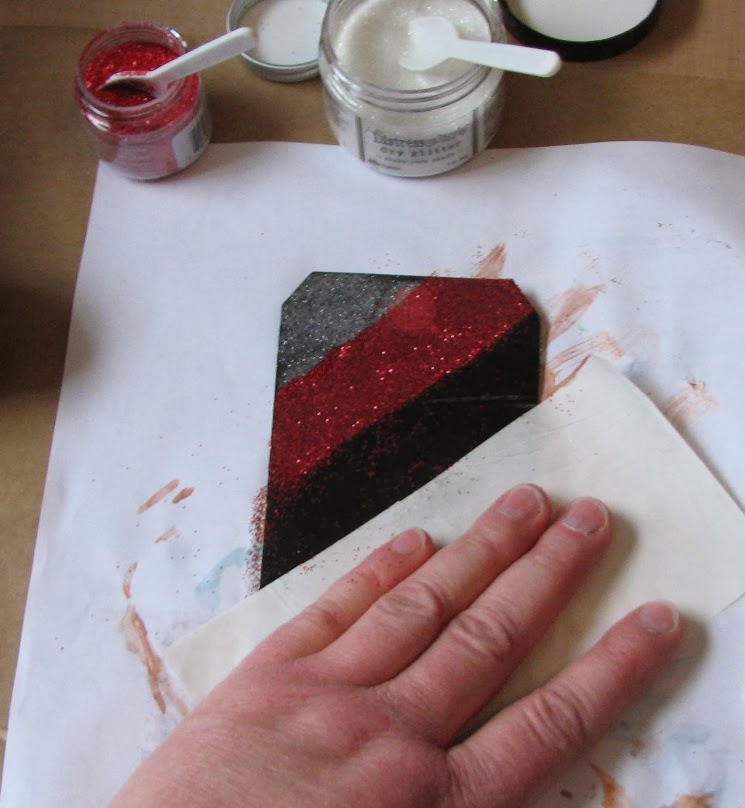
Here I am finishing up the very last tip of the tag...heat, glitter, shake & done!

Of course you don't have to work in stripes...here is a sample I was messing around with ~ I thought I was going to use the red & green glitter in just a random pattern but then I thought of the candy cane stripes.
This technique has so many possibilities ~ think of die-cutting either the Heat N Bond it's self or after the H&B has been ironed down, die-cutting or hand cutting the backing paper.
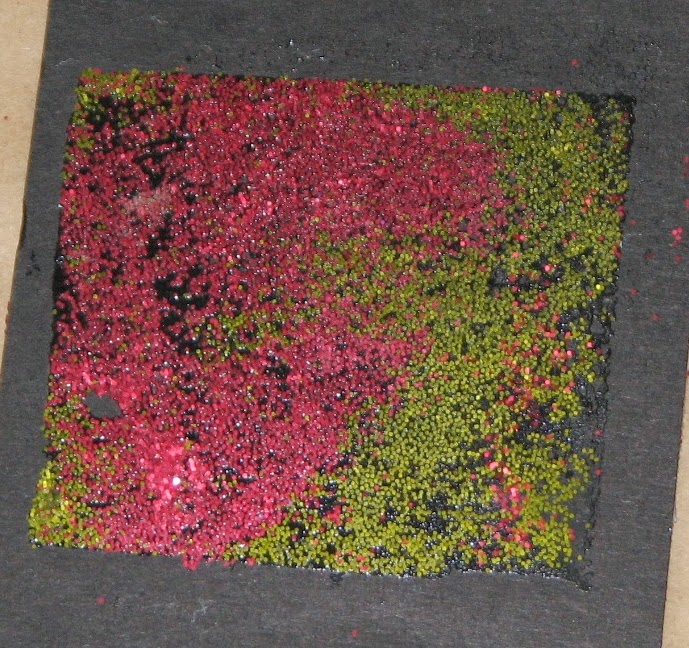
Here is what my tag looked like once I finished adding the glitter....

And here is my finished calendar page!

A closer look at the image, background & my reindeer...

Stamp credit: Deep Red Stamps
And so we come to the end of our Technique Calendar for 2014!
I hope you have had fun trying each technique and if you haven't had time or supplies remember they will be here in the future for reference.
Of course this isn't the end of the techniques for the year but for some reason making and assembling these calendars are always so much fun.
I'll be posting a recap this weekend with links to each technique post for easy access.
Have you taken time to enjoy a bit of art recently?
Oh my gosh, I used this stuff like forever in sewing and never, ever thought to transfer it to paper crafting - sheer genius. Thanks for a super tutorial and some awesome inspiration.
ReplyDeleteRoni, to all of the haters who don't understand the dread of repairing a hem, I say to them that they have not experienced the joy of a fusible project. My philosophy, when it comes to tasks such as the repair of a hem is, the faster I can repair a hem, then the more time I will have to have fun in my craft room creating a new memory. With that said, I love this project and technique! It allows you to use your small left over pieces of the Heat and Bond and it allows you limit your mess thus wasting your glitter. I can't wait to give it a try! Thanks, Roni for another great and creative idea!
ReplyDeleteWhat an amazing idea/technique! Thank you so much for these fantastic 12 calendar techniques and tags. I loved each and every one and can't wait to have the time to try them. Each of your tags are beautiful and unique.
ReplyDeleteLove those glittery stripes!
ReplyDeleteThis calendar tag project has been so much fun! I have all 12 of them hanging on a baker's twine rope above my desk. I think my favorite tag is the one I made for April, although I do love the glitter stripes, dimensional poinsettias, and red velvet ribbon I used for December. I also used a generic calendar so I can display this year after year or make the tags into a book. For now I'm just enjoying looking at them all. Thanks you for your tutorials and all of the inspiration I find in your blog. Anne, yourmainestamper
ReplyDelete